Wow, great work!
Nicest protégé I've seen

 Registered User

Wow, great work!
Nicest protégé I've seen
1994 Mustang - SBF swap in progress
Registered User

Love the rack de-powering. Awesome.
Originally Posted by killramos
 This quote is hidden because you are ignoring this member. Show Quote
Registered User
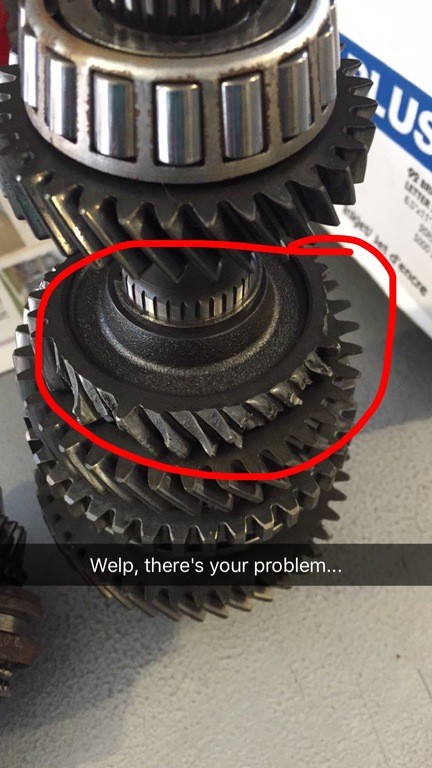
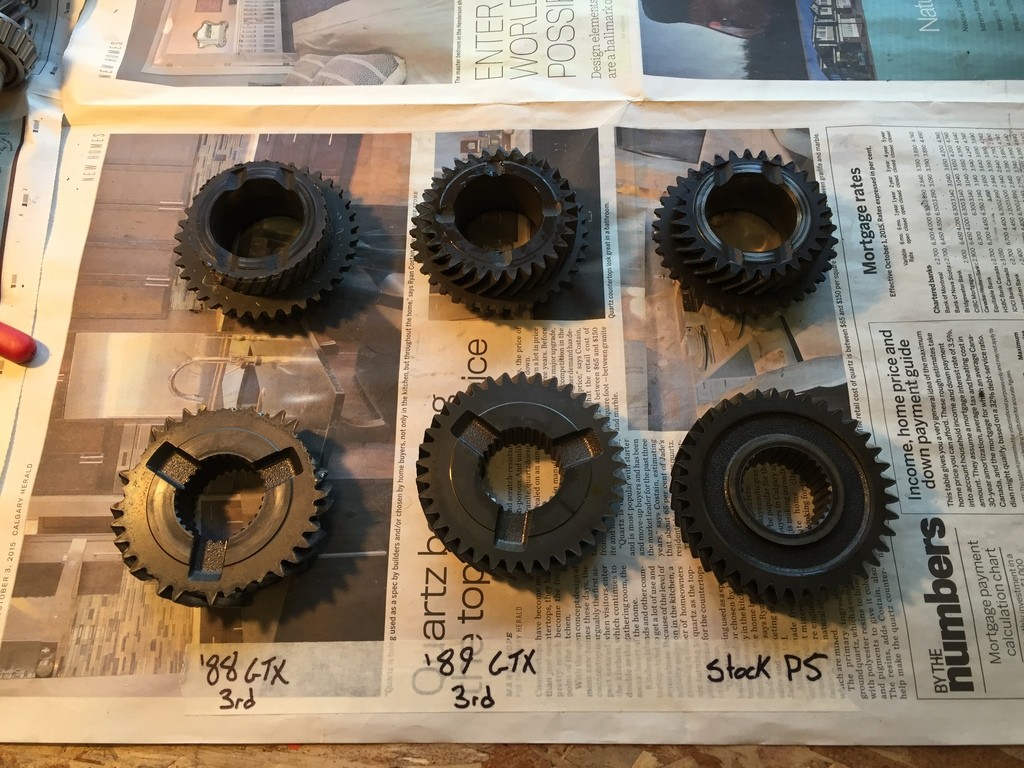
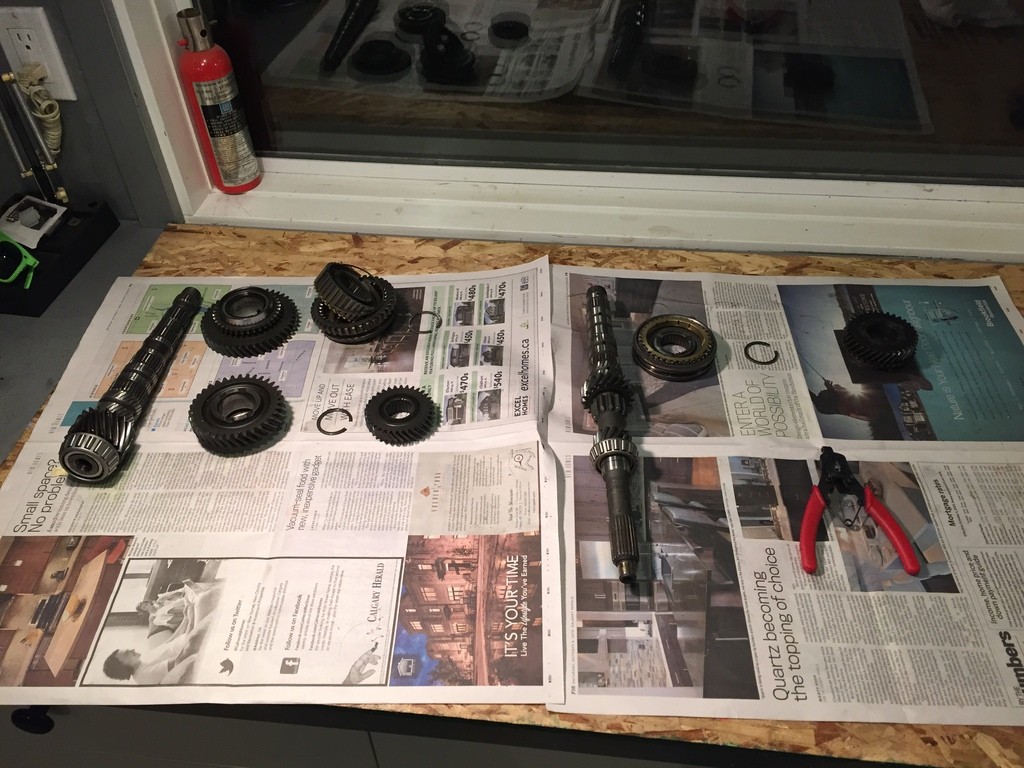
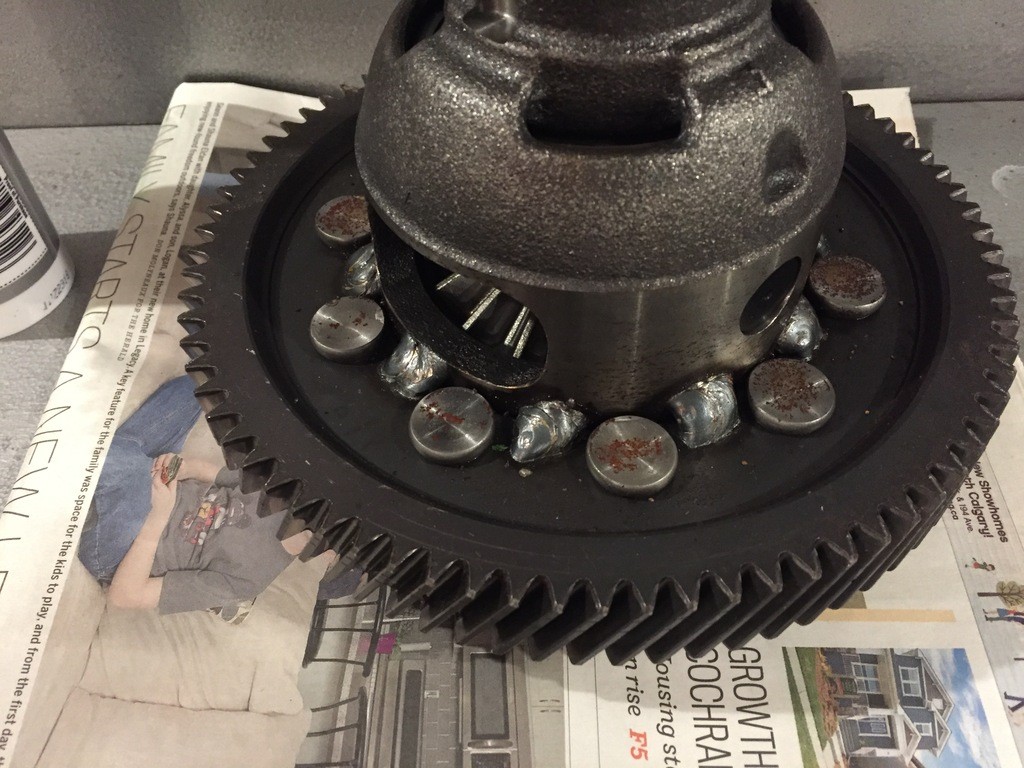
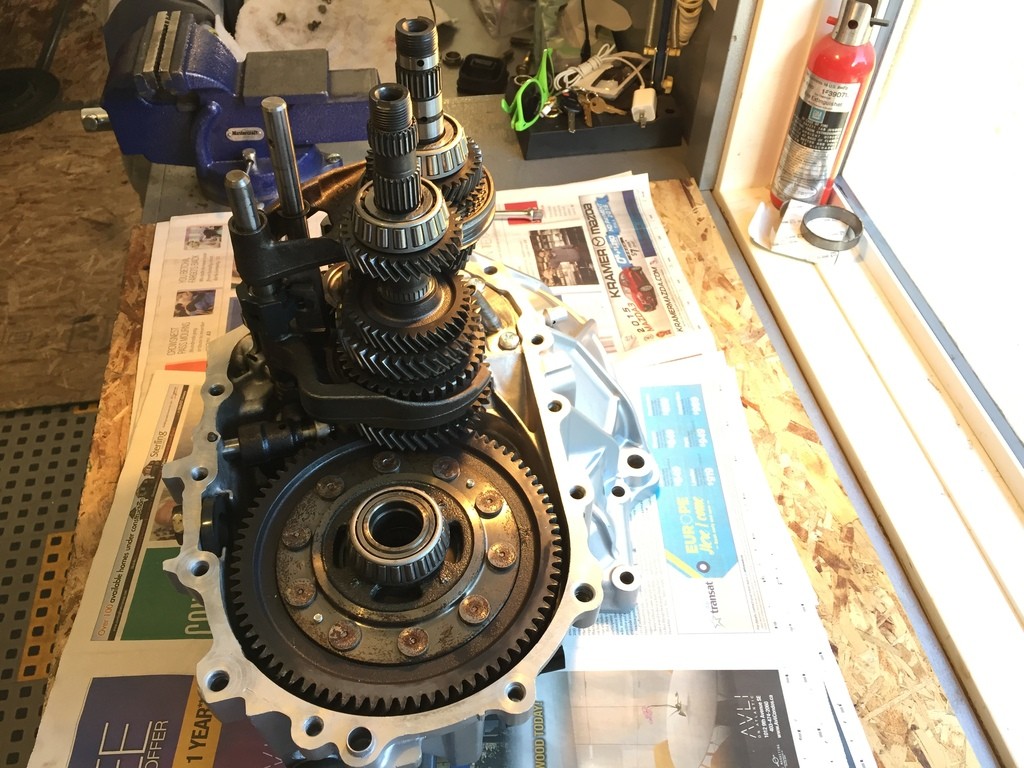
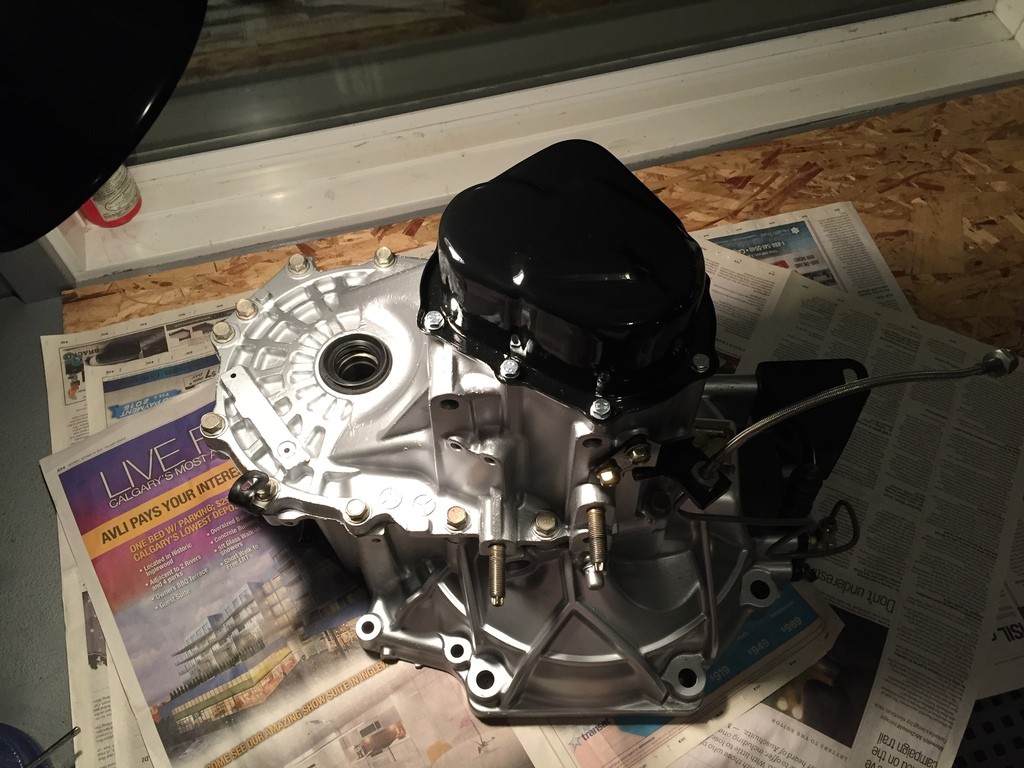
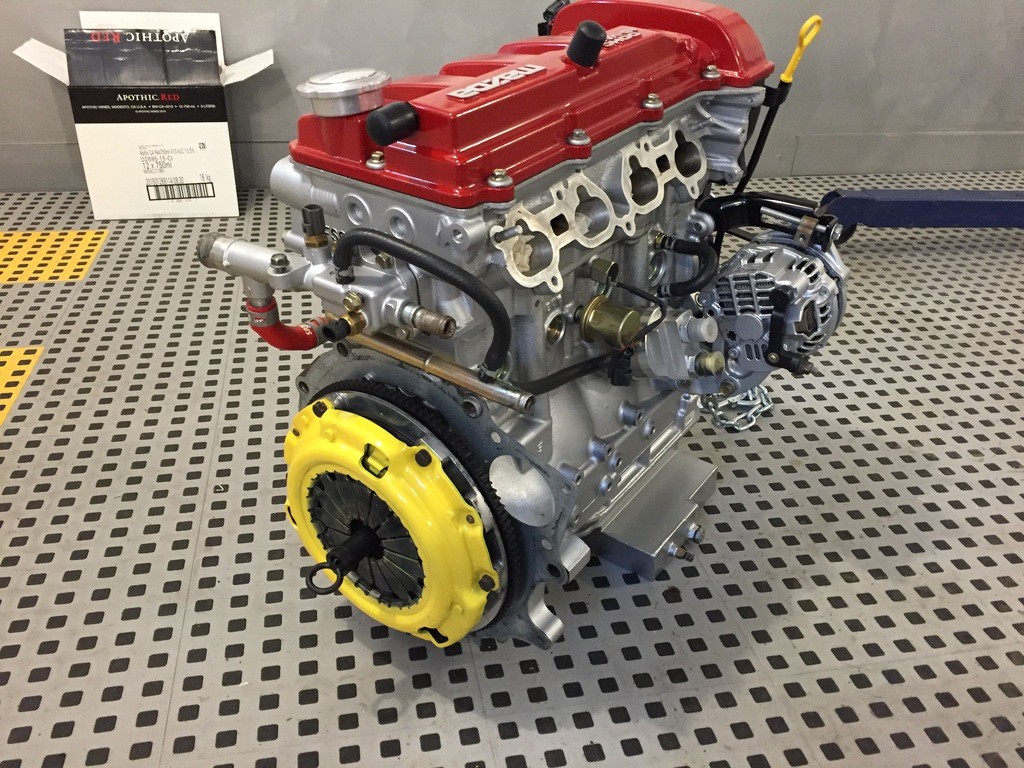
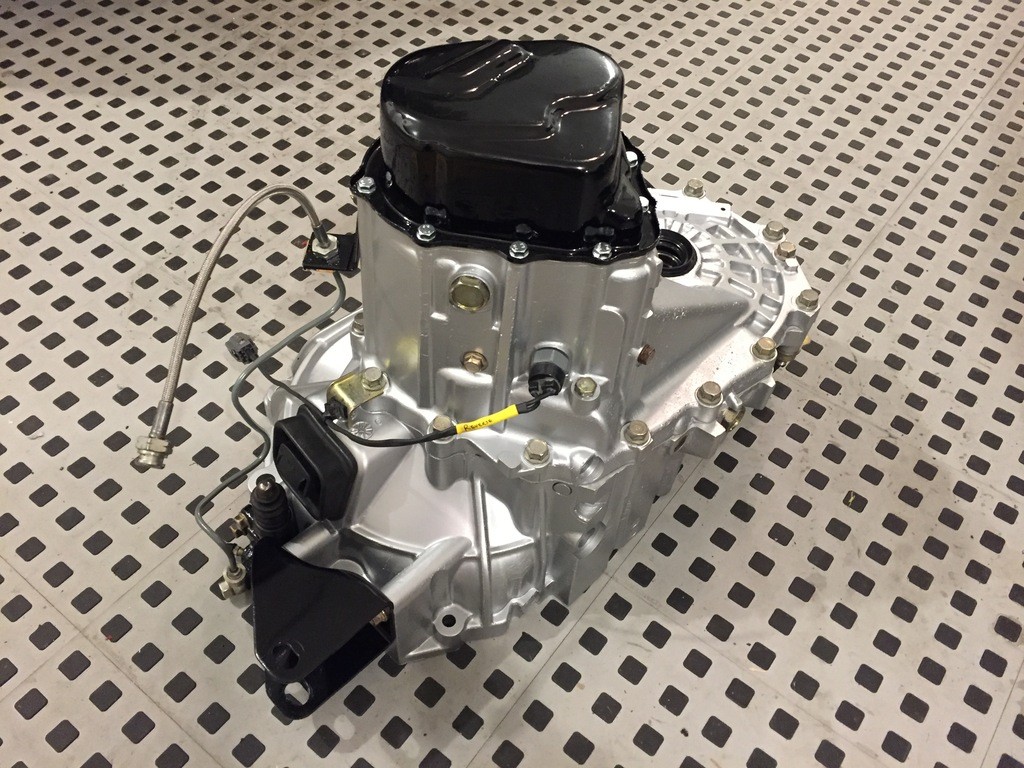
With literally 3.5 times the stock power level stuffed through the transmission, something was bound to break. This is officially transmission #4. The Protégé trans is extremely fragile for anything over about 200WHP. To combat this, I've done a number of things. Completed a gear swap (3rd, 4th, 5th) from an '89 Mazda 323 GTX Turbo AWD. (Remember those?) They are marginally stronger than stock, and swap right onto the stock shafts. I've also installed a Mazdaspeed limited slip differential (on my 3rd one now) and welded it to the ring gear so the stock press pins won't snap. (A common problem.) There are options available like a fully custom straight cut gearset from PAR engineering and MFactory, and other limited slip differentials such as Quaife or MFactory, but for what those cost, I can afford to have spare trannies kicking around with upgraded Mazda internals.
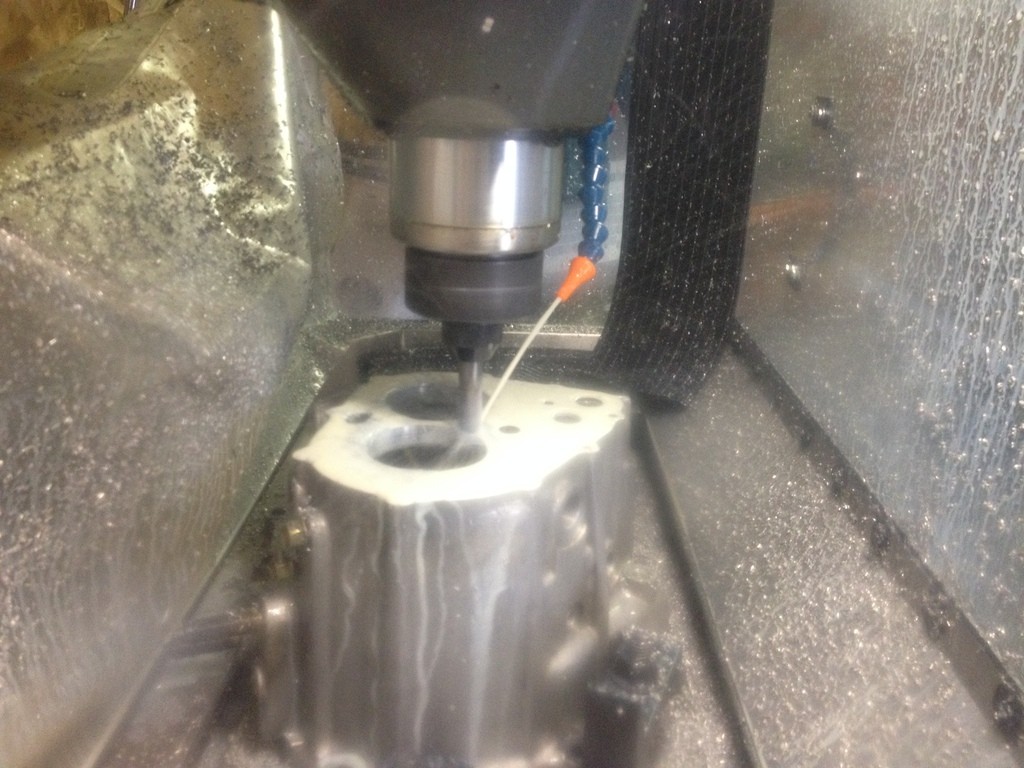
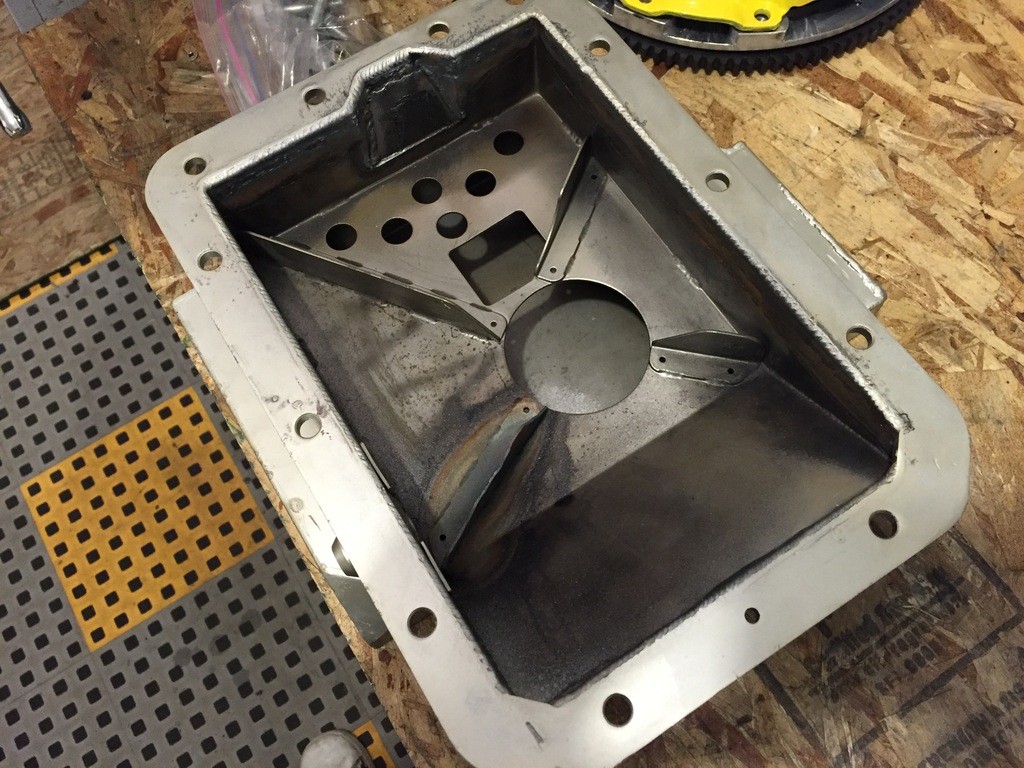
The main issue with helical cut gears is their tendency to pull apart under high loads. The stock aluminum transmission case can only take so much before flexing under high horsepower and allowing the shafts to spread, breaking the gears. To combat this, there is available a machined steel reinforcement plate, which does not allow the shafts to spread apart under load and should make for a much more robust transmission.
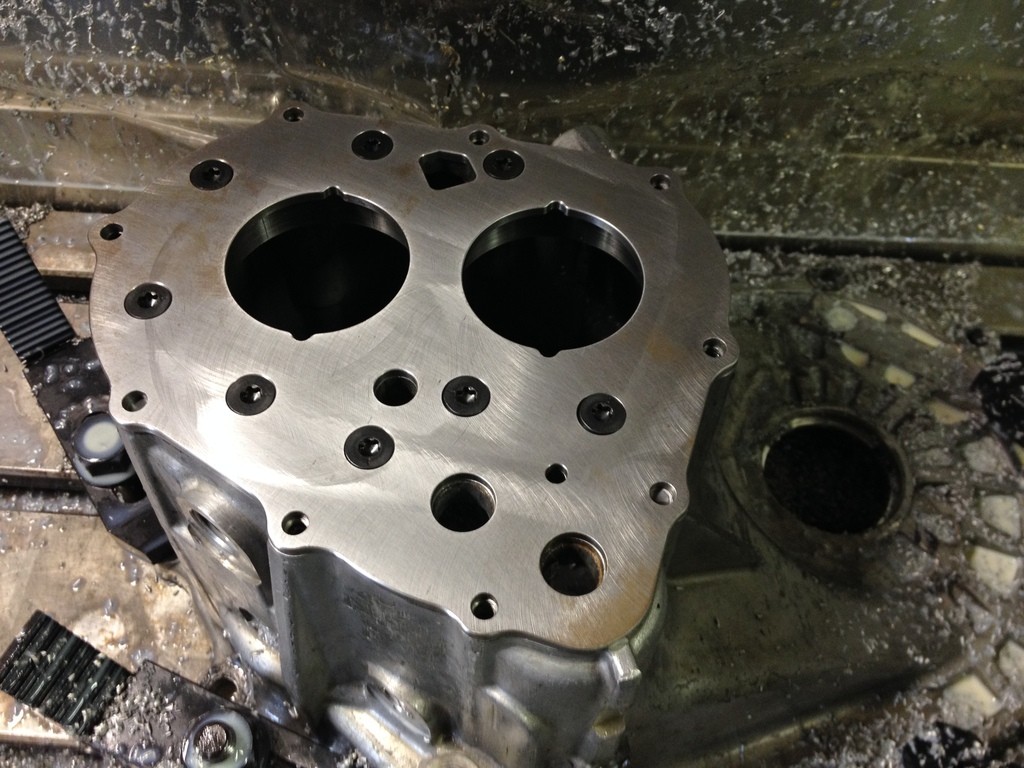
The stock case needs to be machined to accept this, so I called on the amazing skill of legendboy to do the machine work for me. Pics of the plate and machining:
...
Registered User
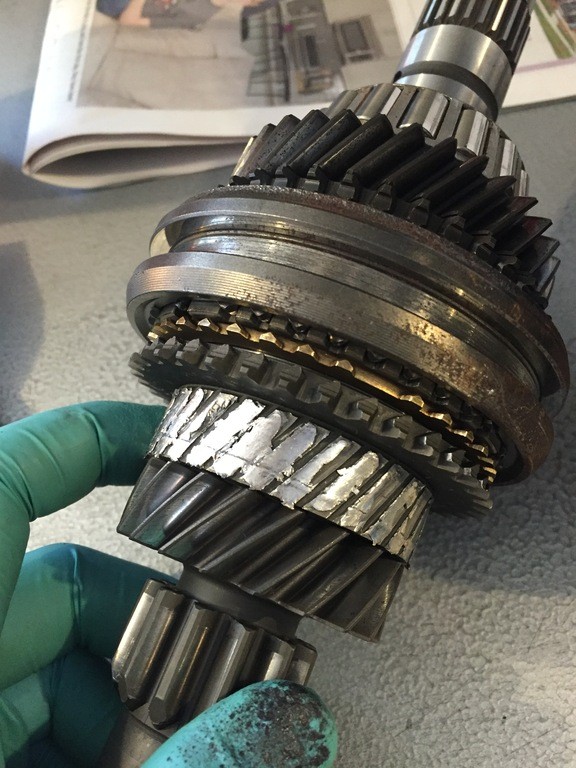
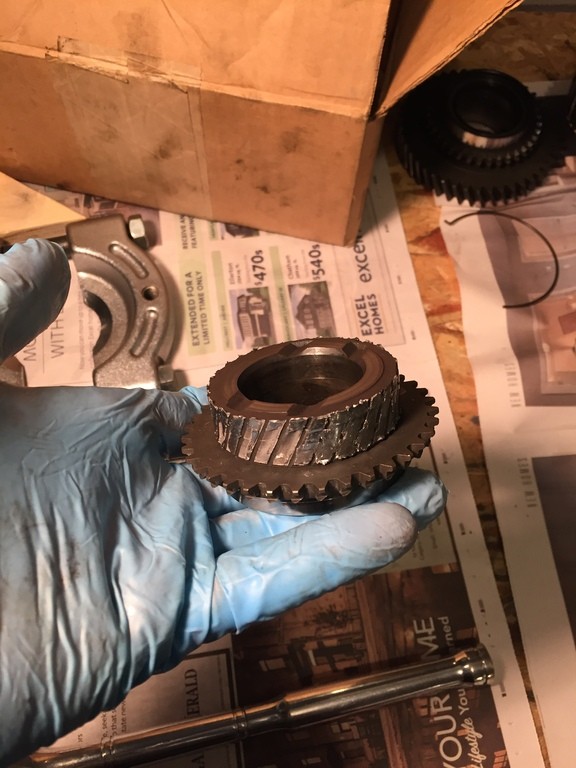
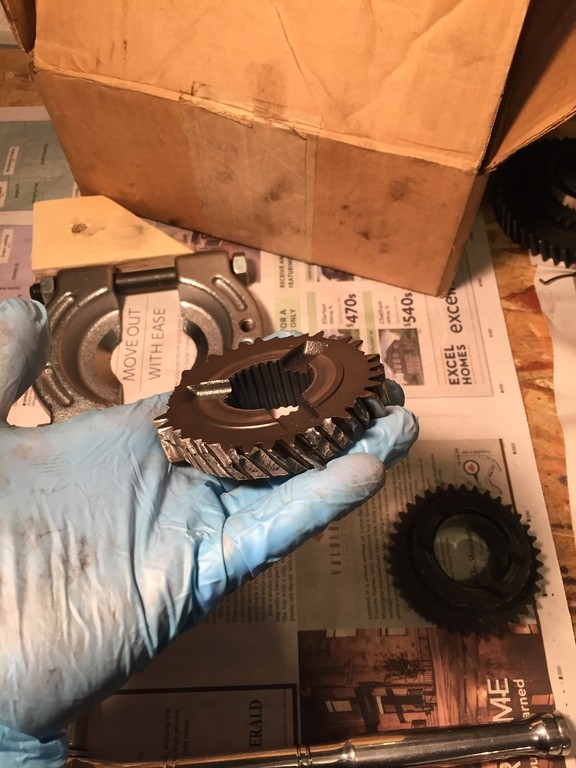
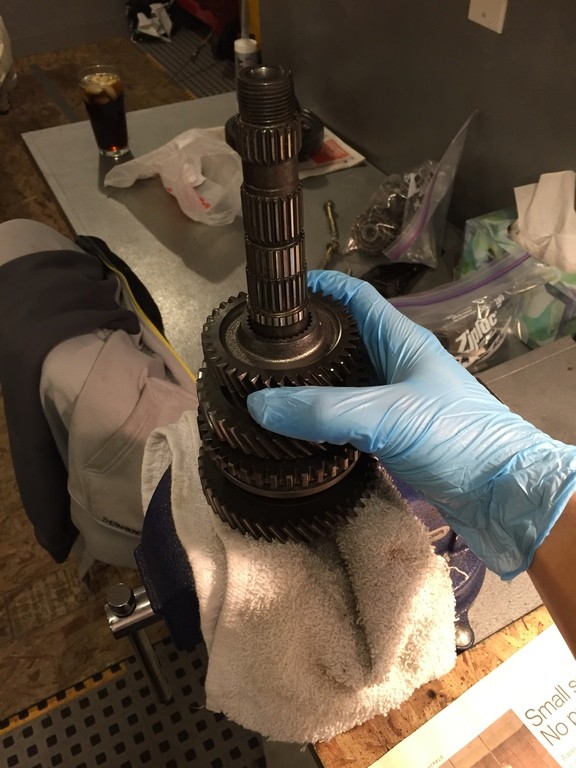
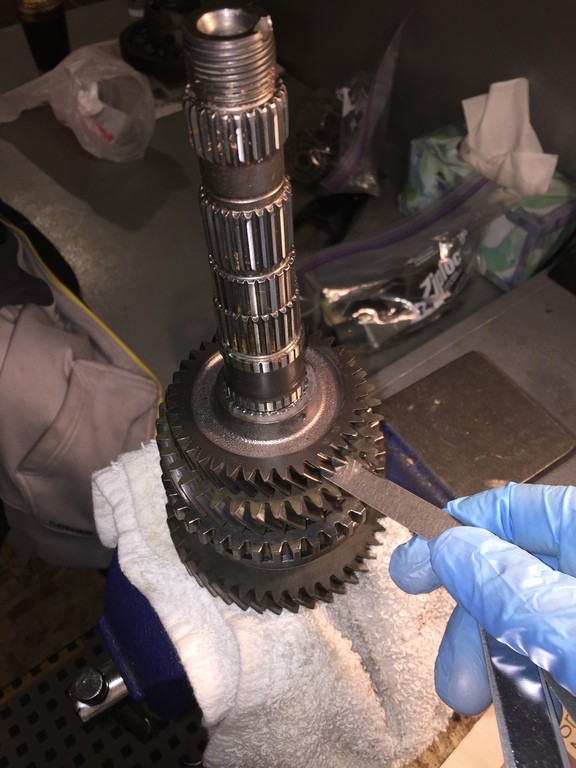
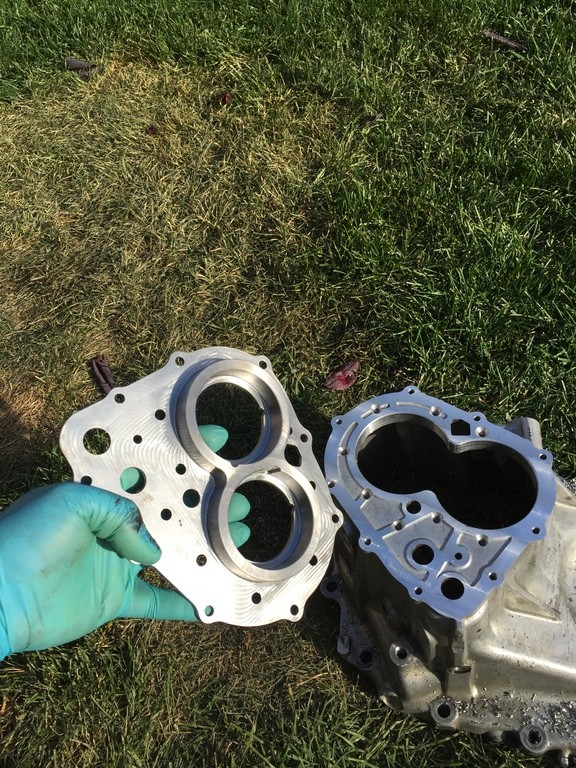
Years previous, I've used the '88 GTX gears in my transmission rebuilds. In 1989 there was a revision to the design, figured I'll try them out and see if they're any stronger. A pic for comparison:
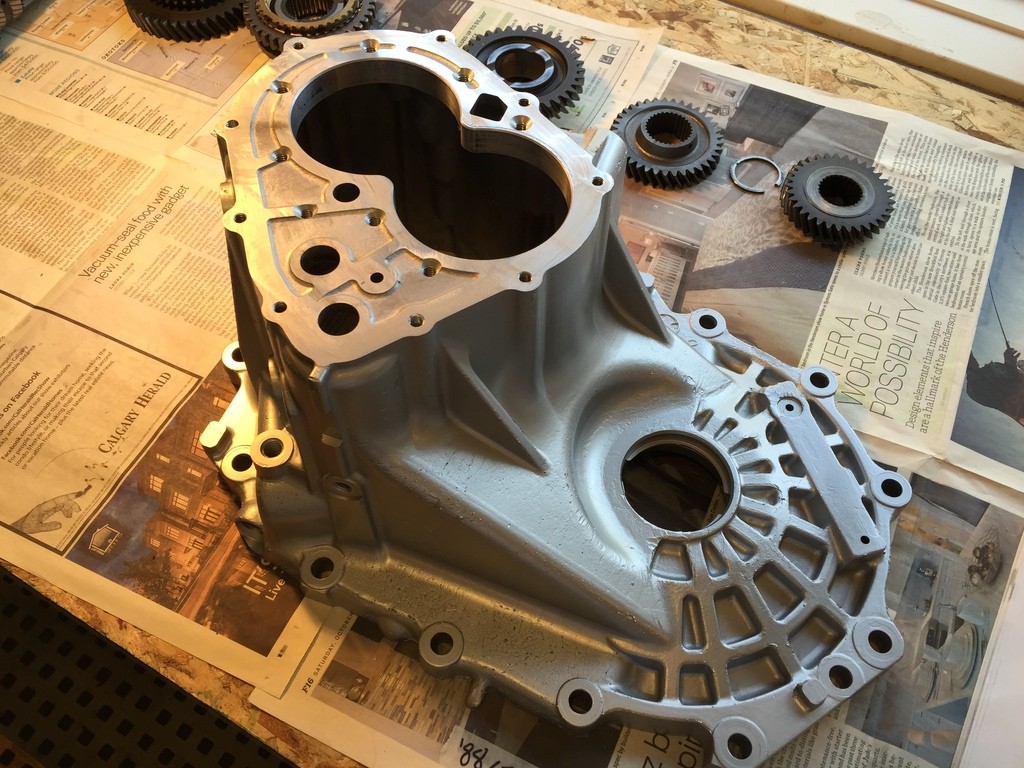
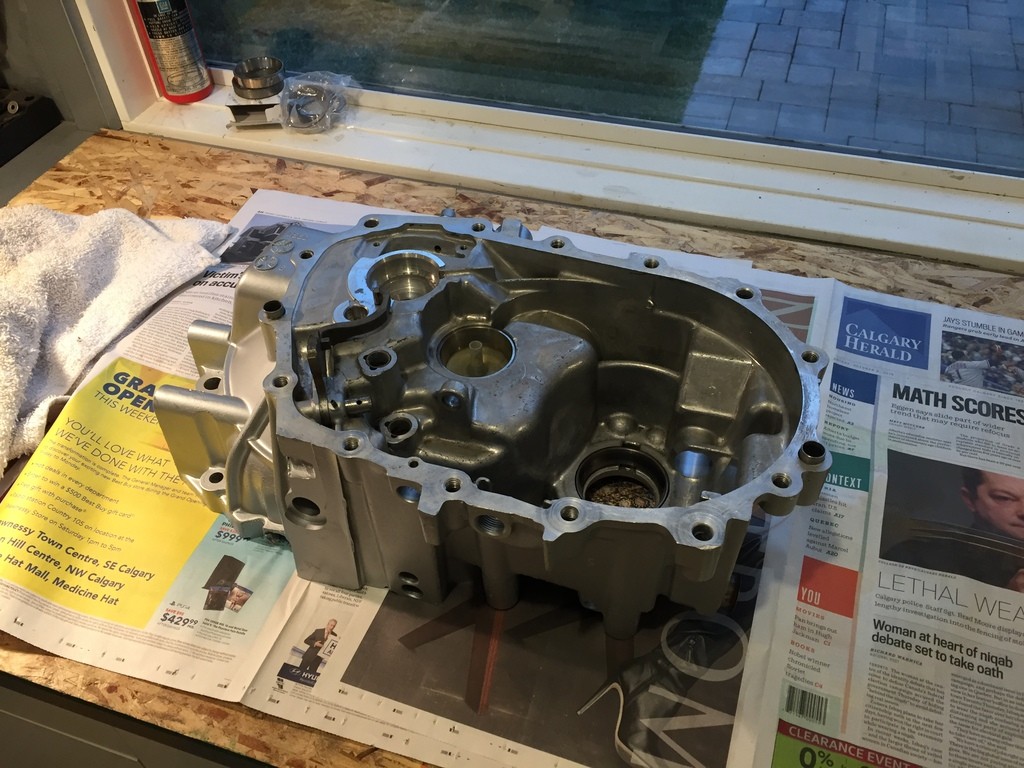
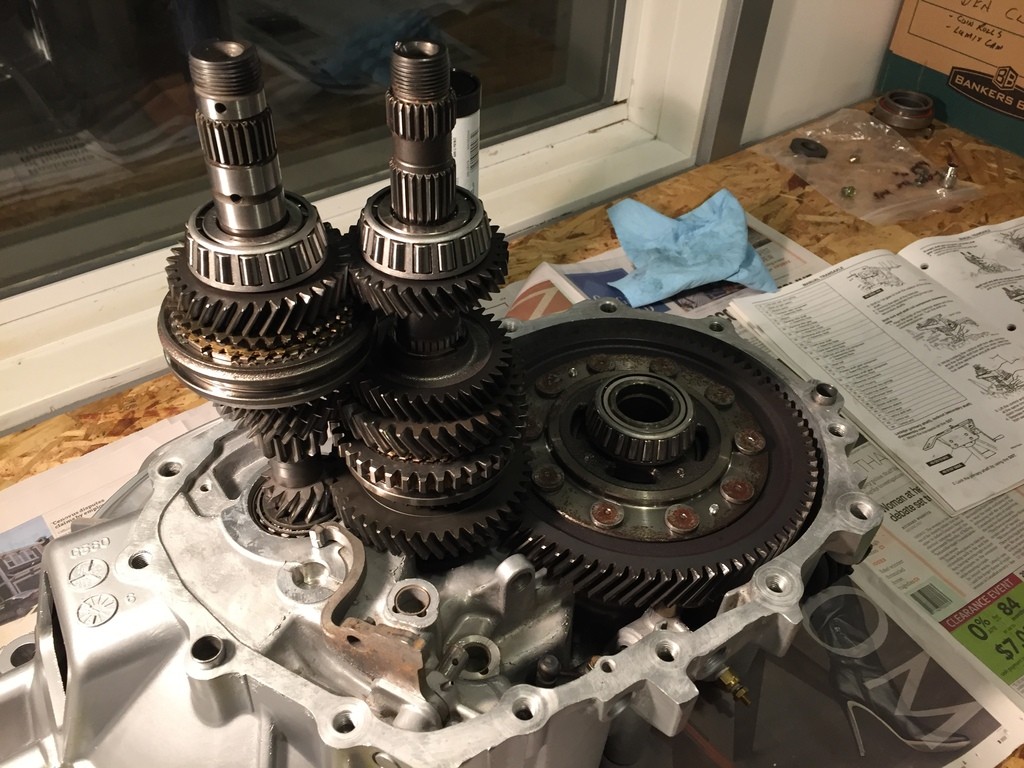
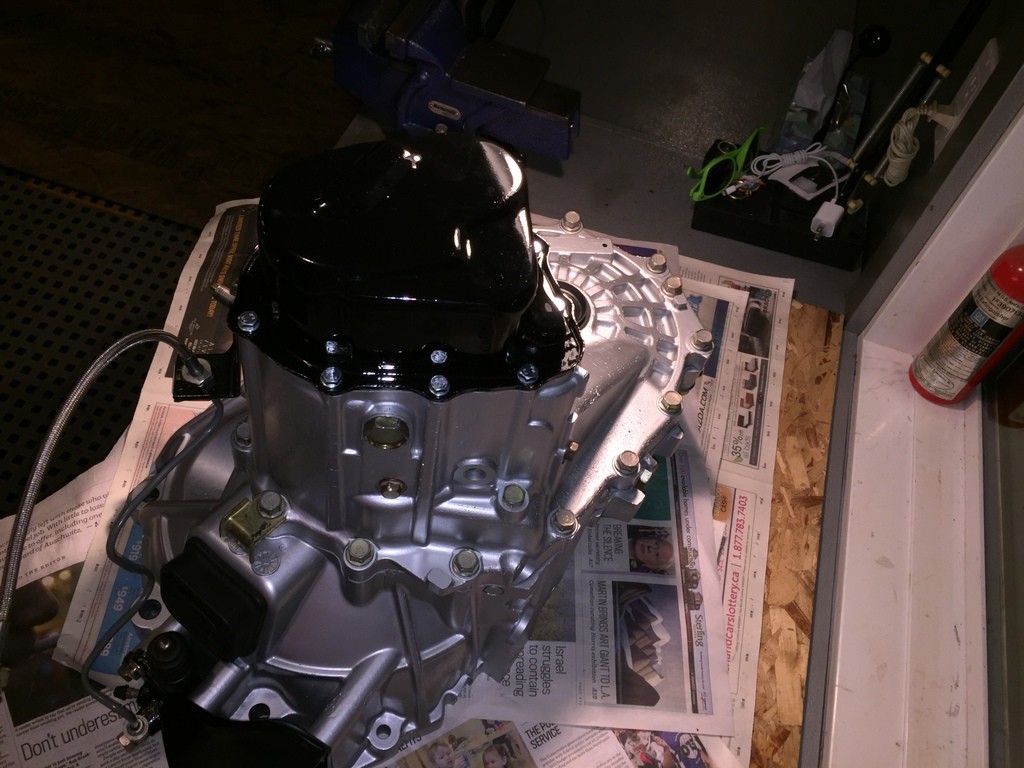
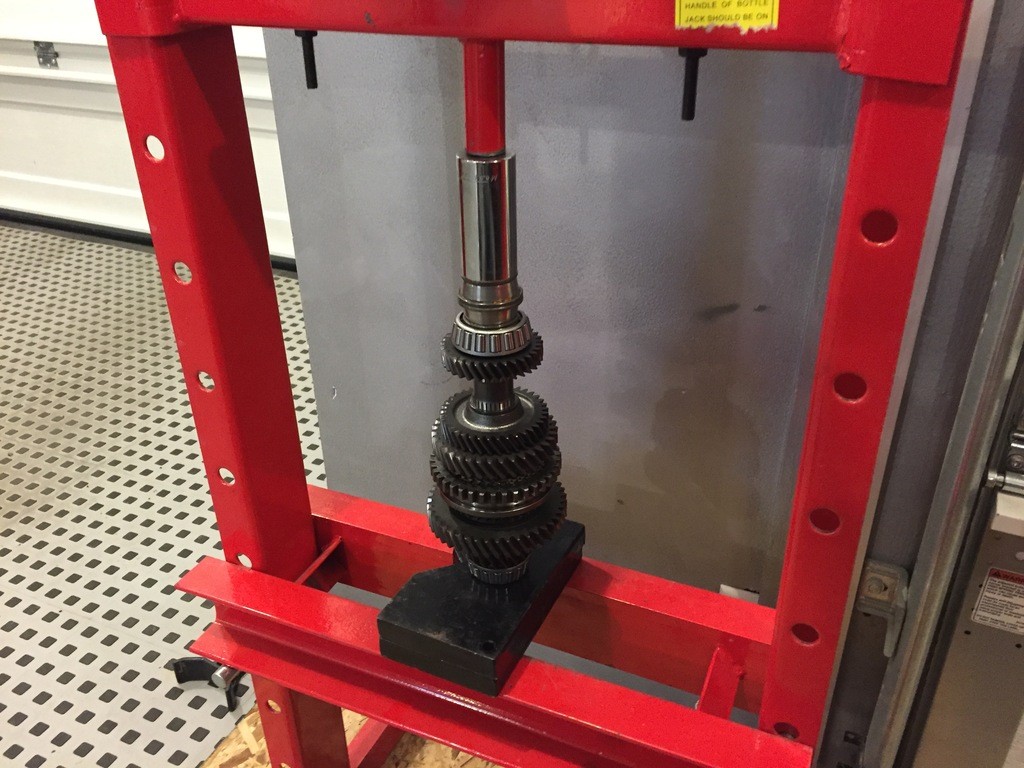
With the machine work done, I could focus on cleaning and painting the cases, as well as disassembly for the primary and secondary shafts.
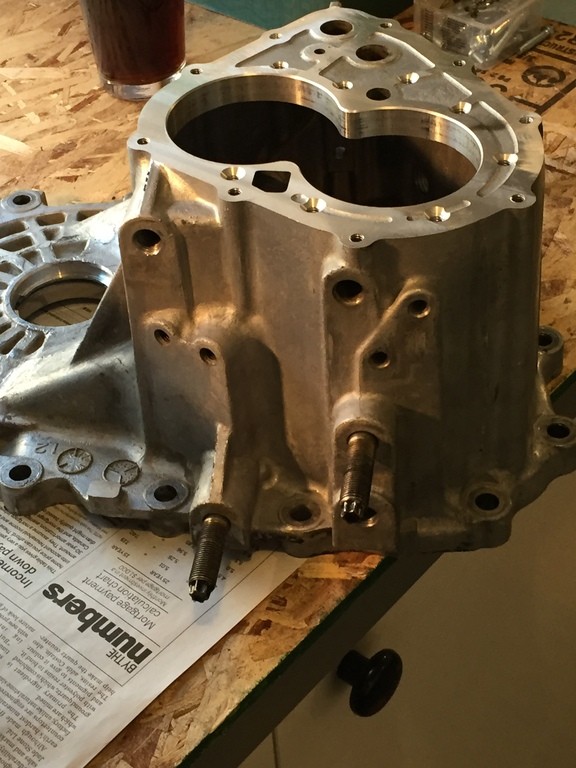
The new gears were installed onto the shafts, clearances set as per the factory service manual. New bearings pressed on, and new races installed into the case.
...
Registered User
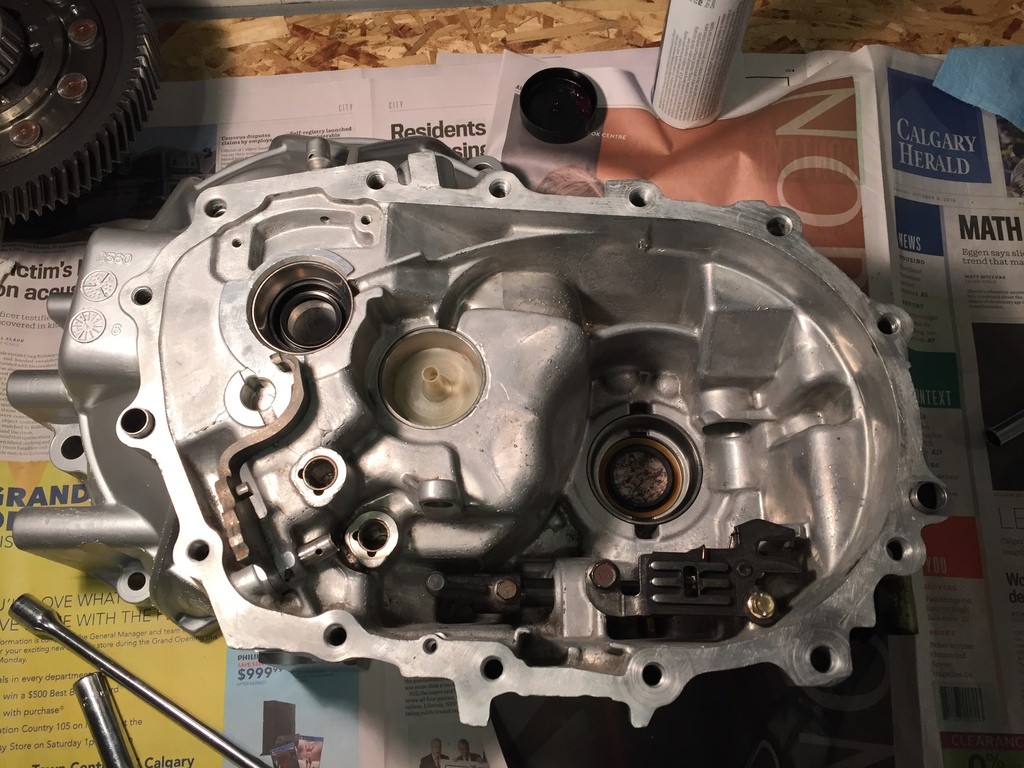
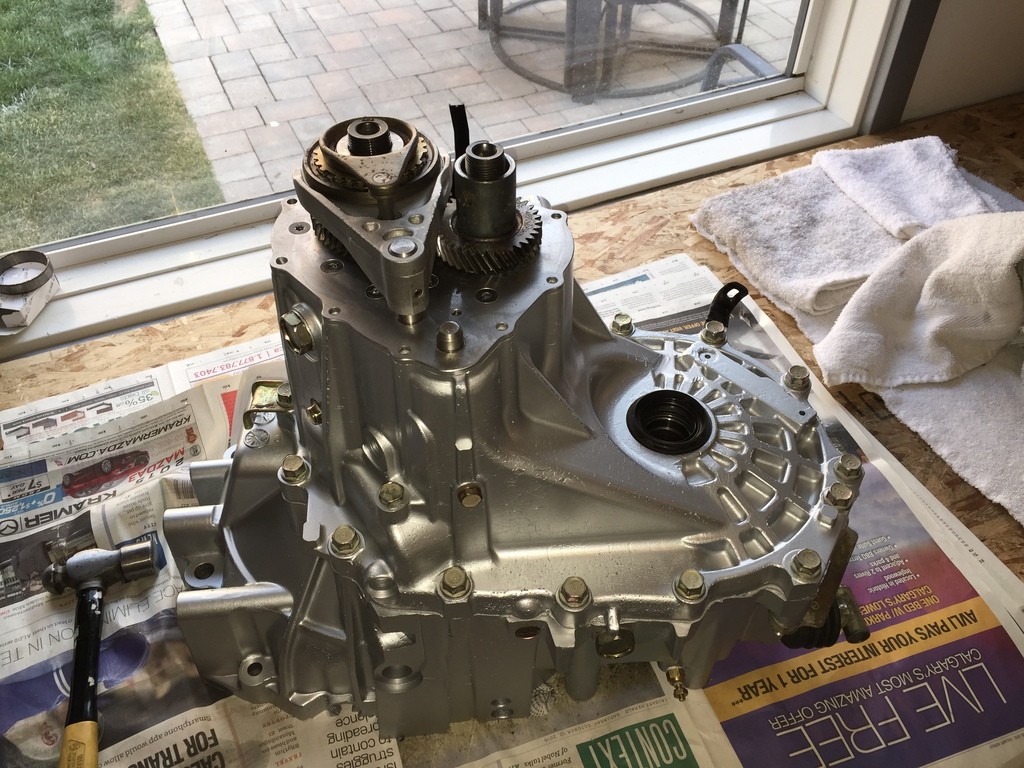
Hardware installed into lower case half, and shot of the welded differential. It still functions as a limited slip. It's not welded solid, it's just permanently affixed to the ring gear.
Differential installed, and shafts in place.
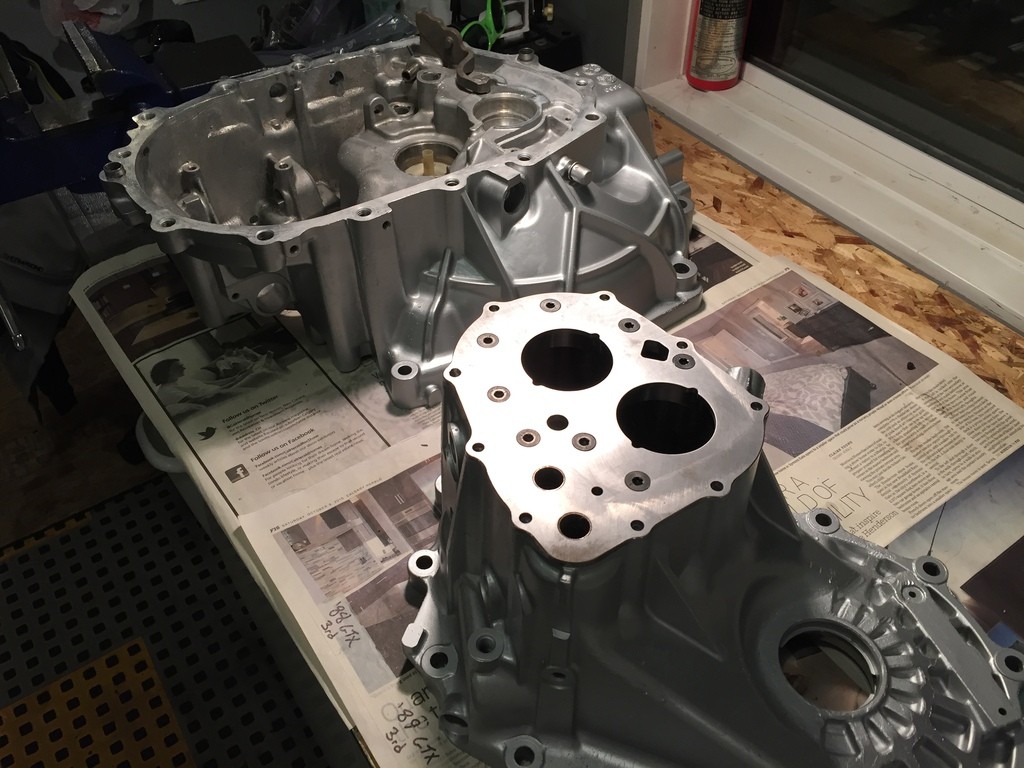
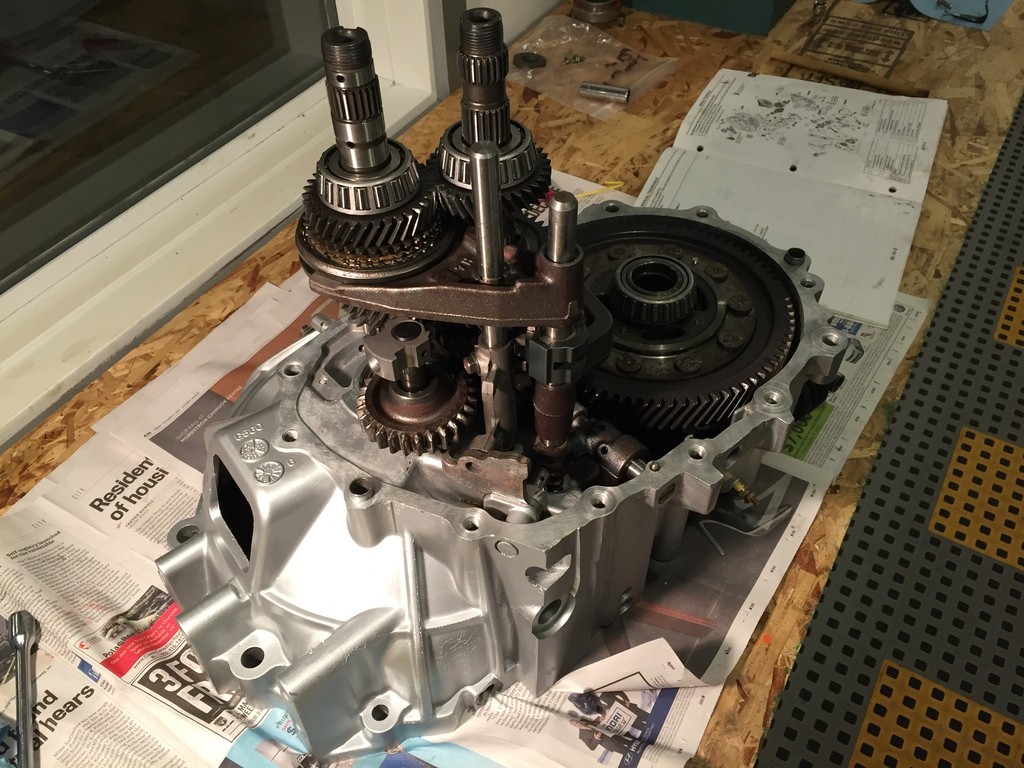
Shift mechanisim installed, case halves dry fit and bearing preload set (with shims.) Now ready for final install of upper case half.
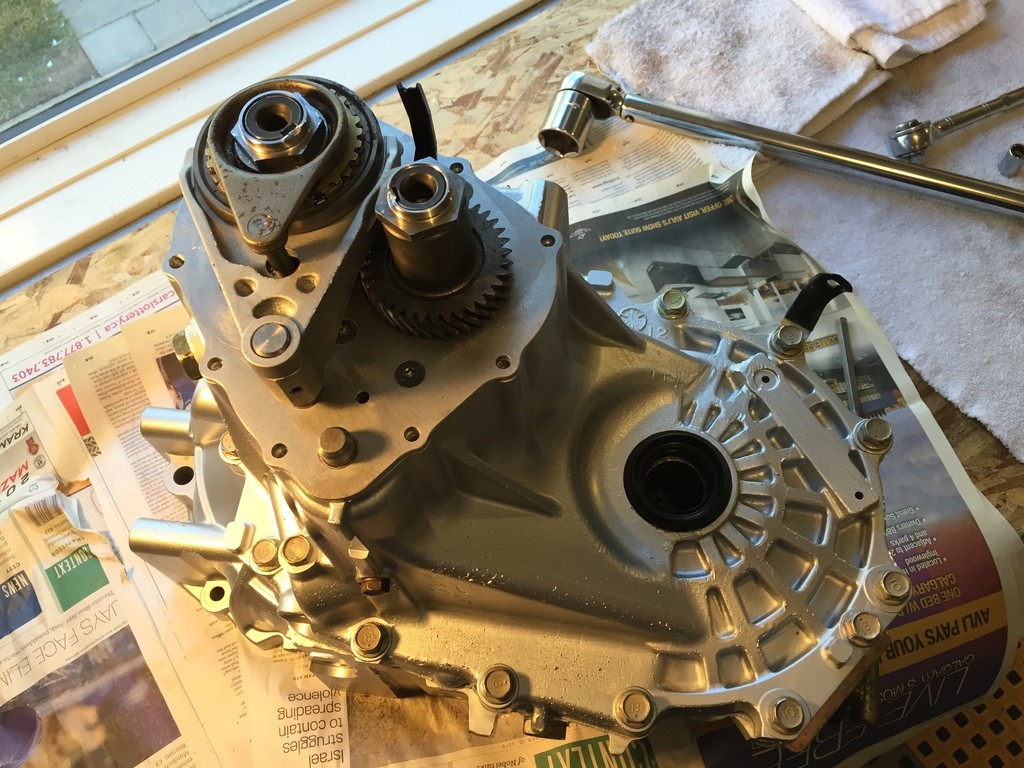
Case half installed, and 5th gearset installed. 5th/reverse synchro set shown. Waiting on a security nut (Mazda sent me the wrong one) which should be in tomorrow and I'll be able to put the top cover on.
Last edited by Maxx Mazda; 10-15-2015 at 07:56 PM.
...
Registered User
This is pure sex. I like the inside of your transmission.
This quote is hidden because you are ignoring this member. Show Quote
Registered User
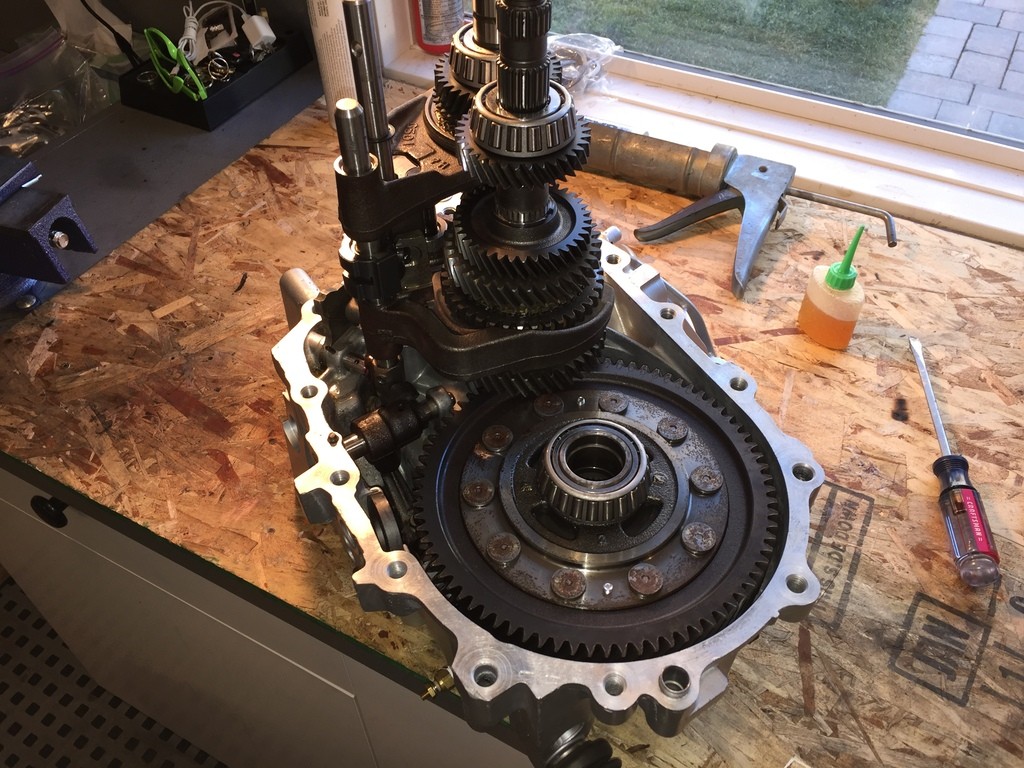
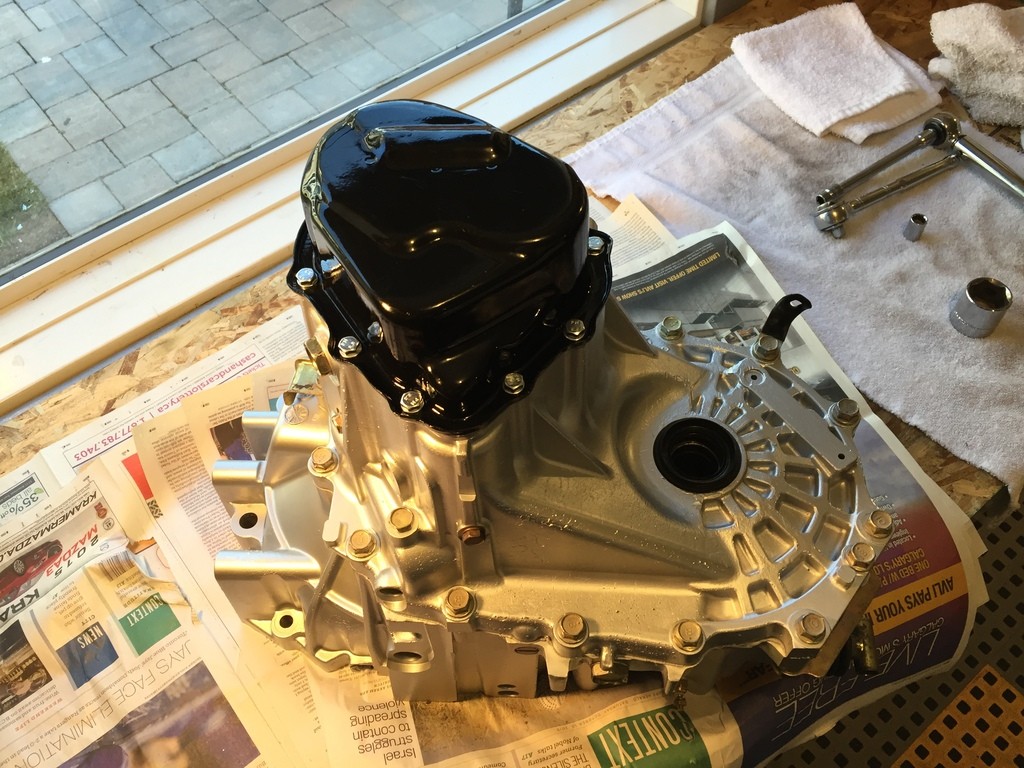
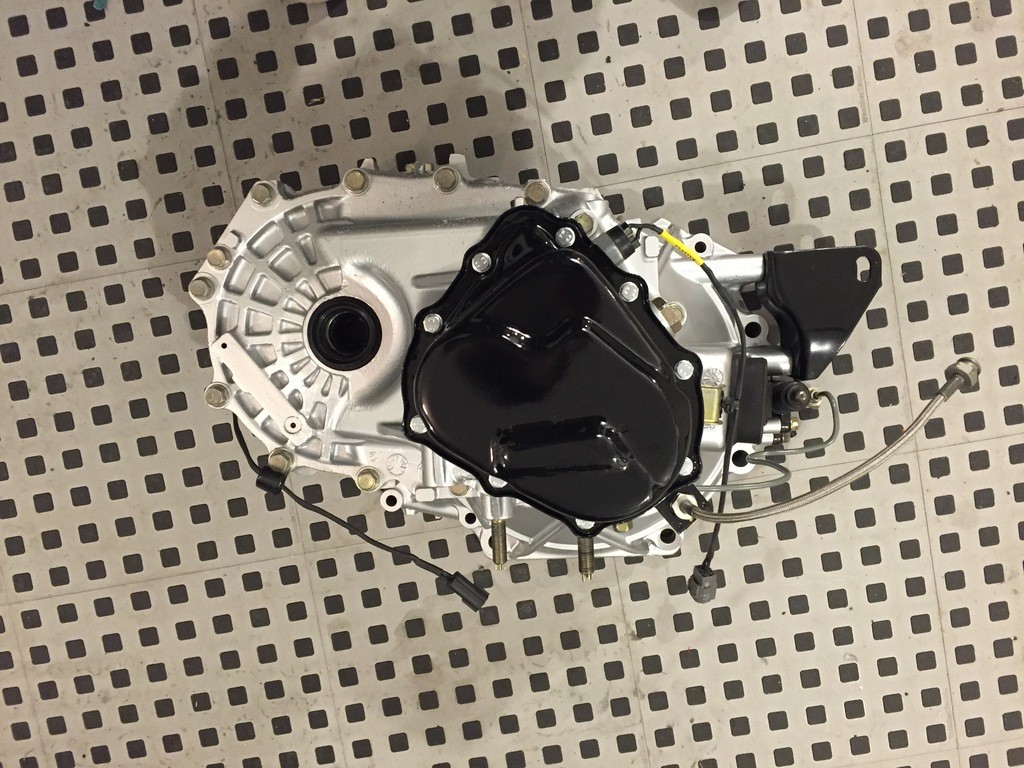
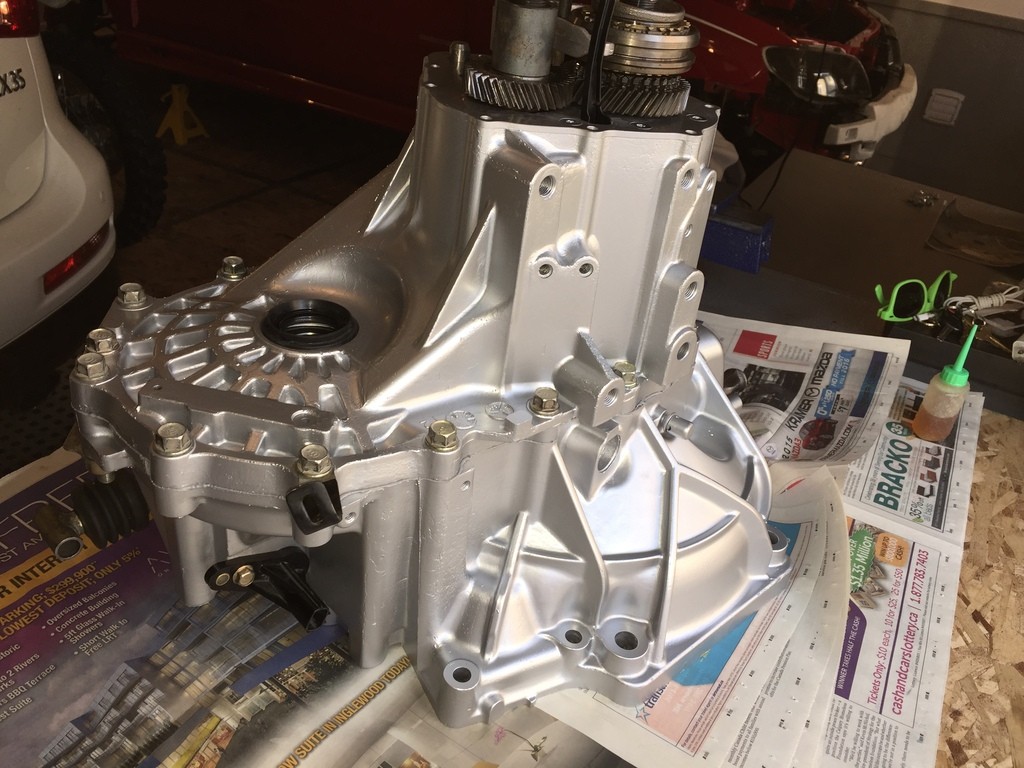
Got the security nuts from Mazda today. Installed and torqued. Installed top cover.
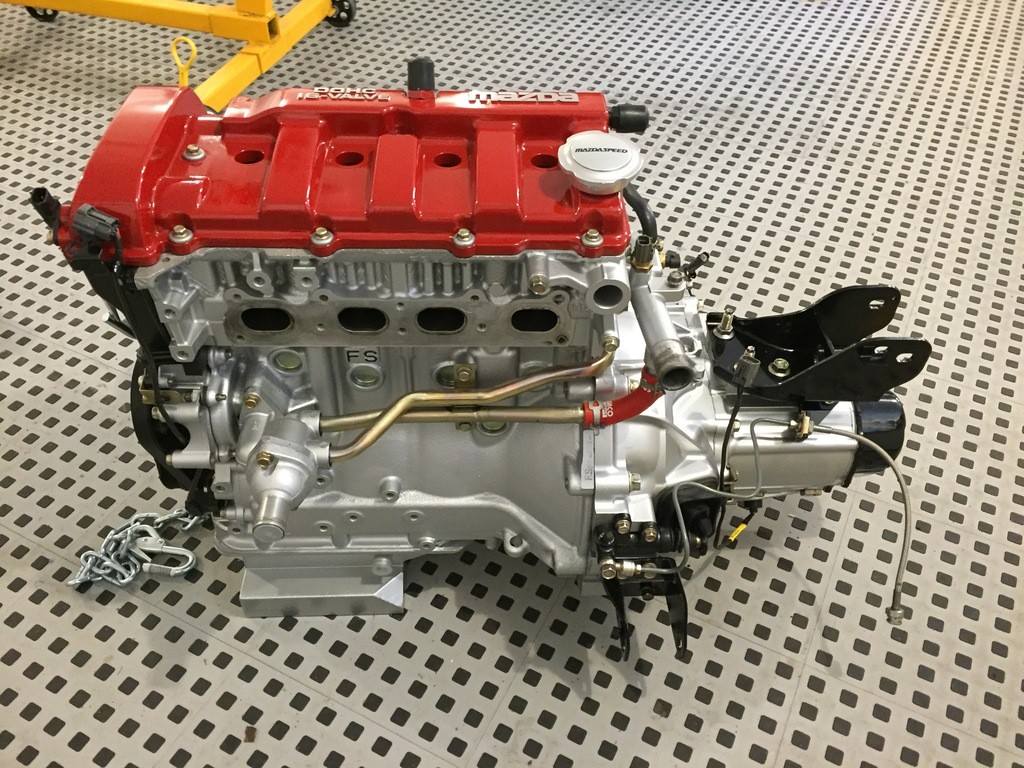
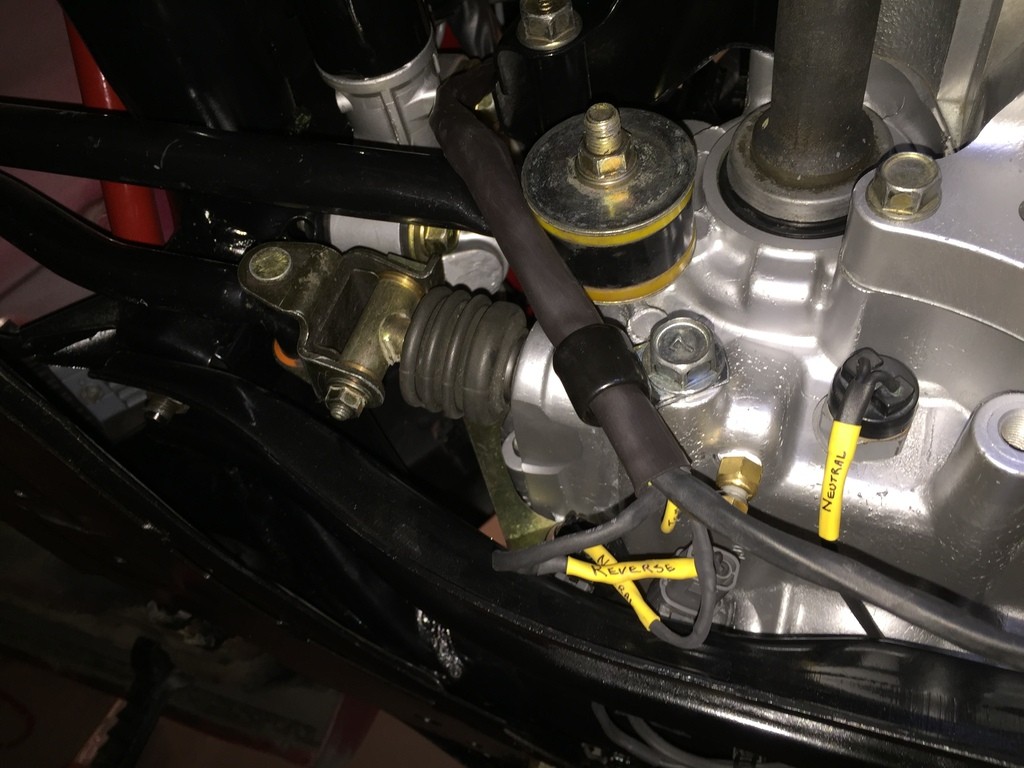
For the reverse and neutral sensors, I de-pinned them and built the wire loom like I did on the main harness. Bolted on all the misc. mounts, clutch slave cylinder, etc. Here is the finished transmission:
...
Registered User
Wow it's been awhile since the last update. Not that I haven't been working on it, just haven't taken many pictures and posted anything.
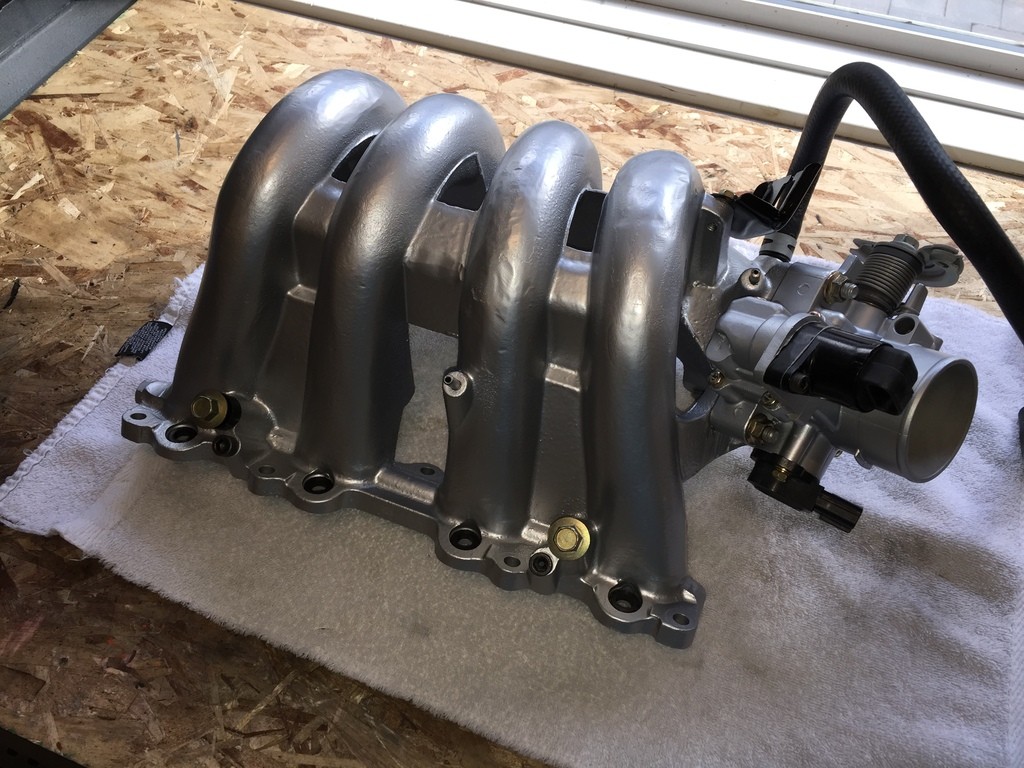
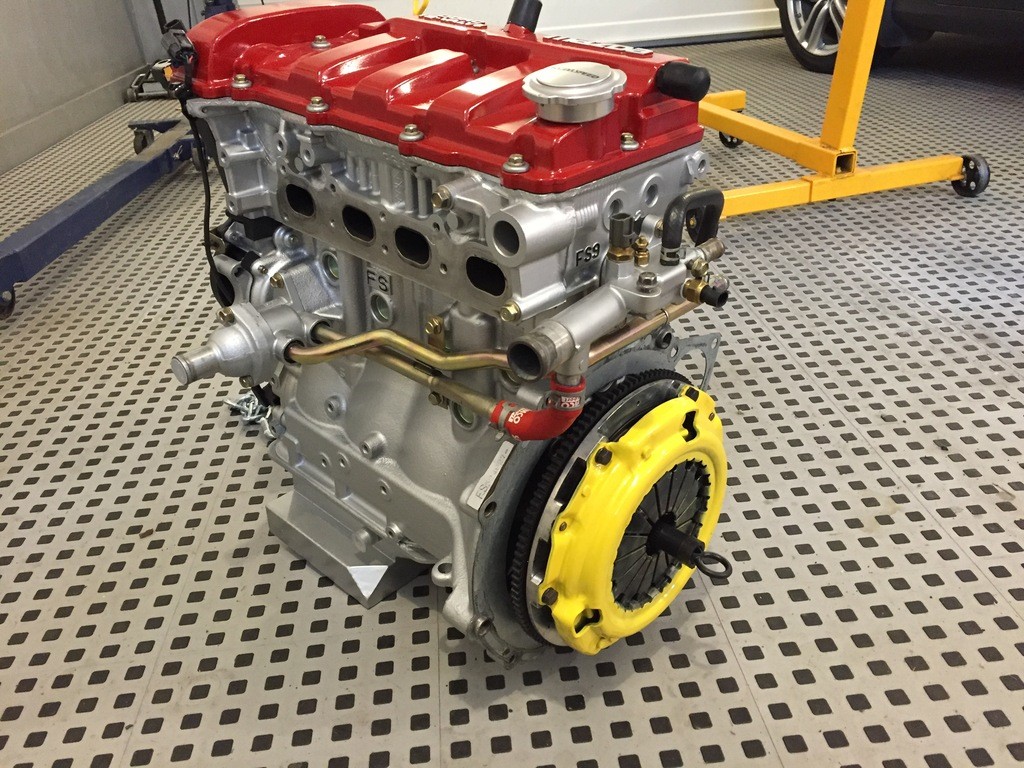
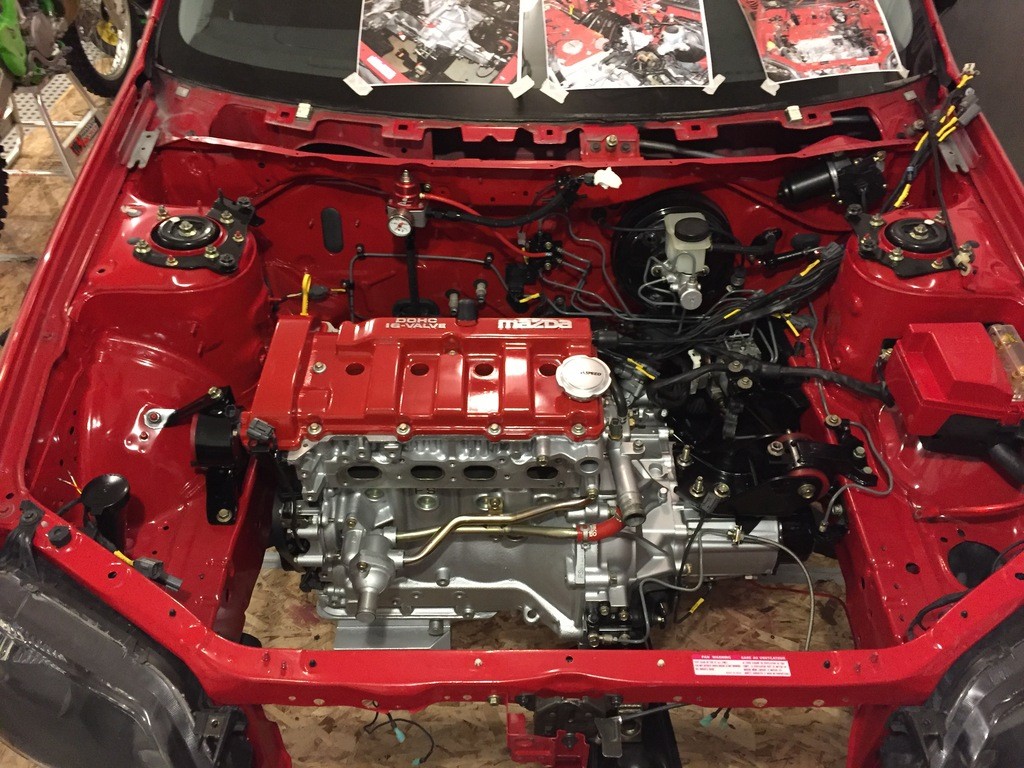
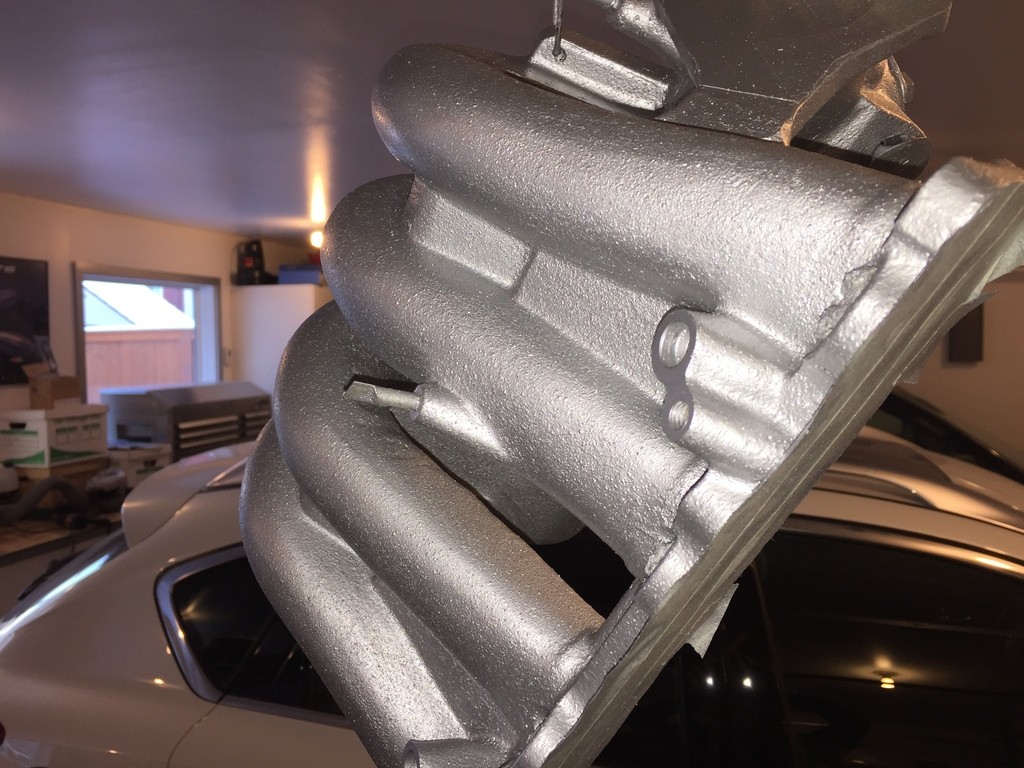
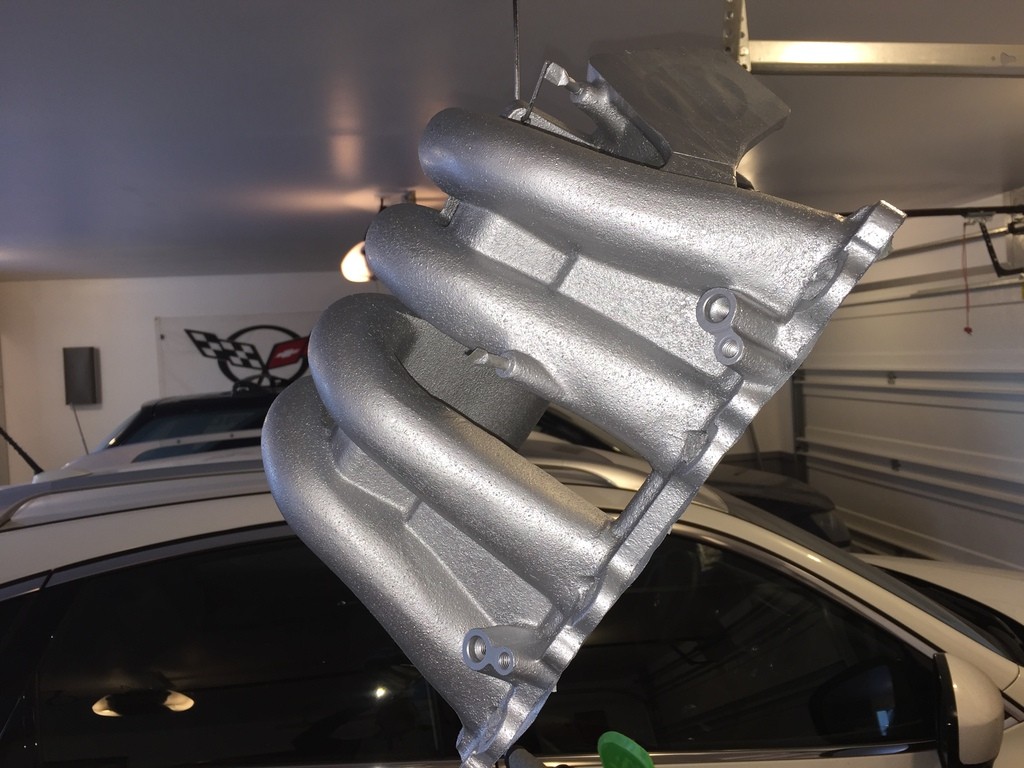
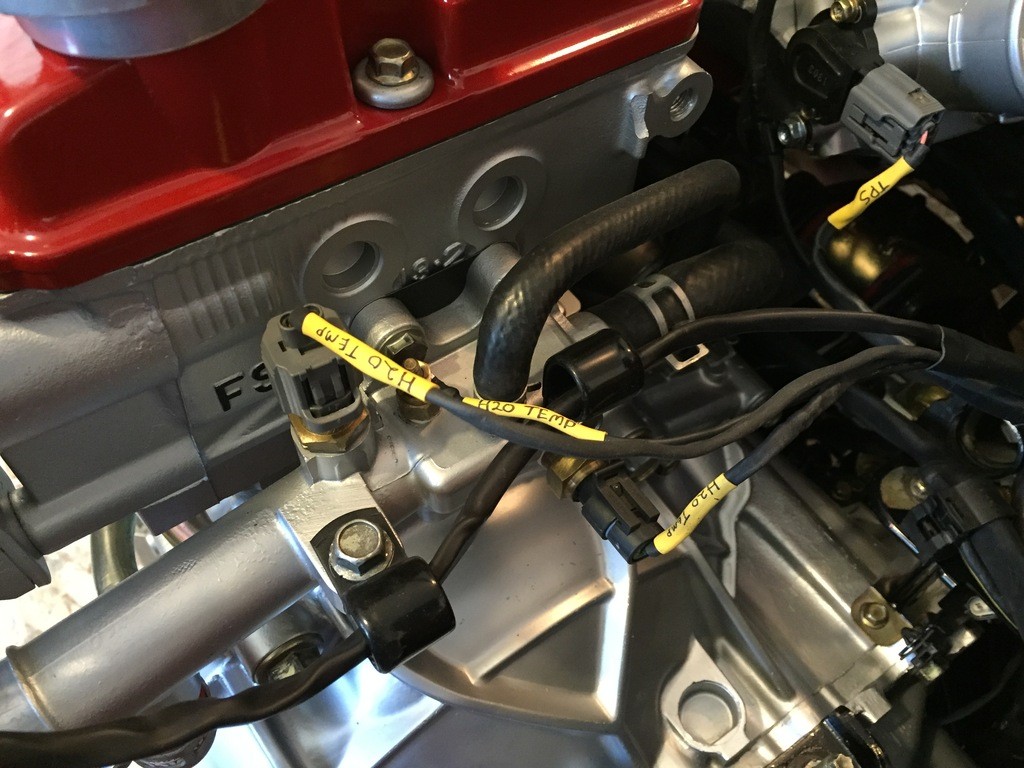
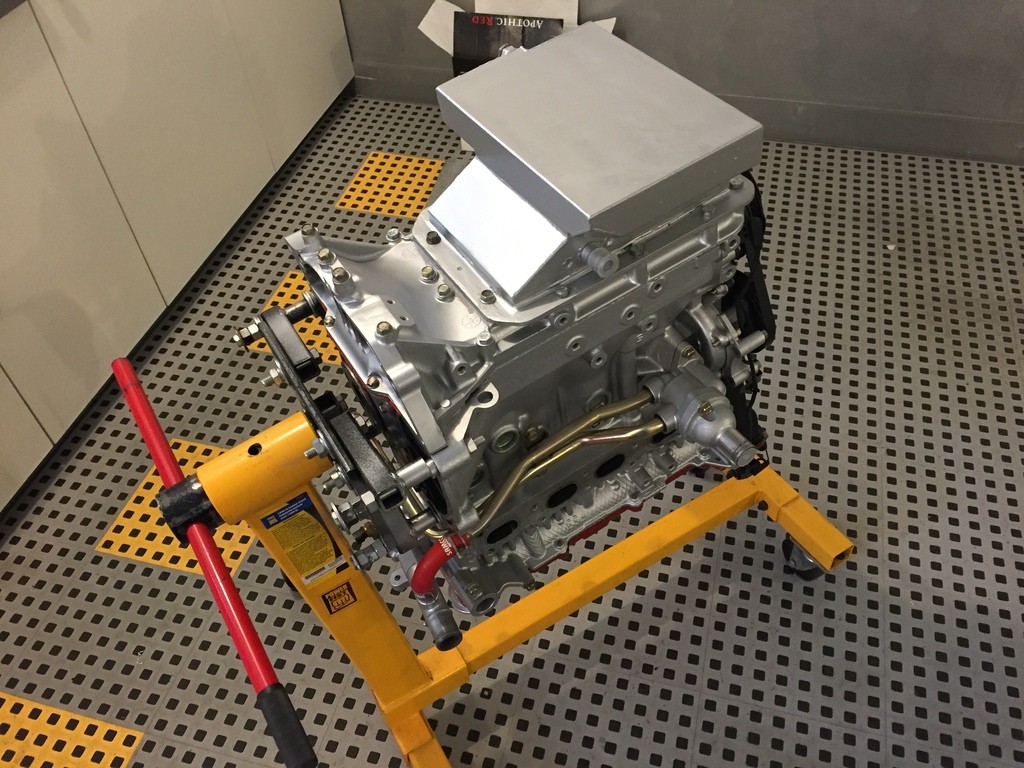
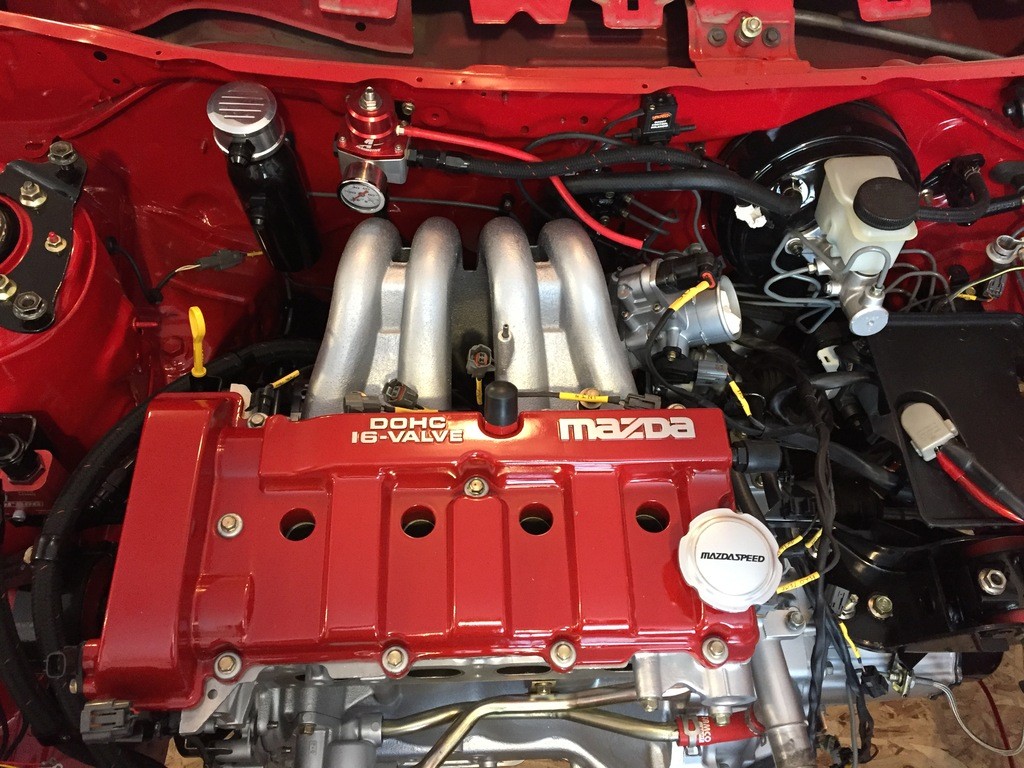
Got the intake manifold planed and reassembled with new gaskets. Installed all sensors and catch can port.
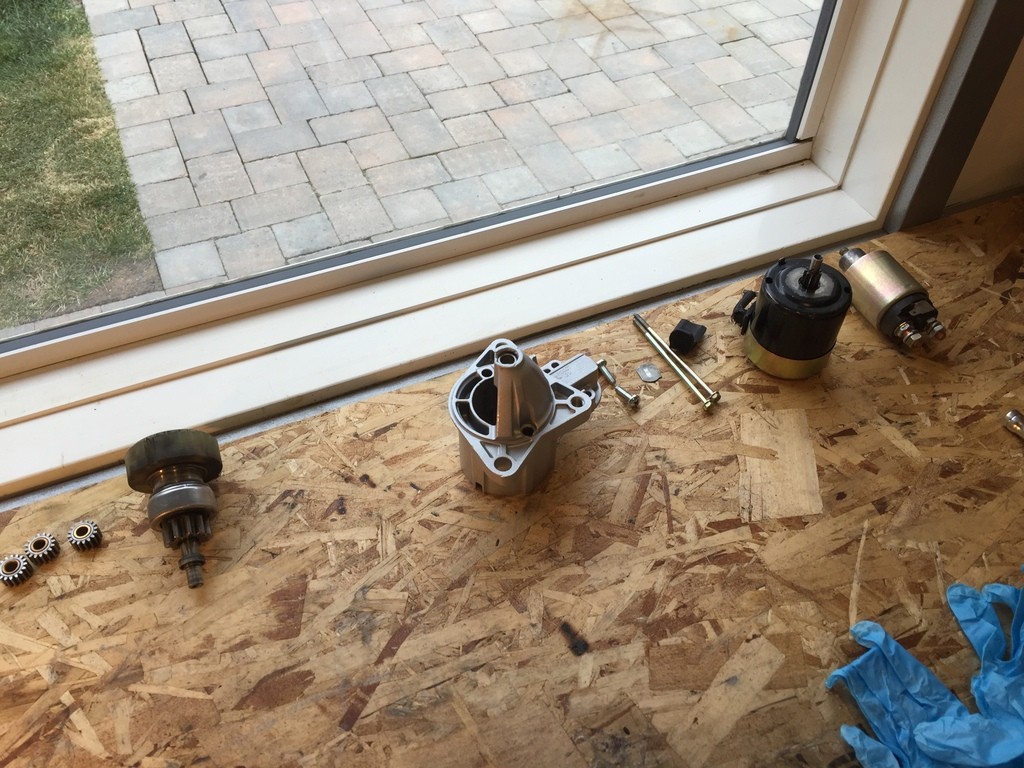
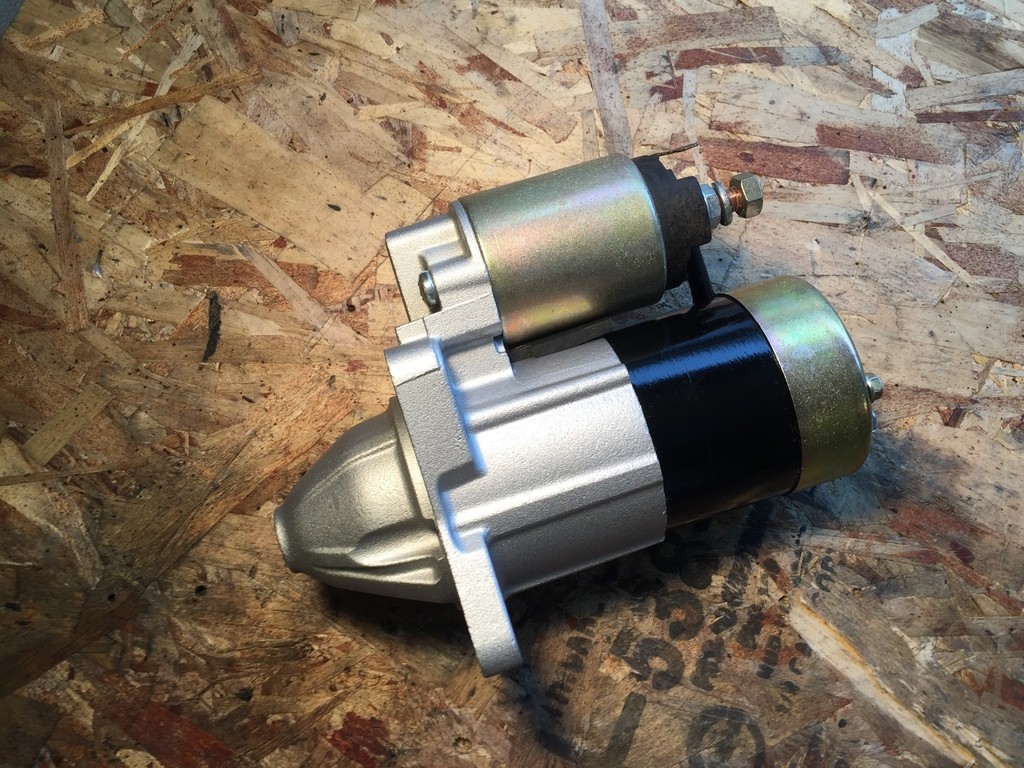
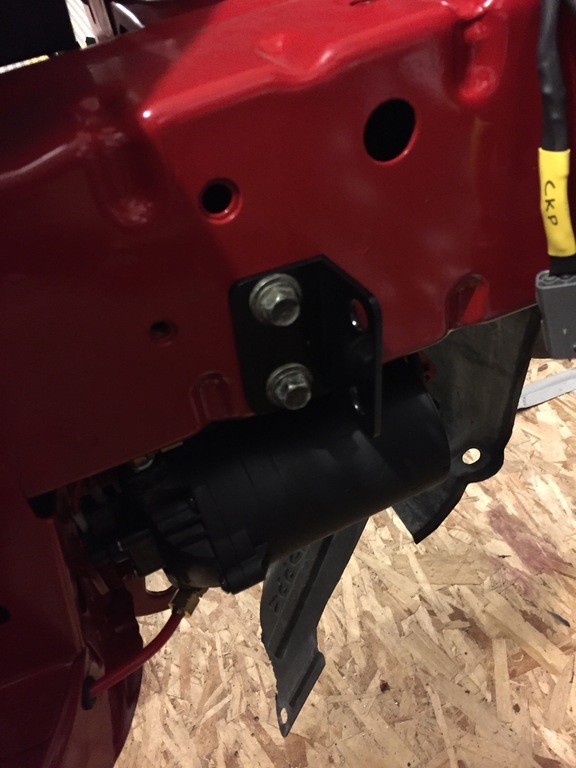
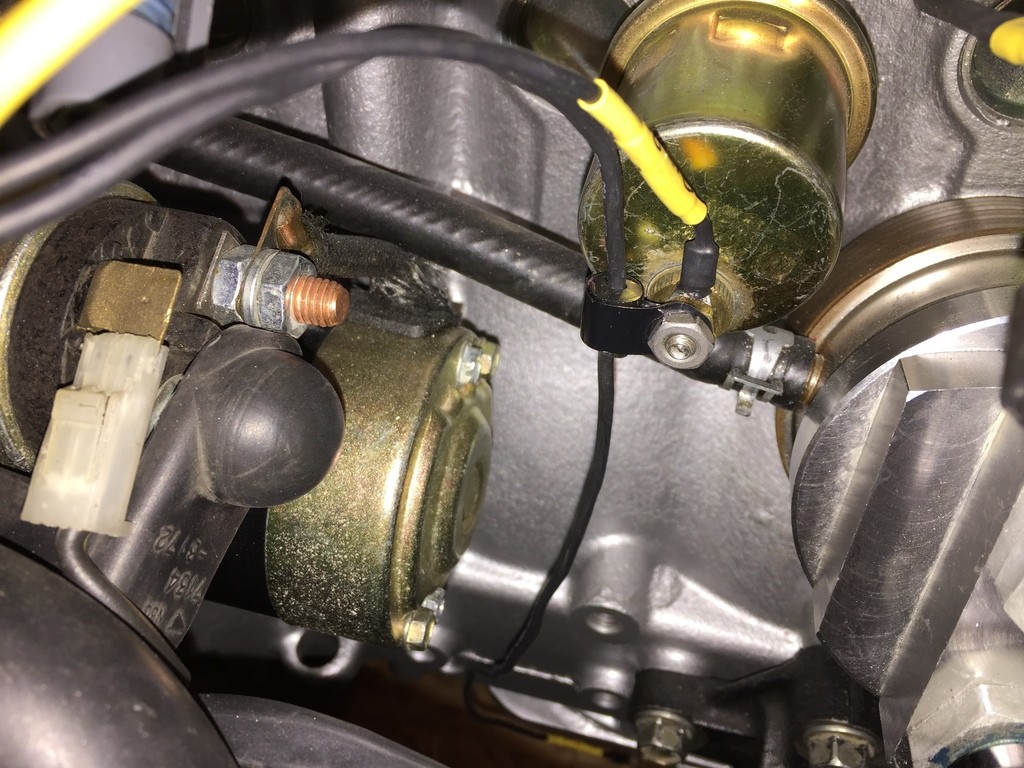
Cleaned and rebuilt the starter:
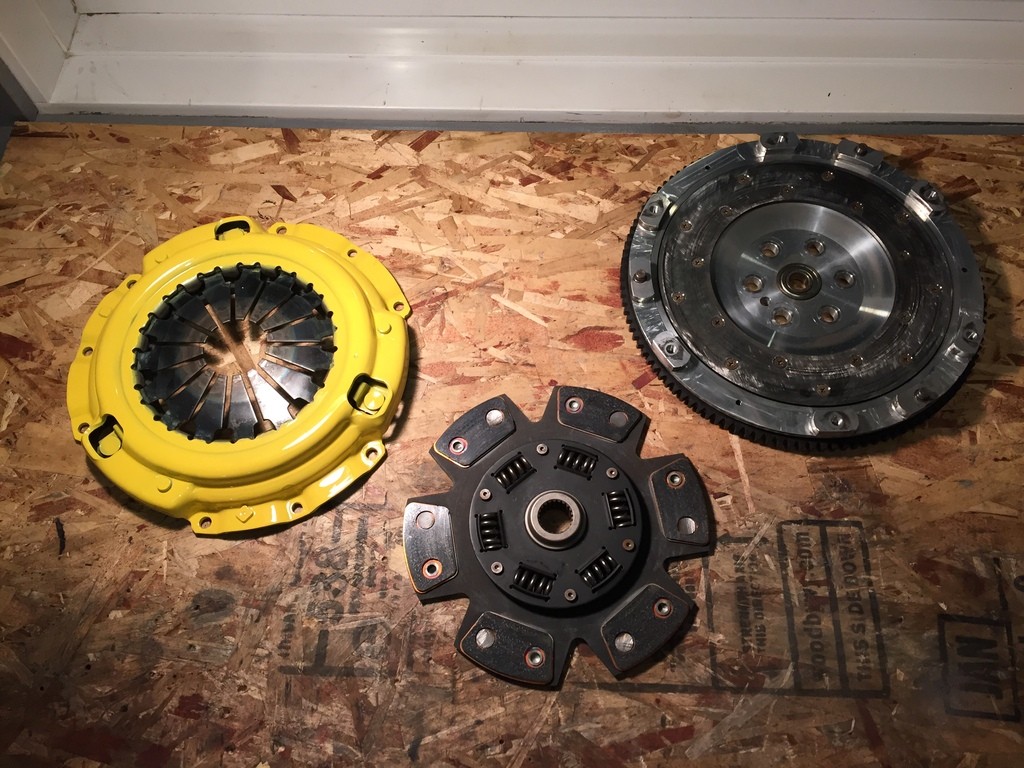
Clutch and lightweight flywheel cleaned up and ready for installation:
This goddamn AWR oil pan... Not known for amazing quality (it would sweat through some of the welds) but unfortunately it's the only deep sump oil pan available for the Mazda FS engine. So, I had Beyond member legendboy touch up some of the seams for me with his TIG, and weld in a couple of bungs for my turbo oil return and oil temperature sensor. Once that was completed, I had the flange planed flat (welding will often cause warping, this is unavoidable) and installed the pan with Permatex Right Stuff silver.
Last edited by Maxx Mazda; 12-10-2015 at 06:43 PM.
...
Registered User
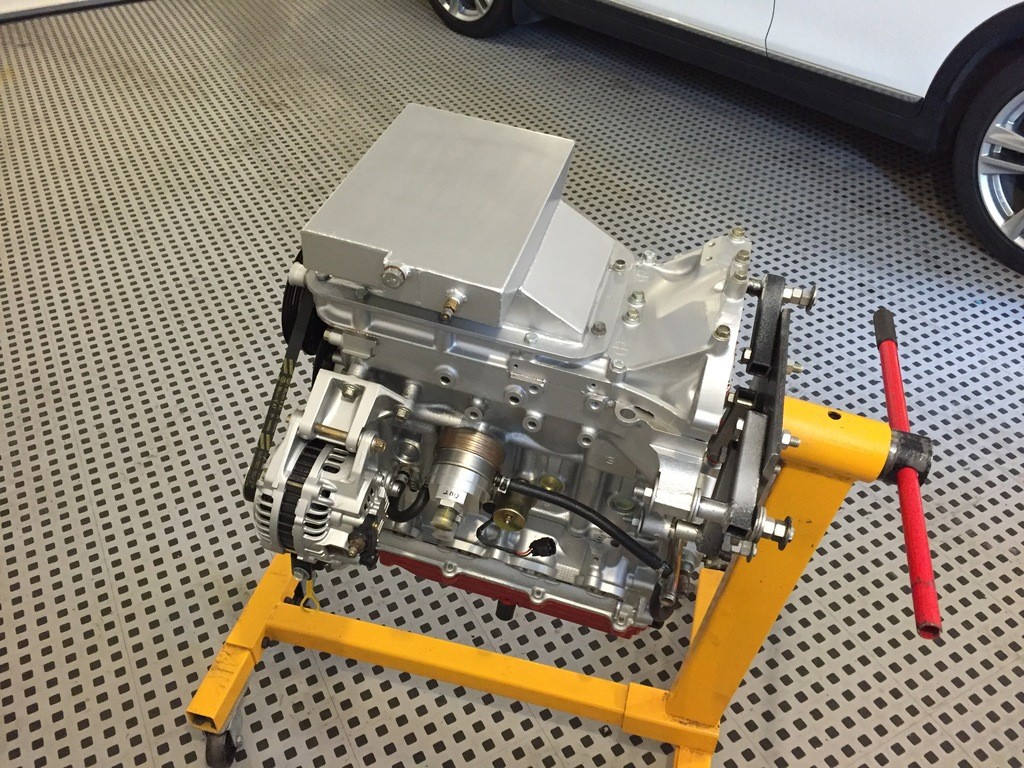
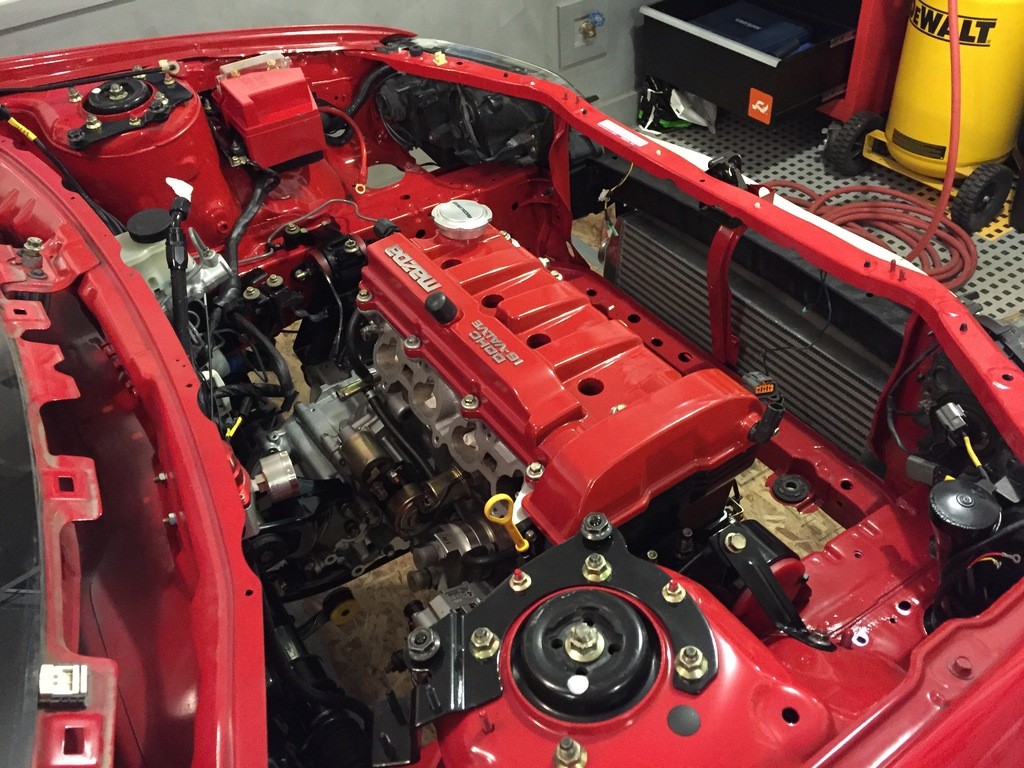
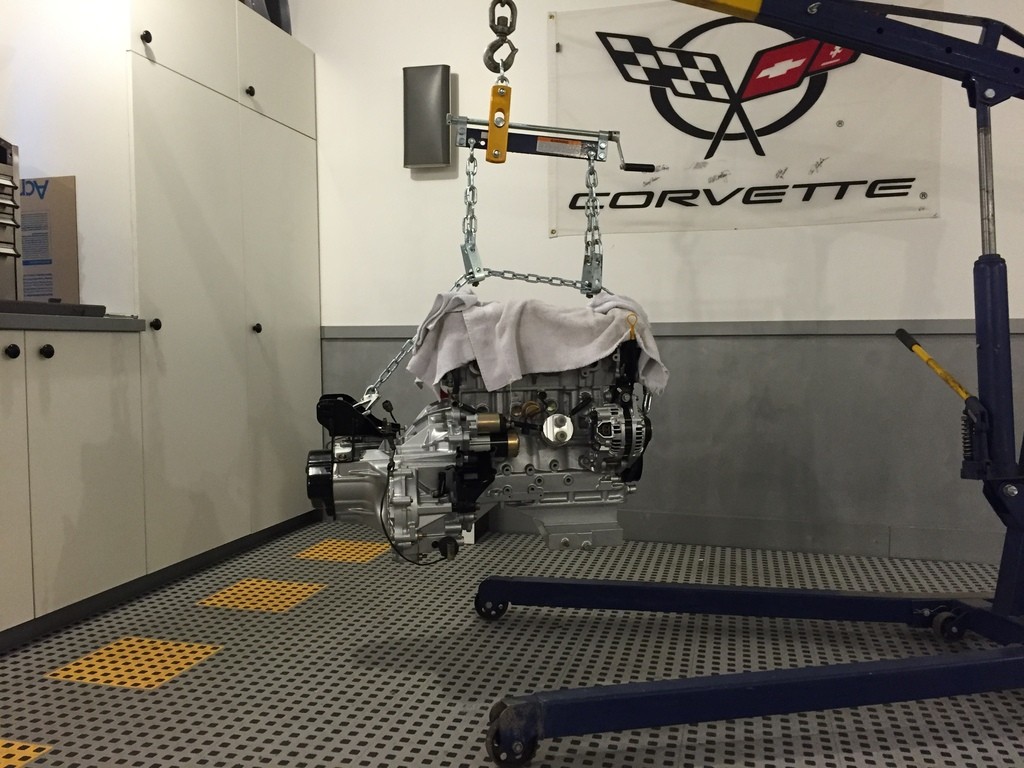
With the engine now off the stand, the flywheel could be torqued down and the clutch installed.
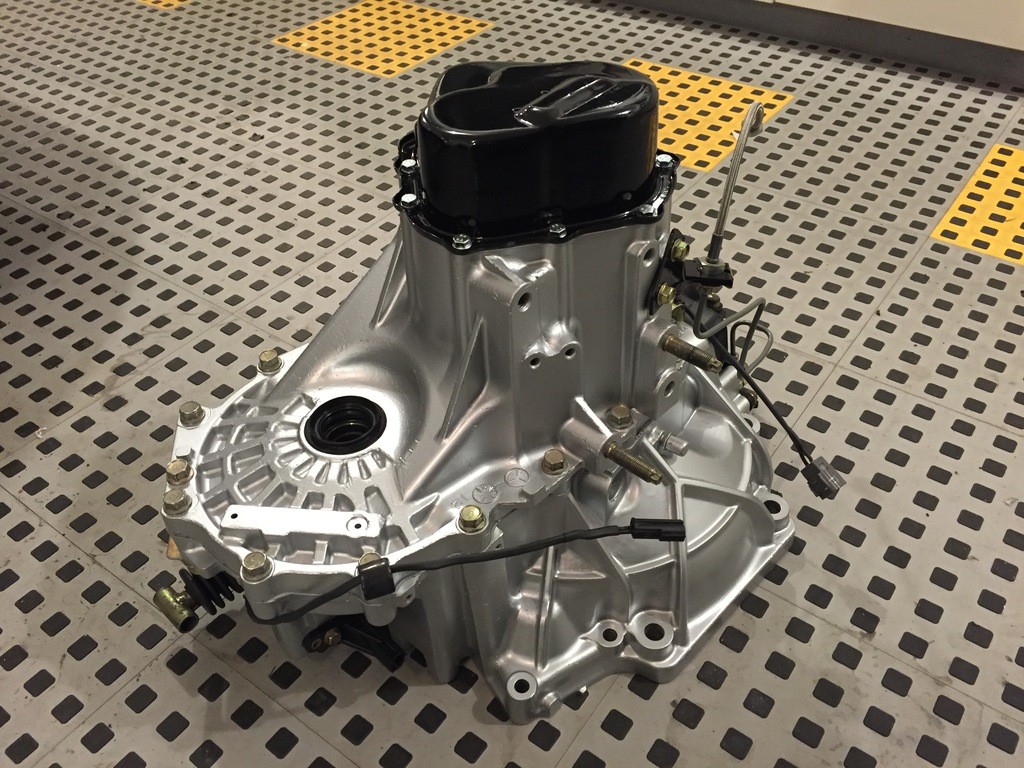
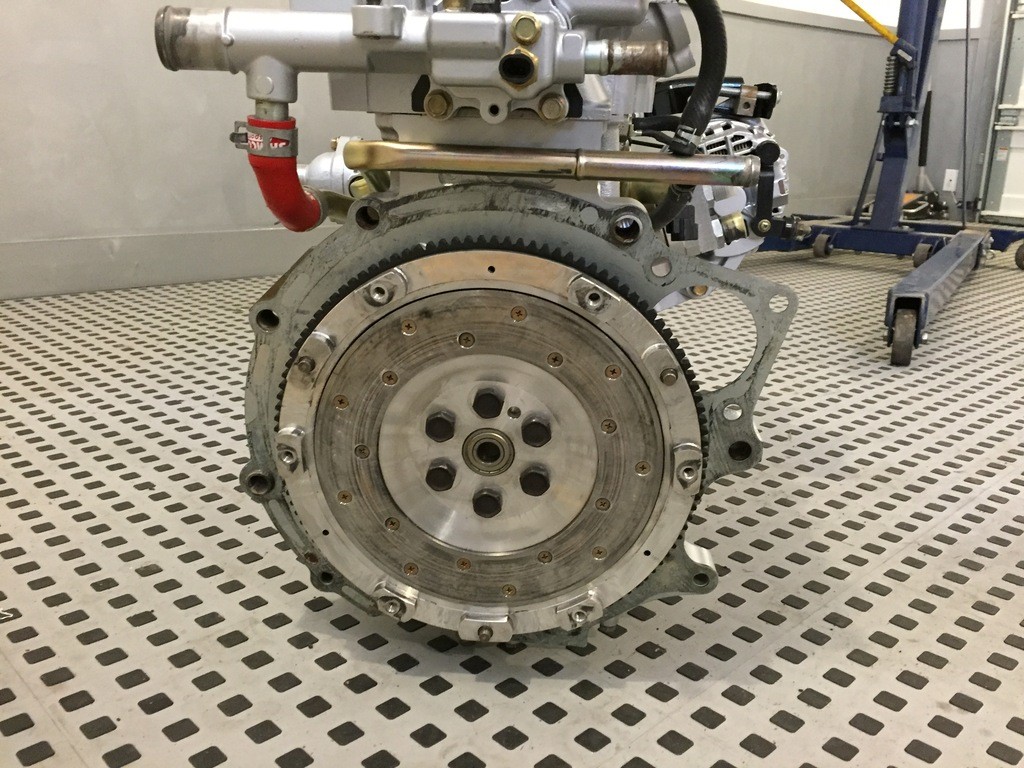
One last look inside the bellhousing before the transmission is installed.
Transmission now installed and torqued down.
Engine leveler installed and hoisted up ready to go back into the car. Towels to protect nicely painted valve cover.
Last edited by Maxx Mazda; 12-10-2015 at 06:48 PM.
...
Registered User
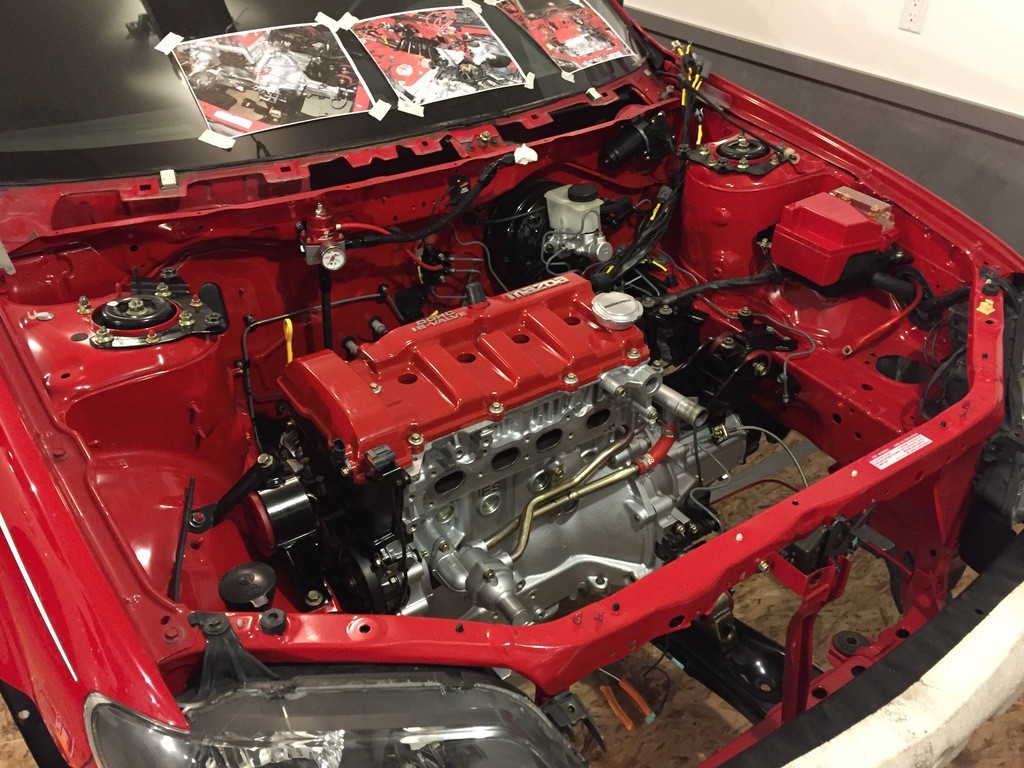
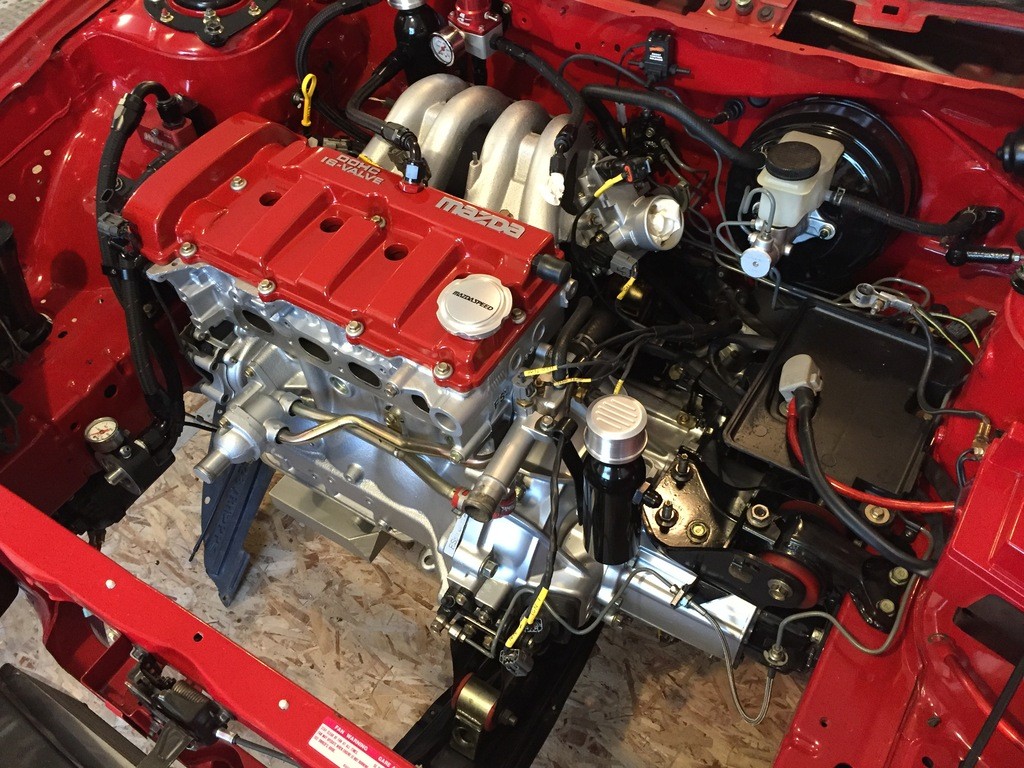
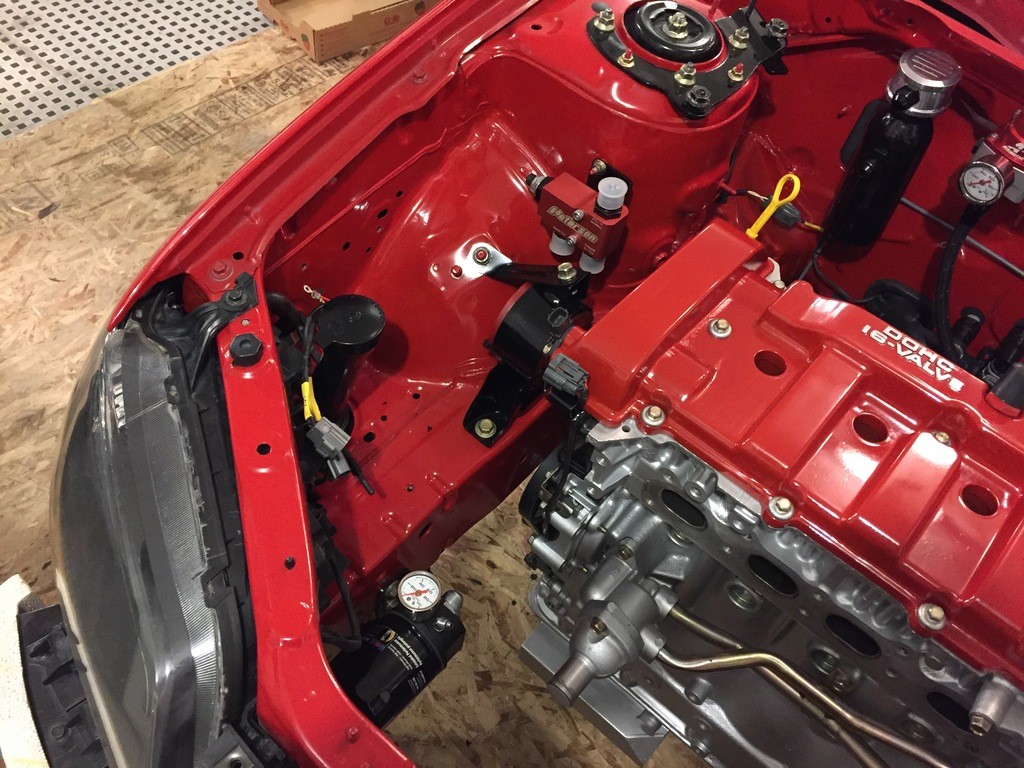
Finally, after close to three years, the engine finds its way back into the car!
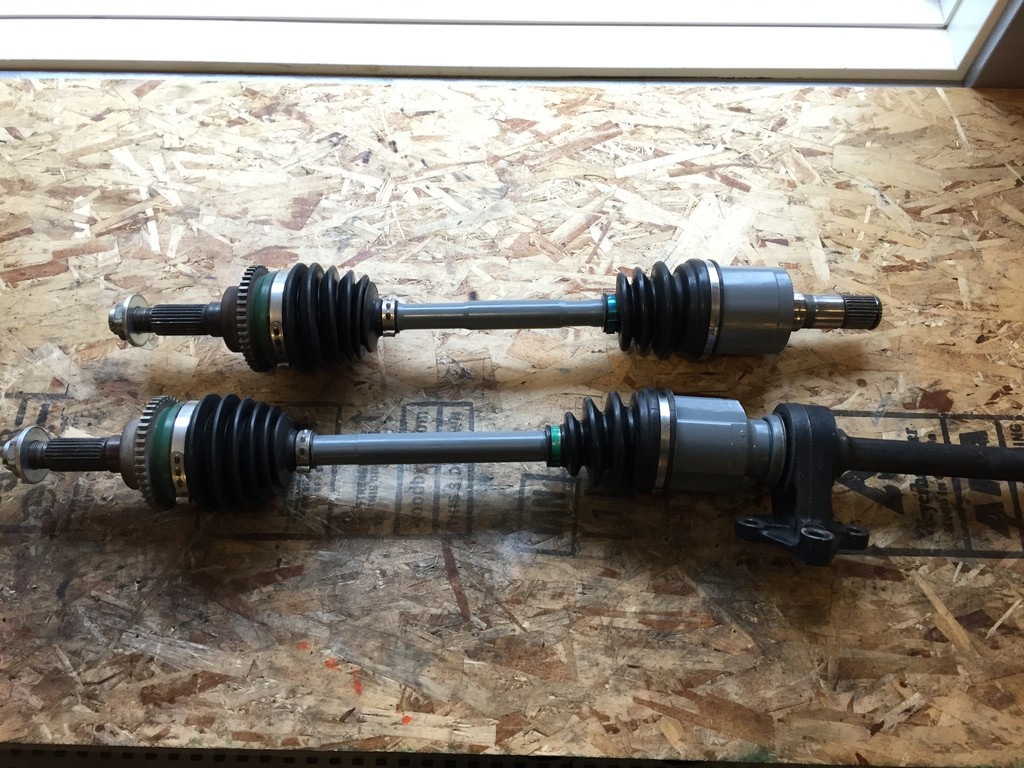
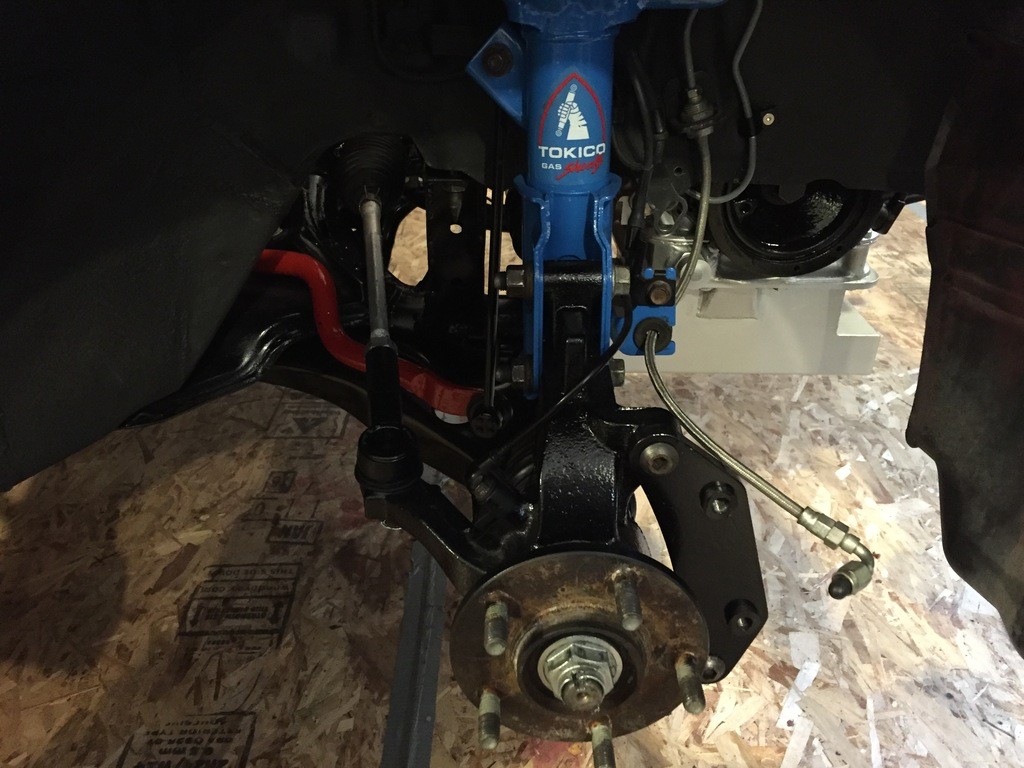
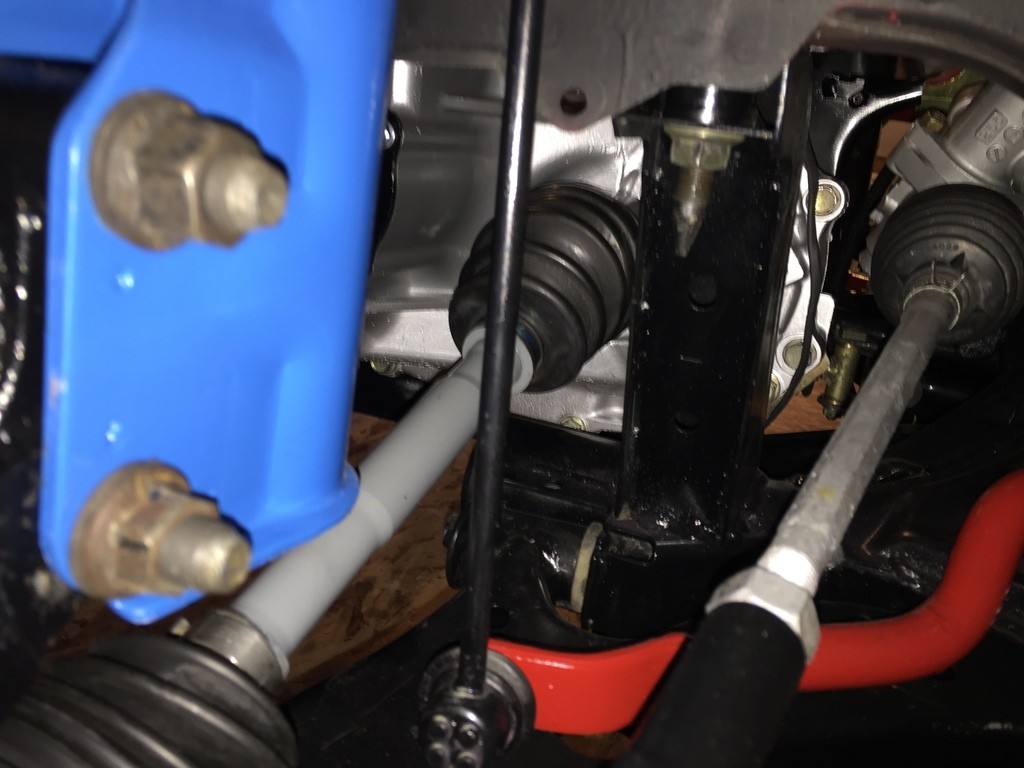
Snazzy rebuilt axles were installed next.
After that, I got onto a bit of a roll bolting shit up and didn't really stop to take many pictures. Not much to mention as most of the work I did was underneath the vehicle anyway.
...
Registered User
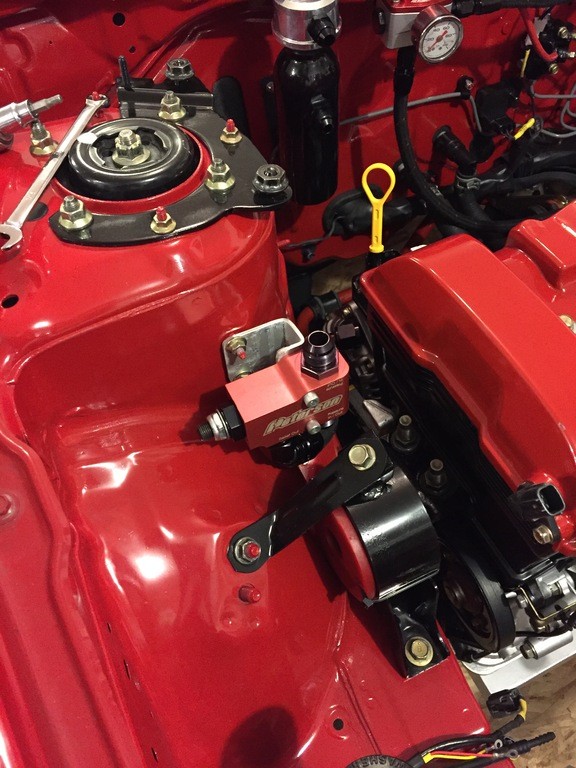
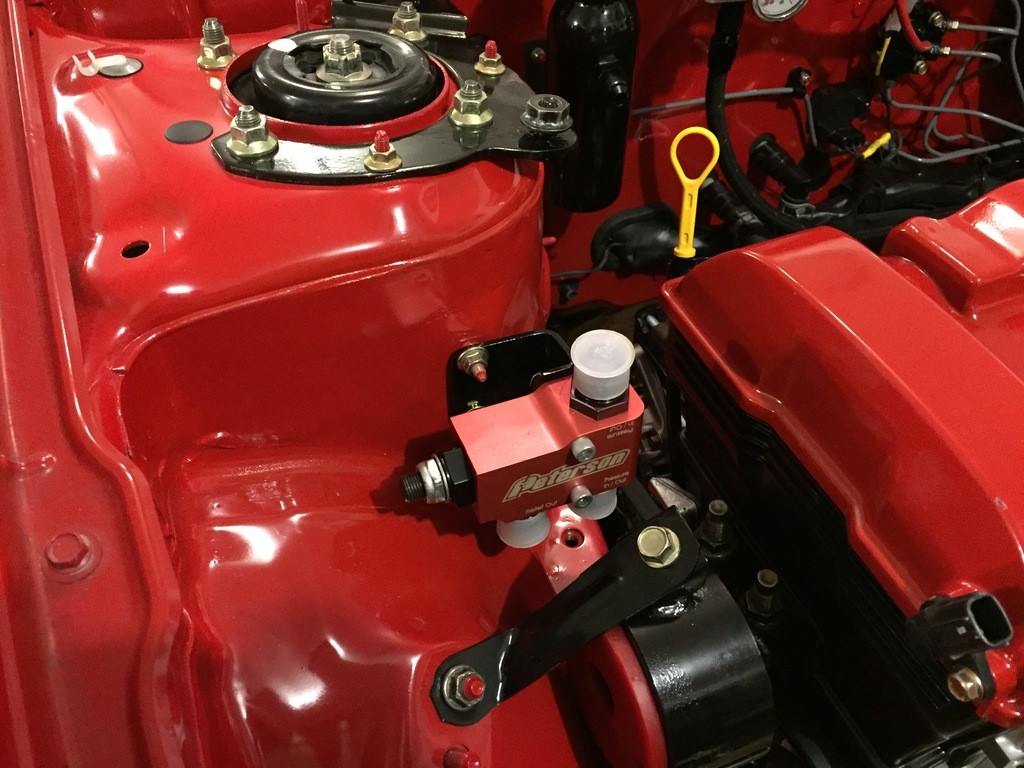
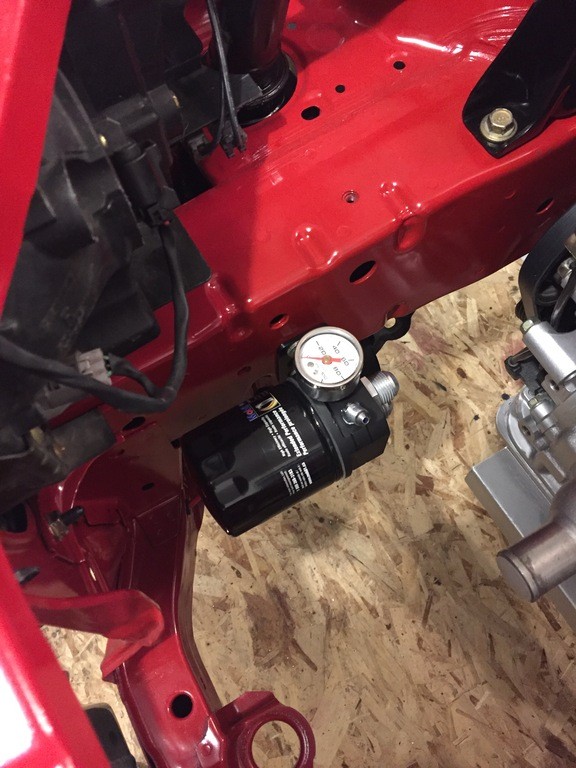
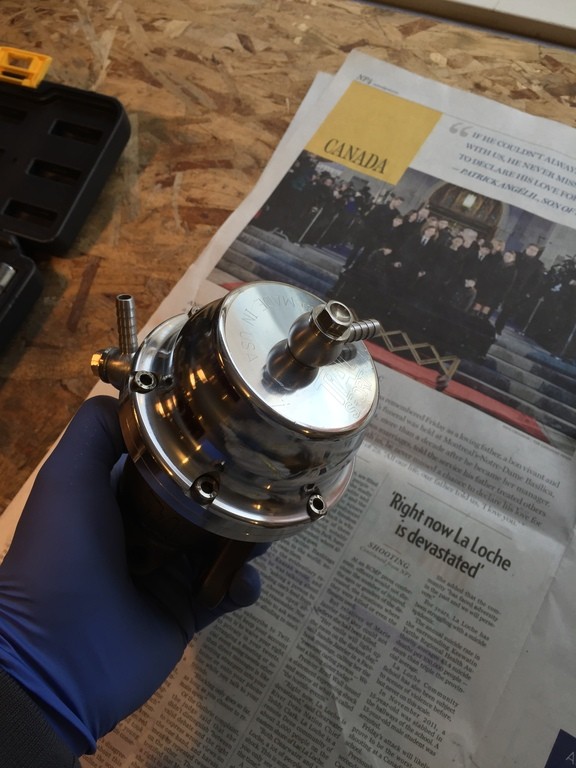
For those not familiar with my oil system, the oil pump has been internally coated to decrease tolerances and ensure maximum pressure is delivered. The internal regulator has been removed, and I am running an external Peterson unit which allows me to run my oil pressure at whatever I choose. With this setup, I've seen 40psi at idle, while still nothing over 100psi at full RPM. Anything higher you risk blowing seals and oil filters.
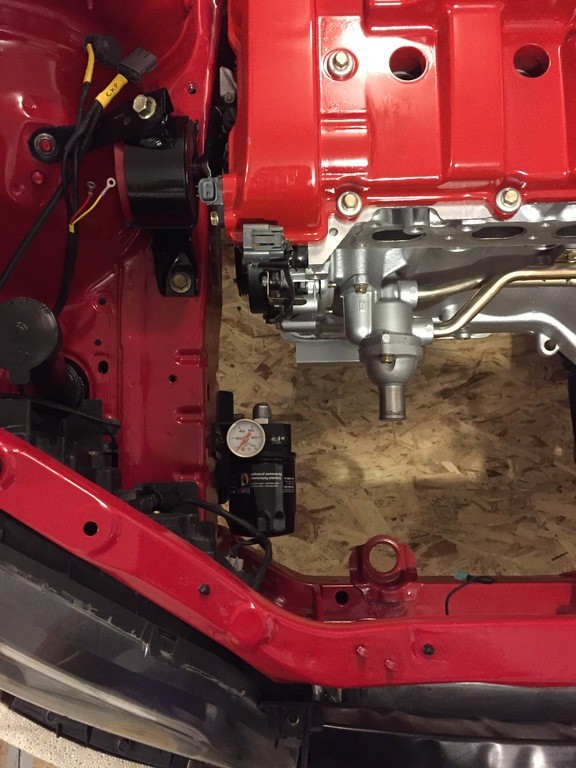
I used to have the regulator mounted to the firewall, and the oil filter back behind the strut tower. With the power steering and AC deleted, I now have much more room up front so I decided to relocate those things for ease of access.
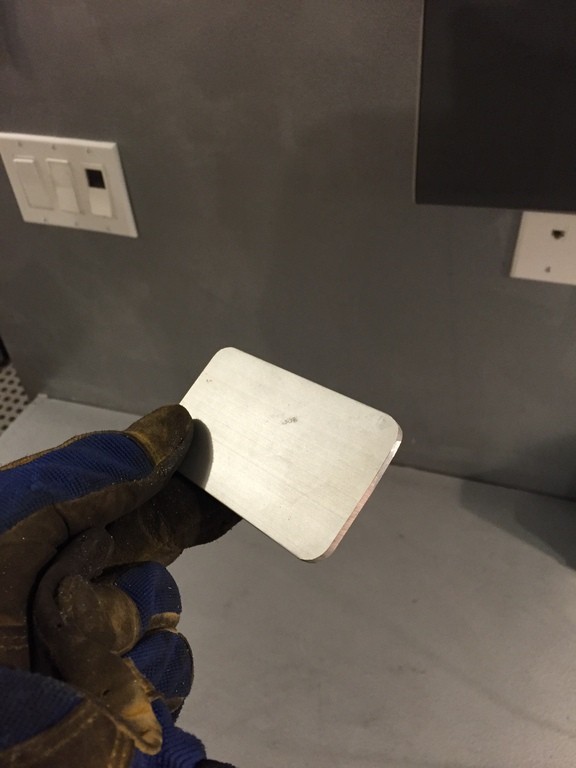
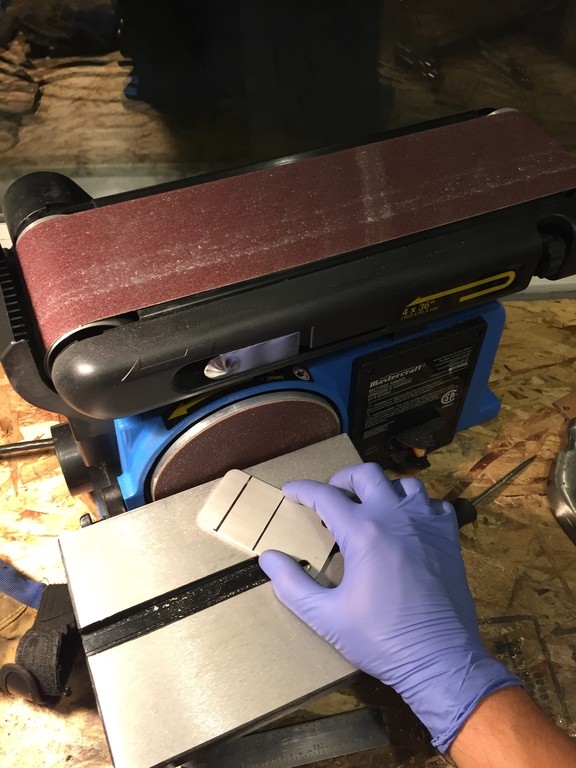
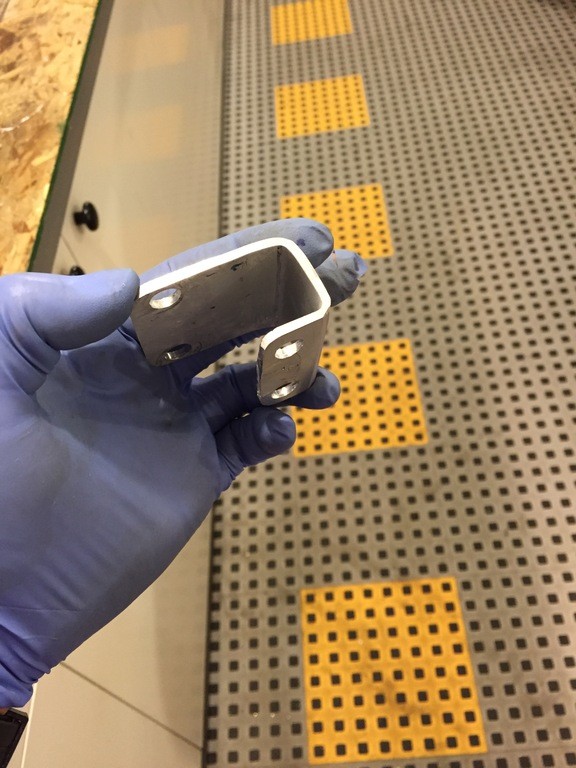
Deciding to mount the regulator now to the front of the strut tower, I needed to fabricate a bracket out of some aluminum plate.
The plate was cut to size, trimmed, and corners rounded.
After bending the two 90* angles and drilling the mounting holes, I could test fit the new bracket.
With the bracket finished, it was bead blasted and painted for a stealth look.
For the filter block (which also features a pressure gauge for easy underhood adjustment and my turbo gets its clean oil directly from here.) I decided to mount it on the forward frame rail to allow easy access for my frequent oil changes.
Again, I fabbed up a bracket from some aluminum in the fame fashion as before, and drilled and tapped the frame rail and filter block for some sturdy M8x1.25mm bolts.
The finished product:
Both components shown. Will need to measure out some new lines, but I have all the required hose end fittings that I'll need.
...
Chatroom Manwhore
Wow I love this, so many protégés are going to the junk yard, good on you for keeping it going.
Looking for a new VW? How about a used vehicle? We are Central Albertas #1 source for pre-owned vehicles
I will beat any deal on a new VW for beyonders
Gary Moe Volkswagen/Gary Moe Used Car Superstore!
Red Deer, AB
Registered User
Sorry it's been awhile since the last update. Had a bad snowboarding accident and ended up breaking my hip and my back.
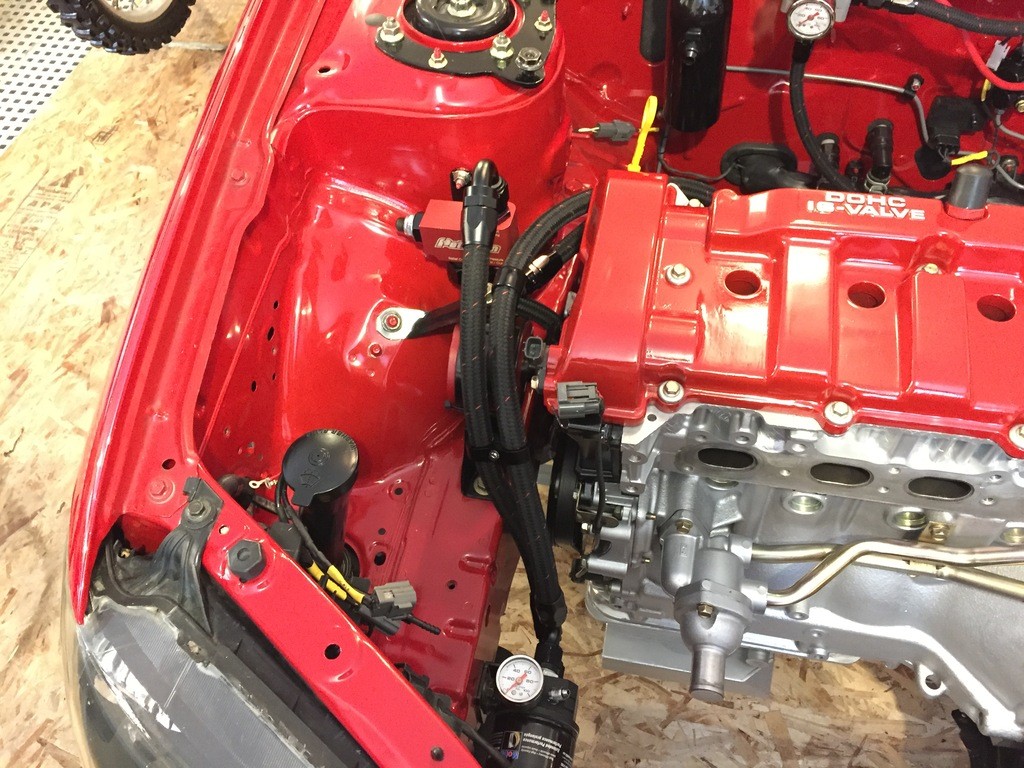
Ended up buying the requisite fittings, and building lines to finish up the oil system. The oil comes out of the block, into the regulator, the excess pressure is then dumped back into the sump. The regulated oil continues into the remote filter, and from there back up into the block. The turbo pulls clean oil directly from the filter assembly.
I made sure to use proper line brackets and spacers for a truly "factory" look. Notice also the red accents on the lines. Subtle but sweet.
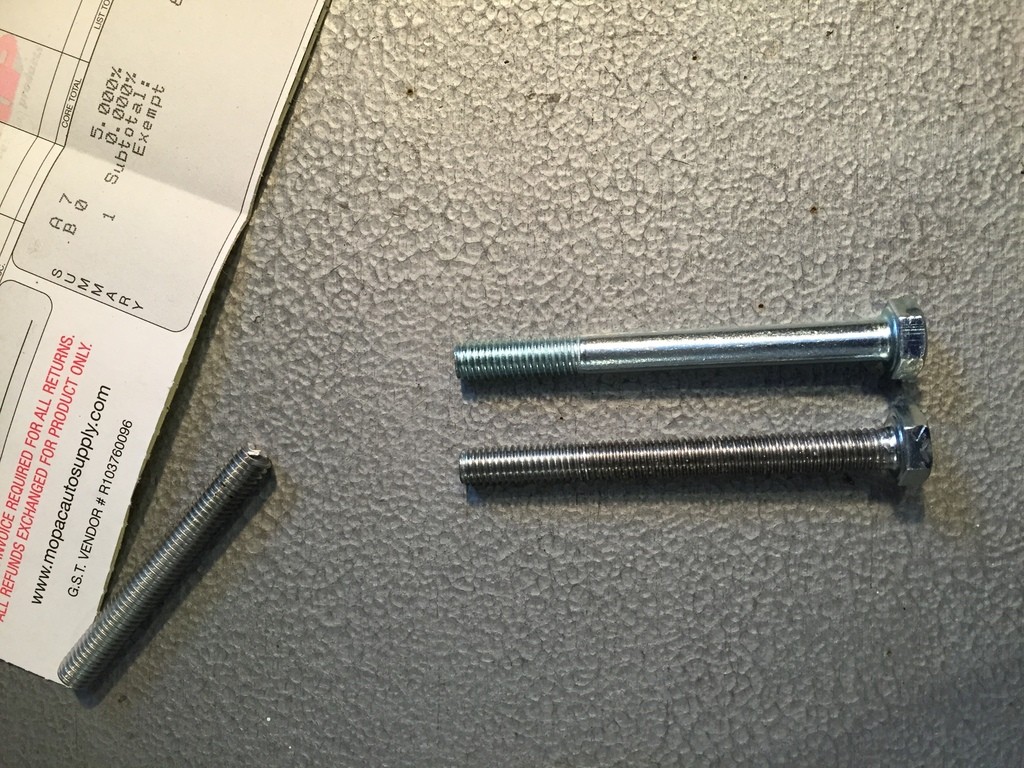
I had to use the alternator belt tensioning bolt to mount a line bracket, and I ended up breaking it. Mazda wanted $13 for a new one, I decided to make my own and cut threads all the way up a grade 8 metric bolt. Yay.
That's all for now. Once my back heals up a bit I'll make some headway.
...
Registered User
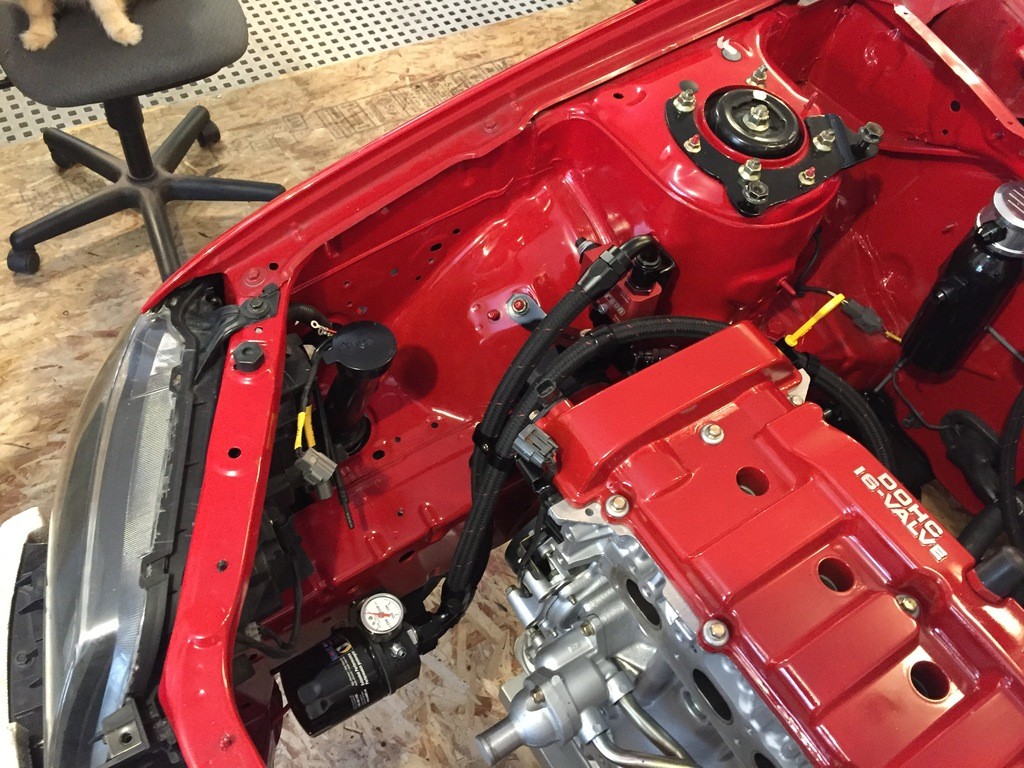
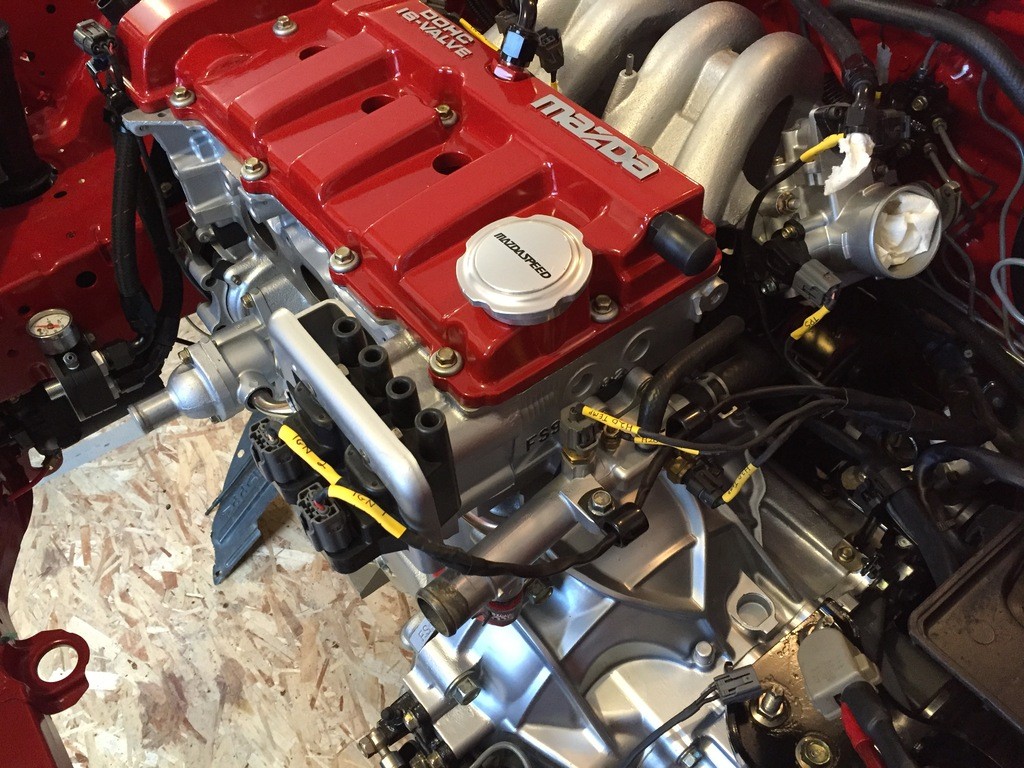
With the oil system completed, I could get to work on bolting up some of the rest of the engine parts. A nice little wire bracket will keep all the wires behind the engine free from chafing, and make it look proper.
For the intake manifold, I decided to clean it up a little more than I had. I stripped the paint, and ground off a lot of the extra material that was in the way. Once you've taken away the texture of the factory "cast" finish, it'll never look right again. I decided to give it a very light speckling with some dupli-color trunk paint, and finish it with high temp engine enamel. The end result is a manifold that has that factory texture back.
With the paint dry, the rest of the manifold accessories could be bolted on. After a new gasket was fitted, the manifold was torqued to the head.
...
Registered User
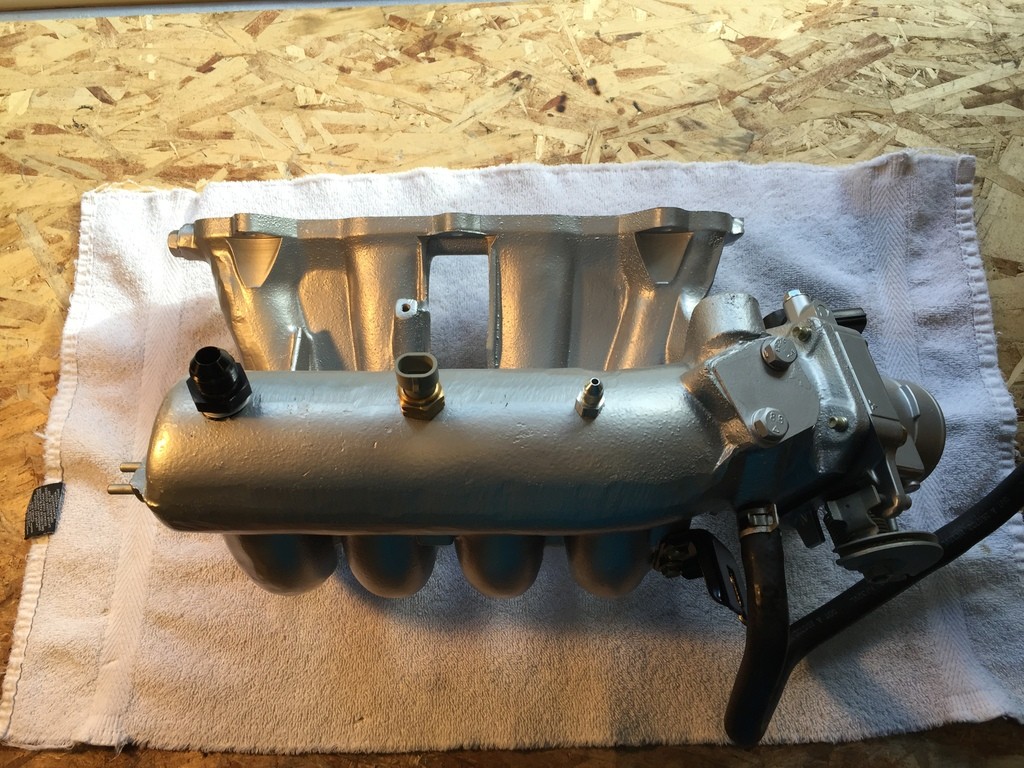
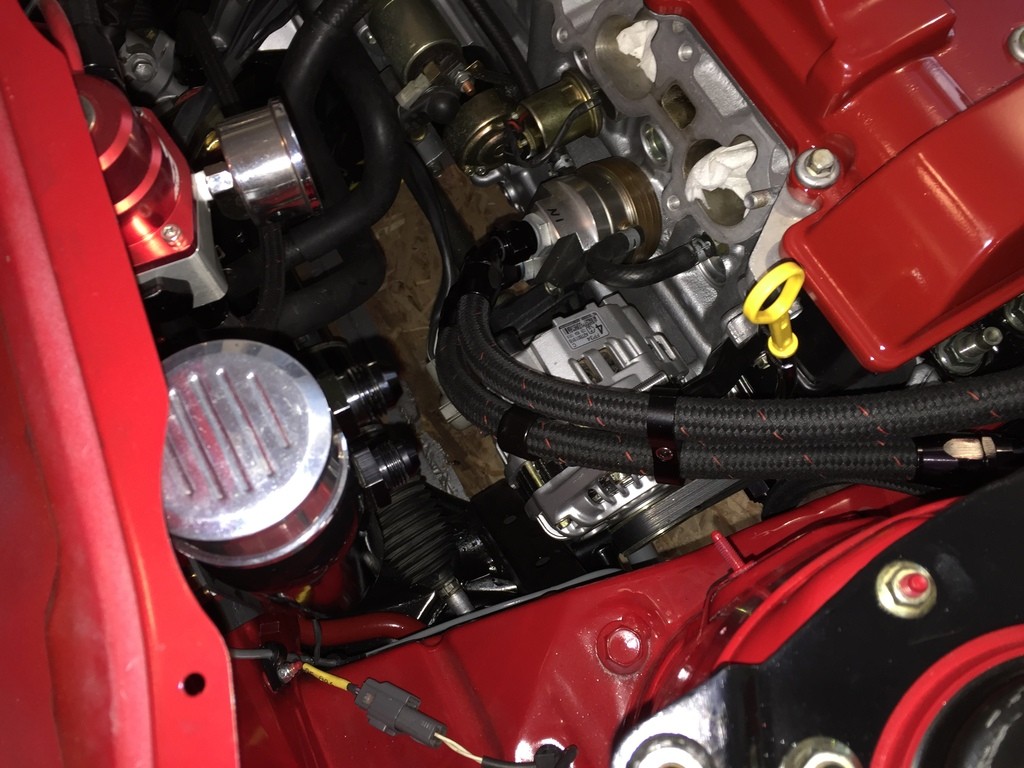
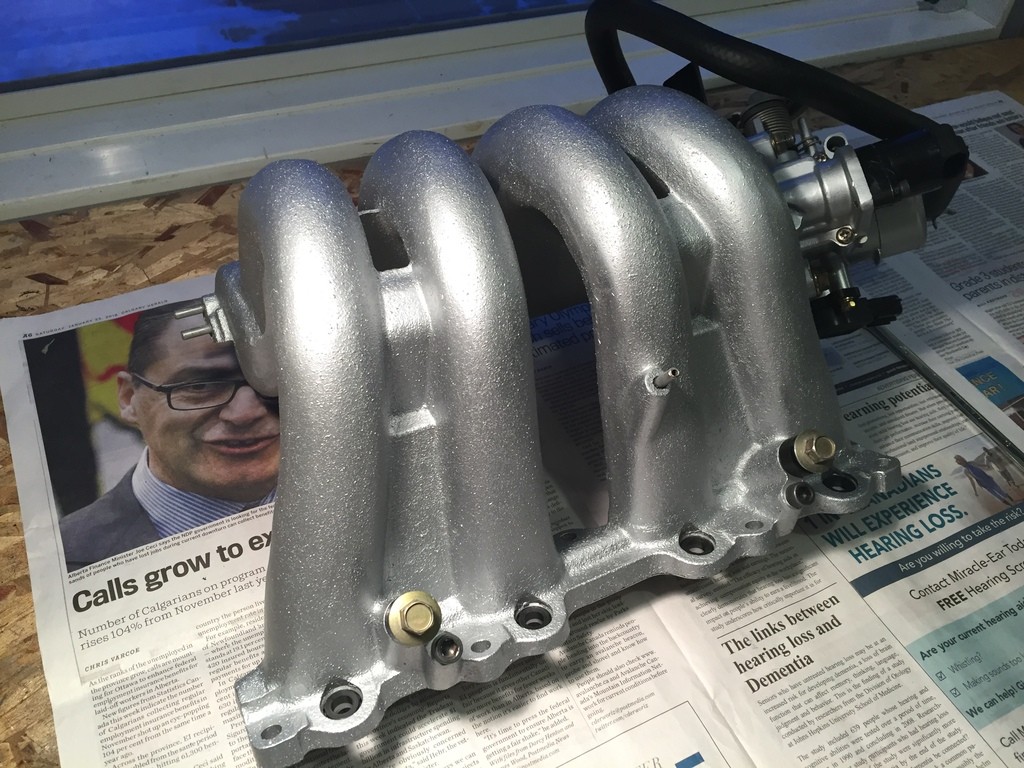
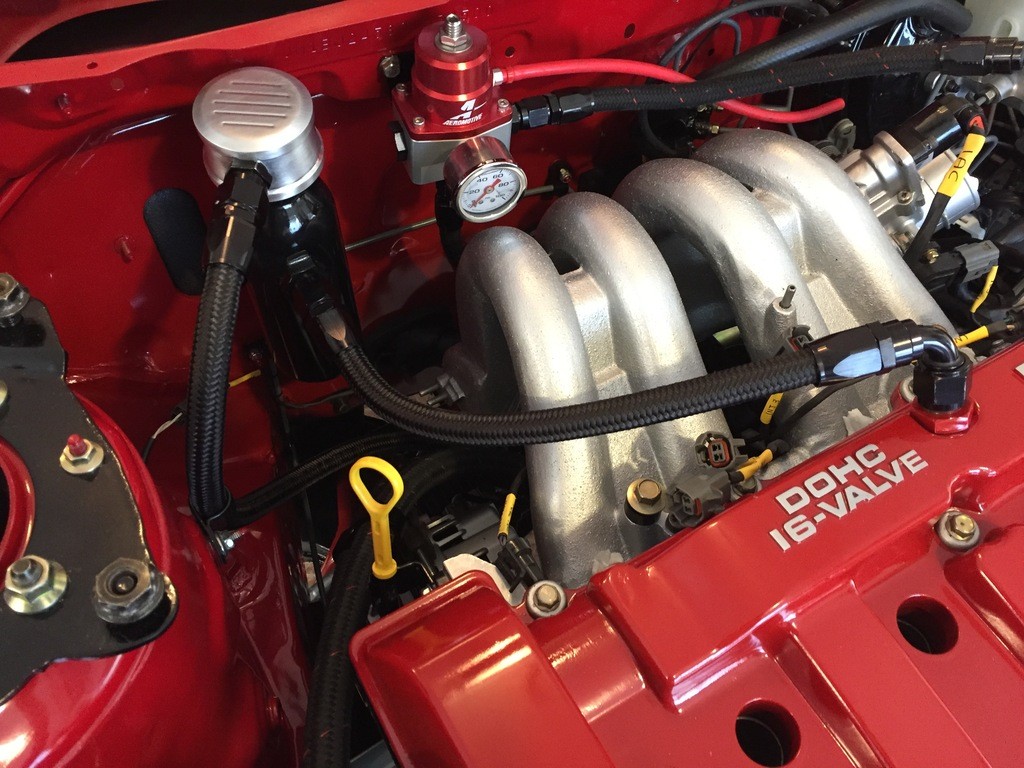
With the manifold fitted, I could attach the fittings for the boost gauge, and bracket some of the wires so they look neat.
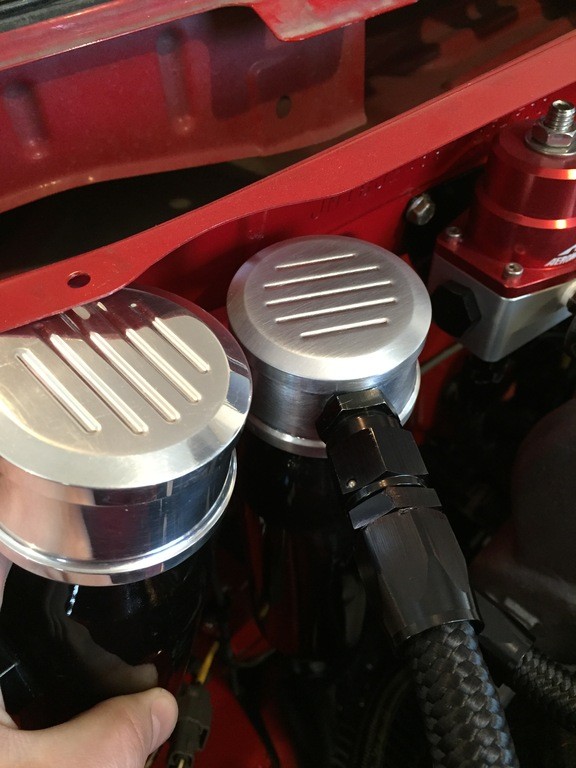
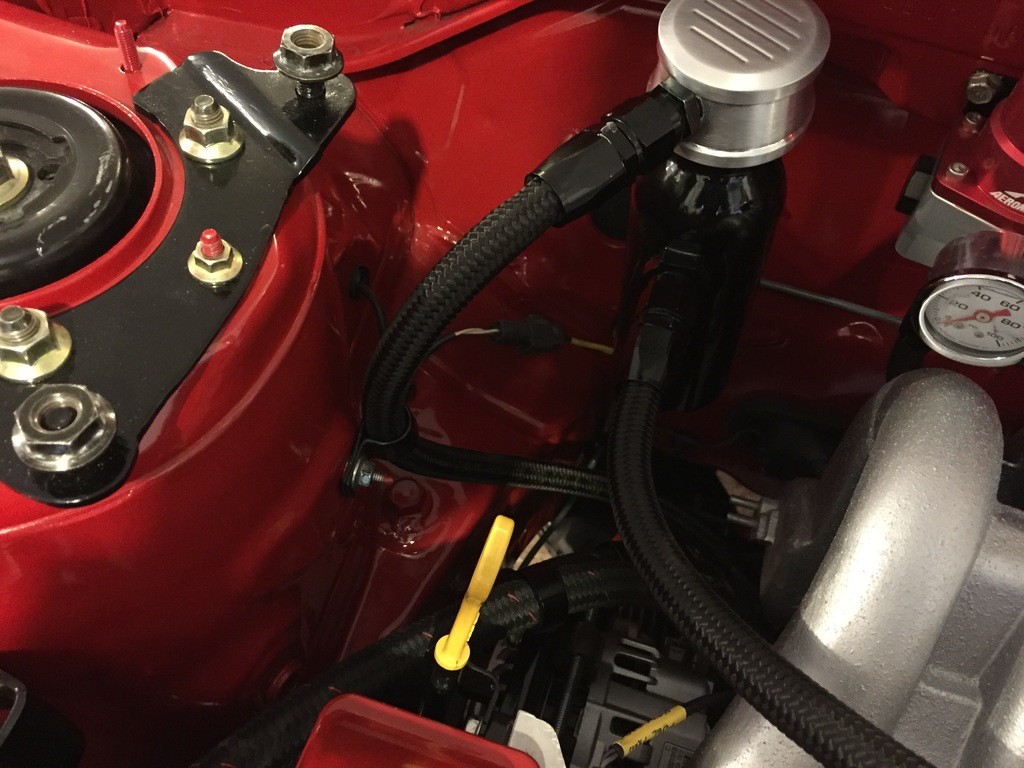
The polished caps on the catch cans didn't really fit the look of the engine bay anymore, so I decided to brush them. Before (left) and after. With the catch can connected to the AN fitting on the manifold, I could get the hoses looking nice.
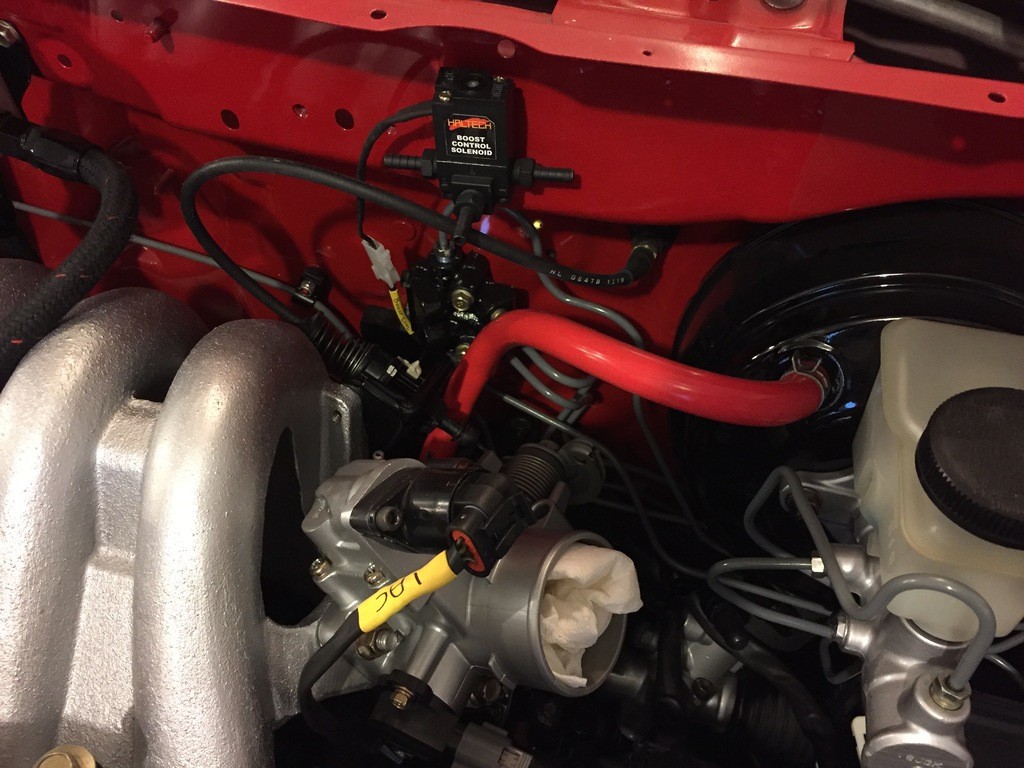
I turned my attention to the wastegate. Cleaned, polished, and with the 15psi spring. I use the Haltech boost controller for anything higher.
...
Registered User
More misc. wire brackets used to keep everything tidy, and the intake side (non check valve) catch can mounted.
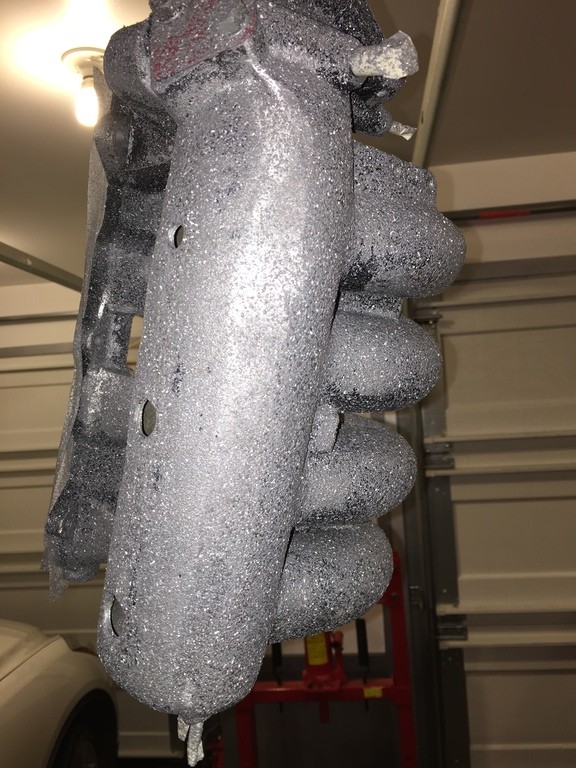
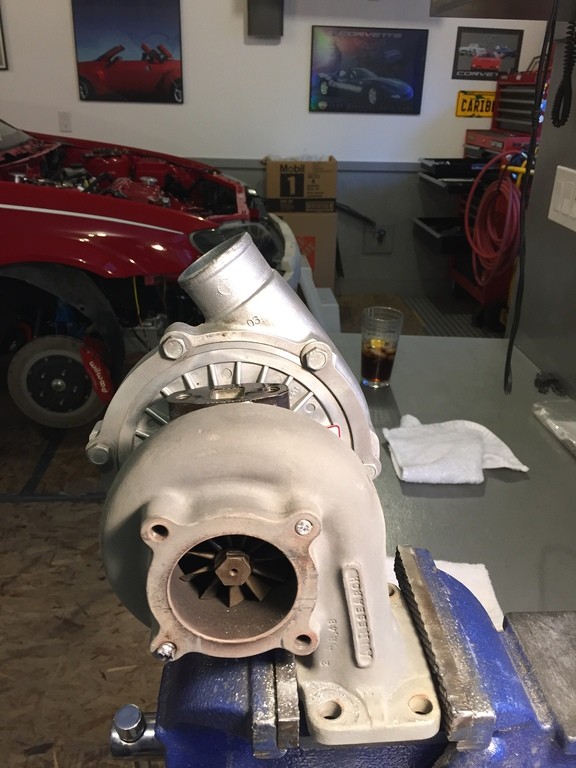
Sumbitch... Exhaust studs always snap off on me. Next project is to remove these bastards, and rebuild the turbo. Nothing especially wrong with the turbo, but with the amount of power I'm demanding from this thing, a rebuild wouldn't hurt. It's been sitting in the basement for close to three years.
Stay tuned for more!
...
Beyond's Biggest E-Mack
Originally posted by Redlyne_mr2
Wow I love this, so many protégés are going to the junk yard, good on you for keeping it going.
My Protégé Sedan just went to the wreckers haha...
Good on ya for this build!!....
...@therealarifjina...
Registered User
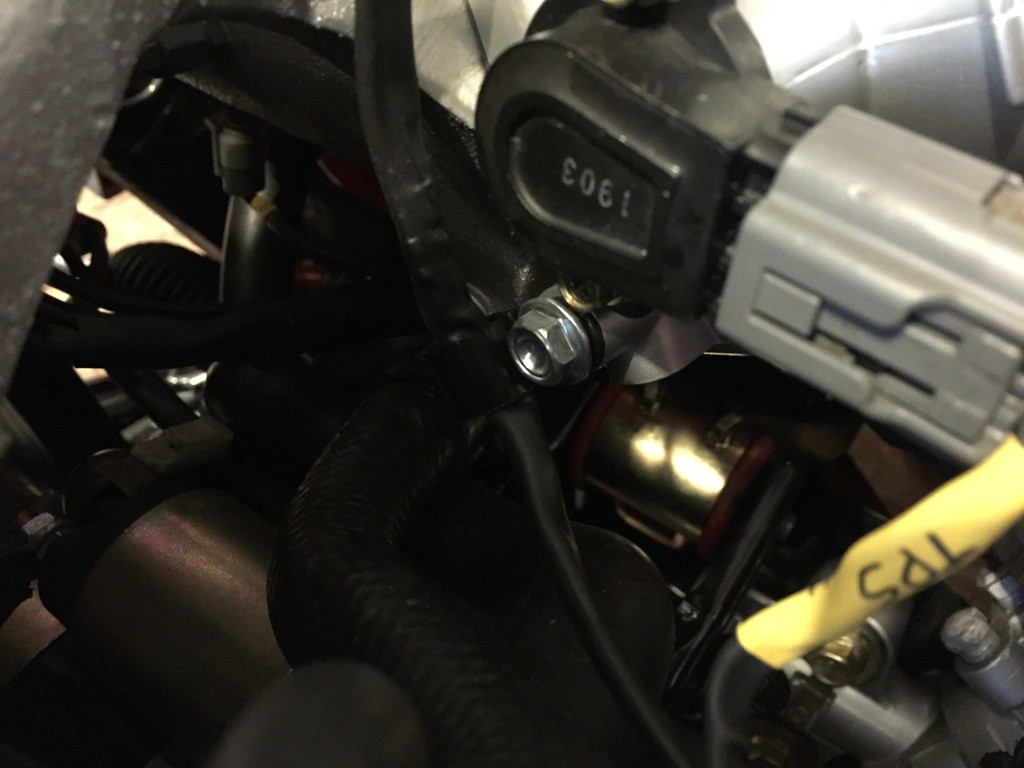
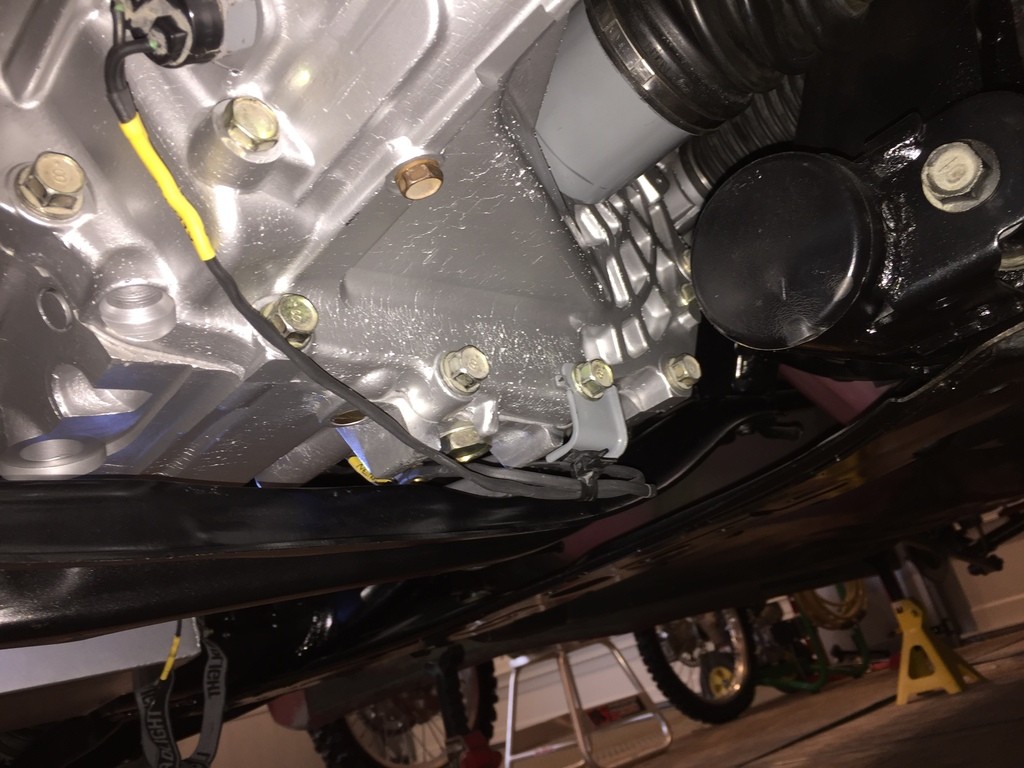
Went a little crazy with the P clamps. In my opinion though, it's better to have wires and shit routed nicely away from everything than just being everywhere.
Even though you'll never see anything underneath, you don't want wires all over the place. Routed everything neatly and used either P clamps or repurposed Mazda hardware to keep everything in place.
Another P clamp for the cam/crank/egt wires keeps everything in place. Be sure to leave enough slack to allow the engine to move slightly.
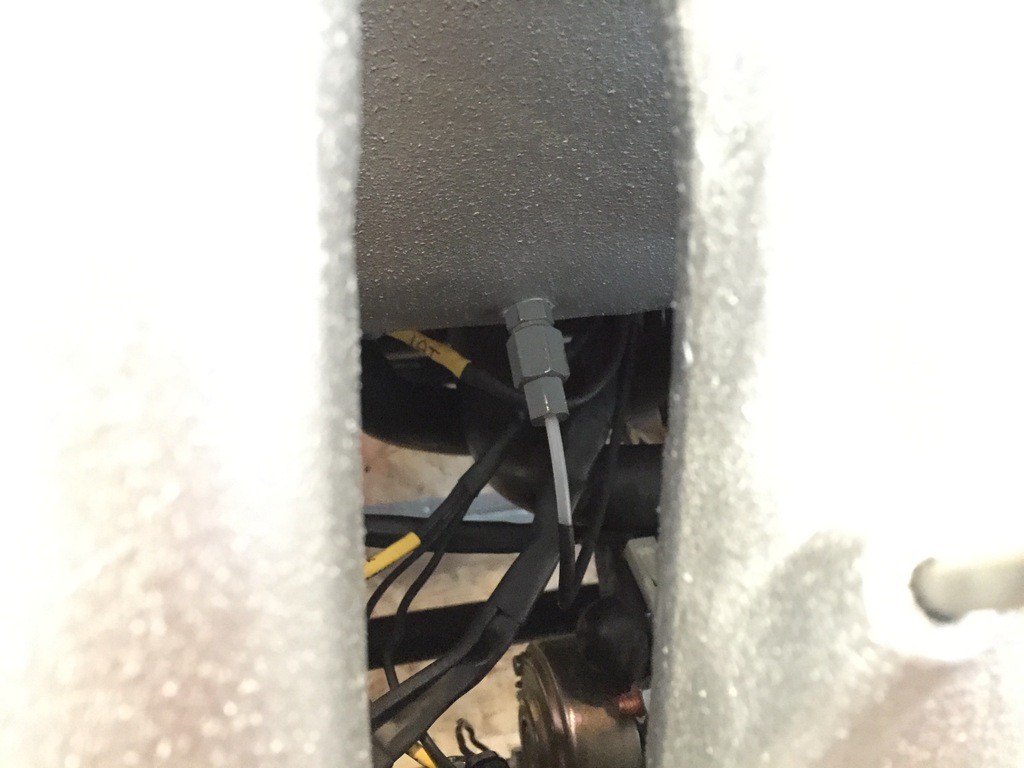
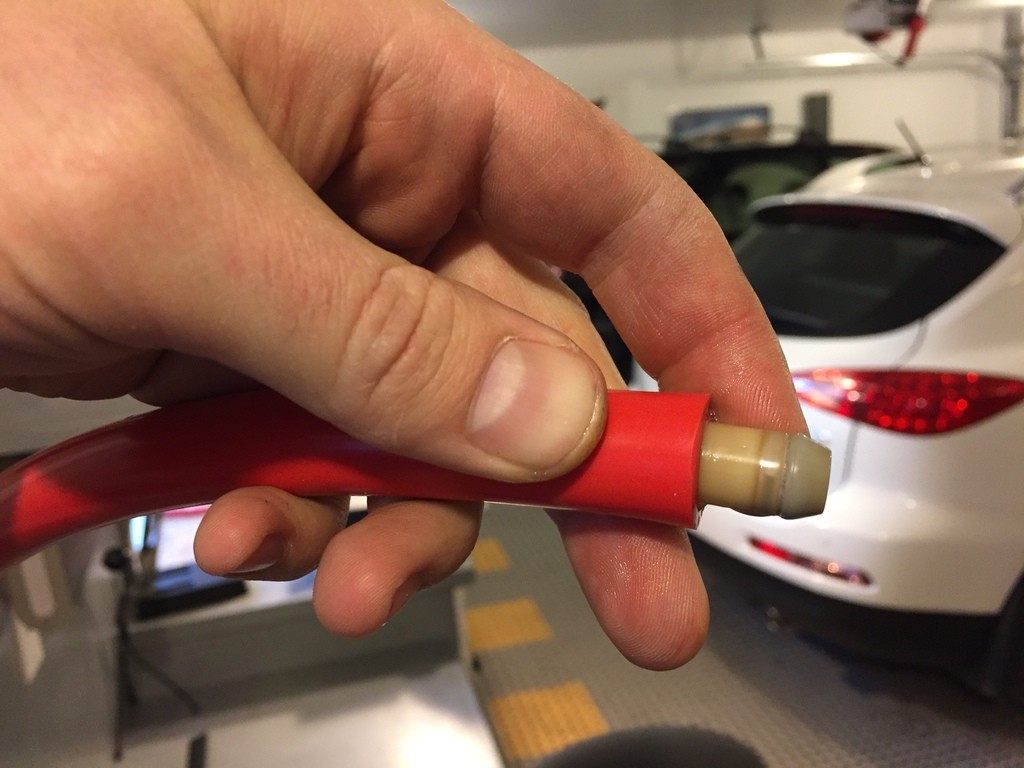
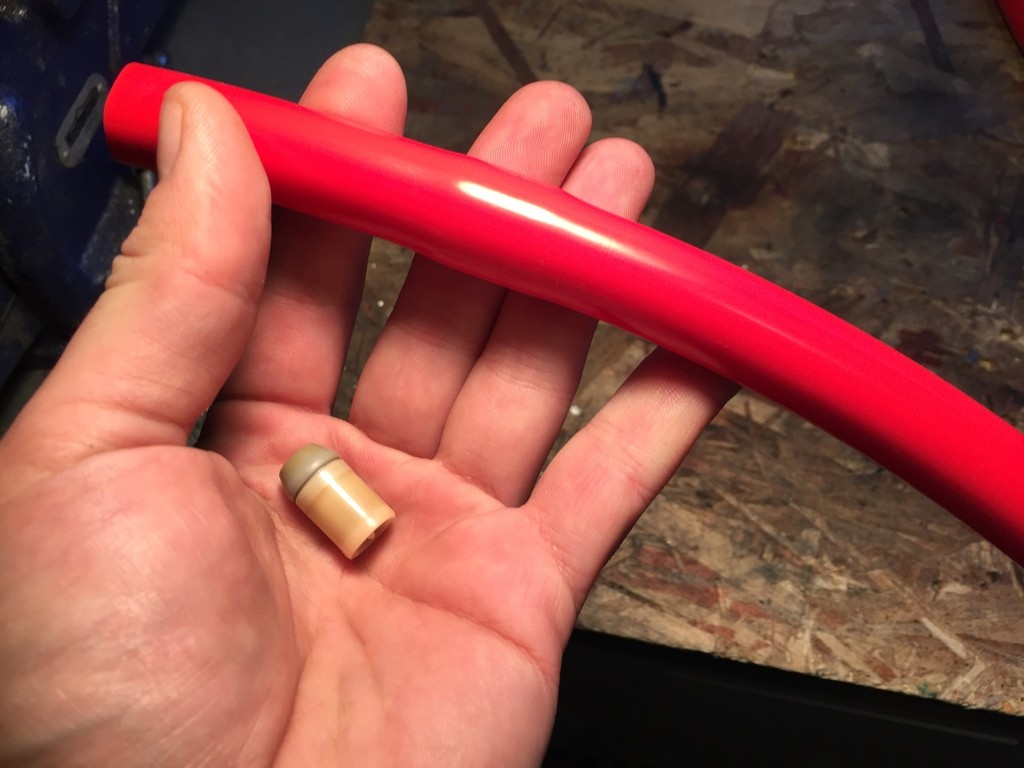
Decided to replace the brake booster hose with a silicone one which will last much longer. There is a check valve inside the stock hose which MUST be swapped over to the new hose to prevent the booster from seeing boost. This is important! I grabbed a couple spares at the junkyard and was able to slide it inside the silicone hose using some dish soap. Ensure you have the valve facing the correct direction.
...
Registered User
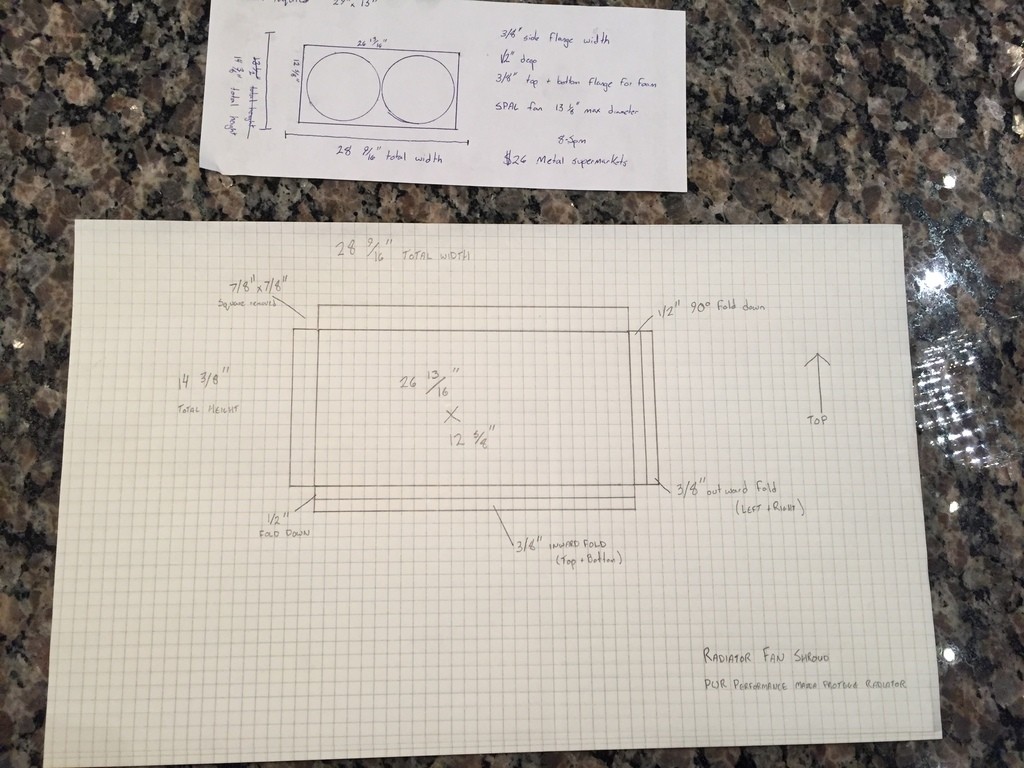
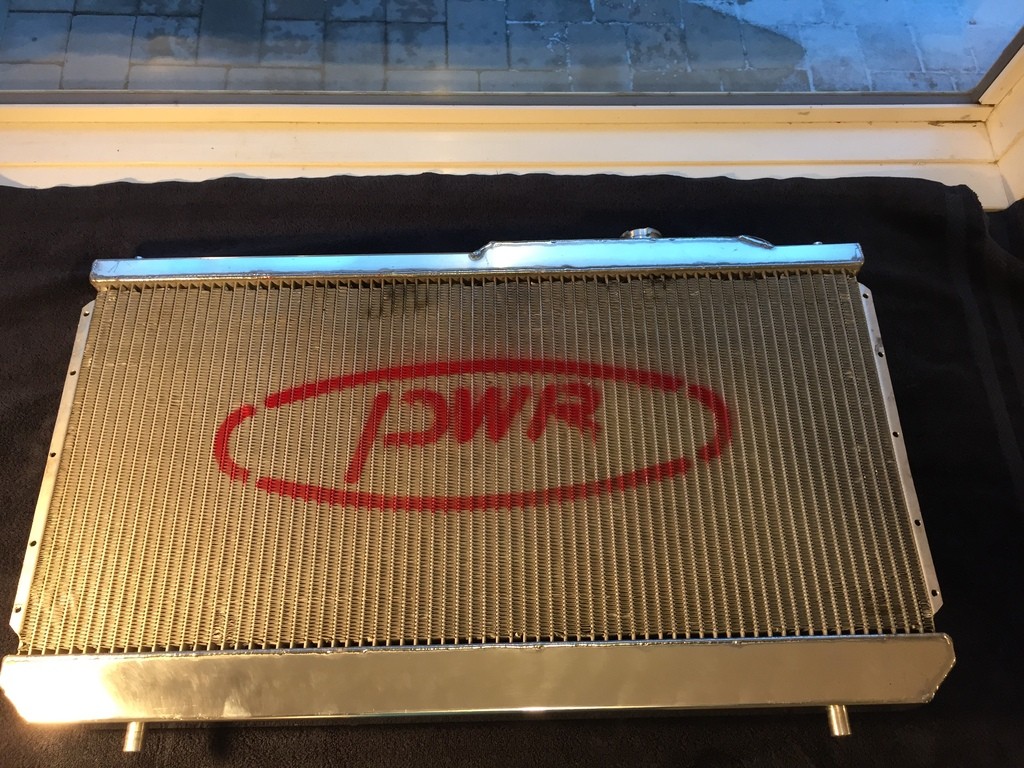
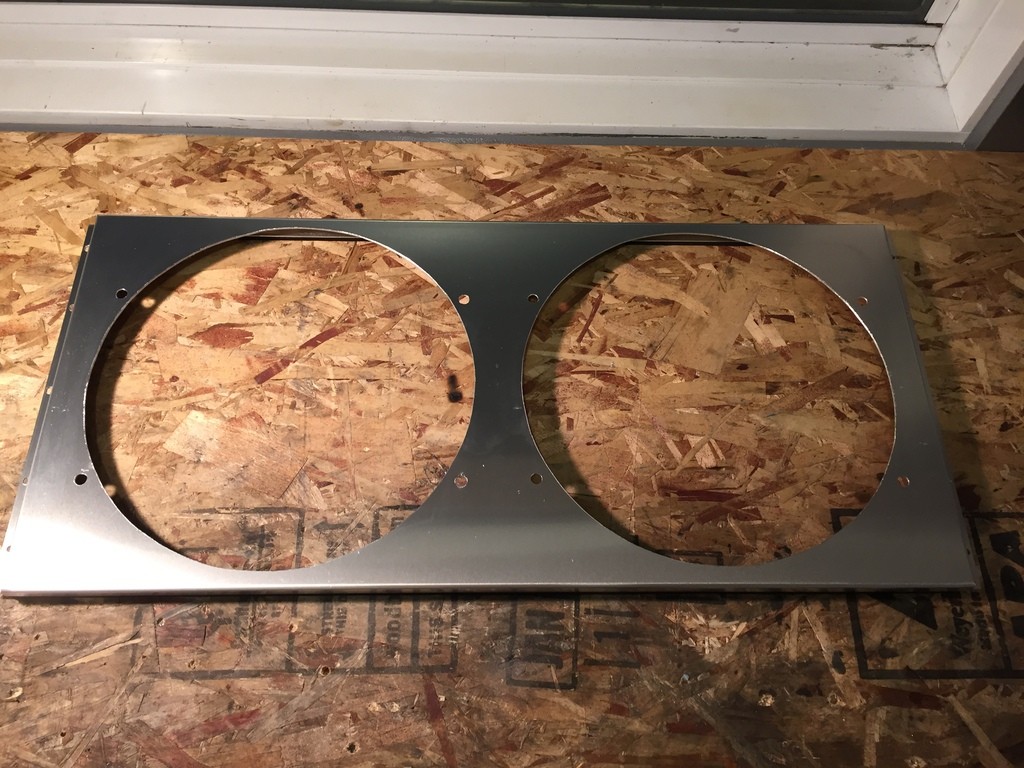
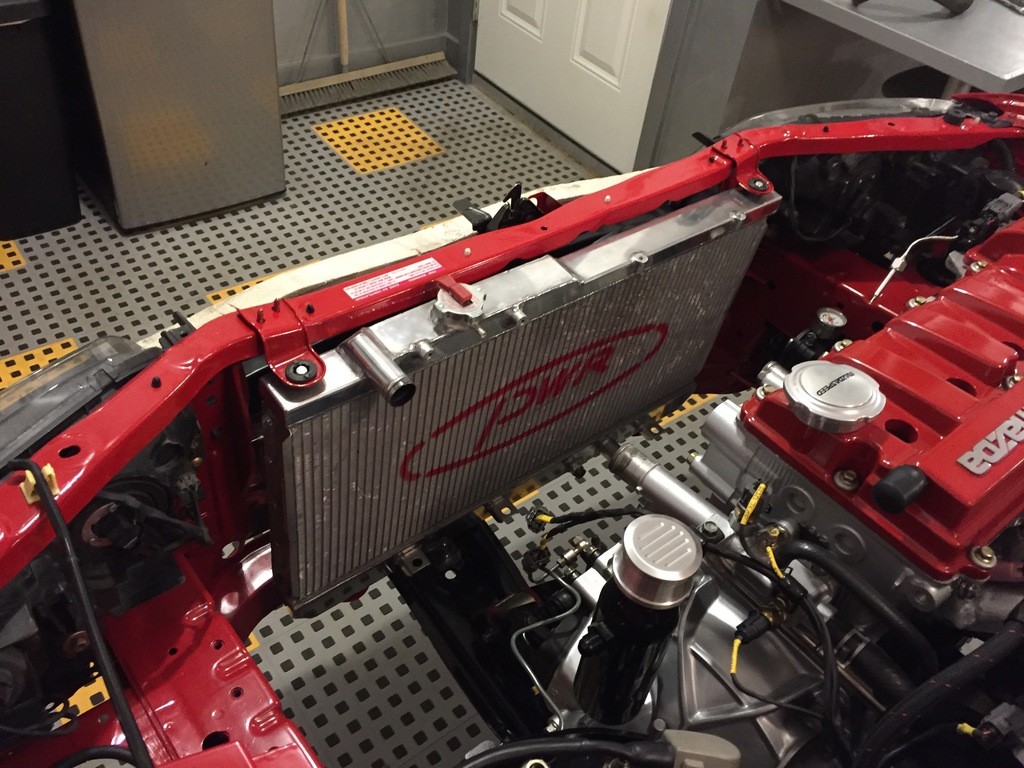
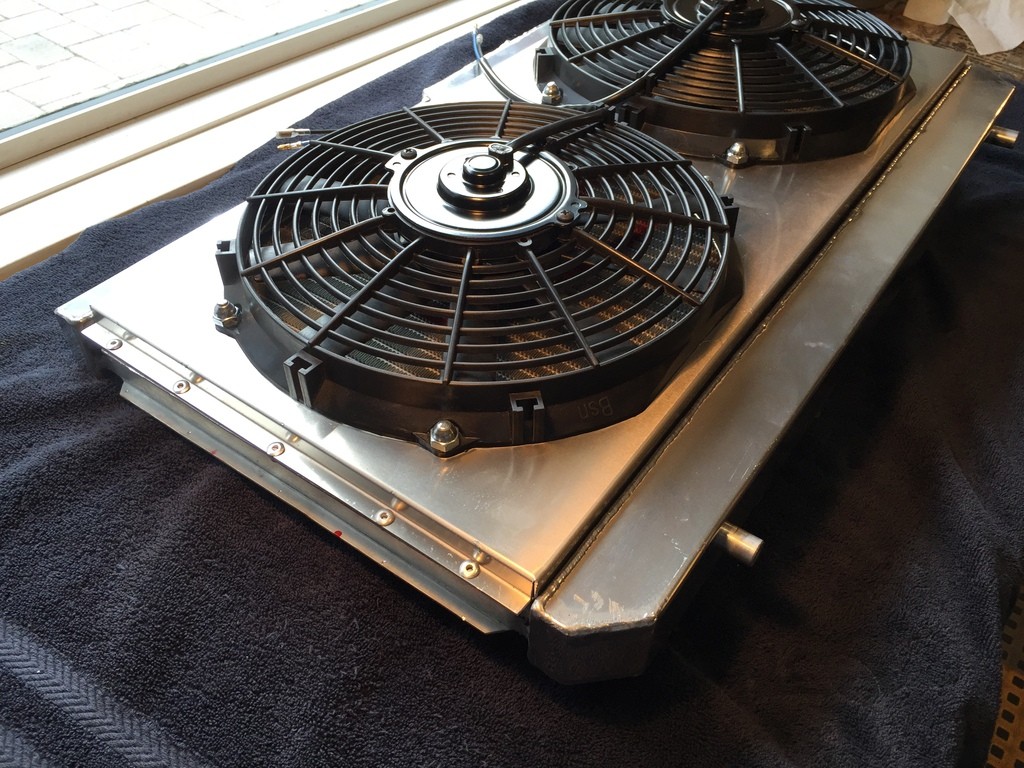
I needed to address the cooling setup on this car. Nothing wrong with what I had before, I just didn't particularly like it. With the A/C condenser and power steering cooler now gone, I had tons of room in front of the radiator to work with now. I decided to build a fan shroud and mount two pusher fans instead of the pullers I had before. This serves two purposes; it frees up room behind the rad for a bigger turbo, and by building a shroud, makes the cooling system more efficient. Some argue that when fans are mounted on the front of a radiator, enclosing them in a shroud will disrupt some of the natural airflow at speed. Because I've got the fans controlled by the Haltech, I can have them come on whenever I see fit, and I maximized the size of them, so there really isn't much radiator that's covered by the shroud.
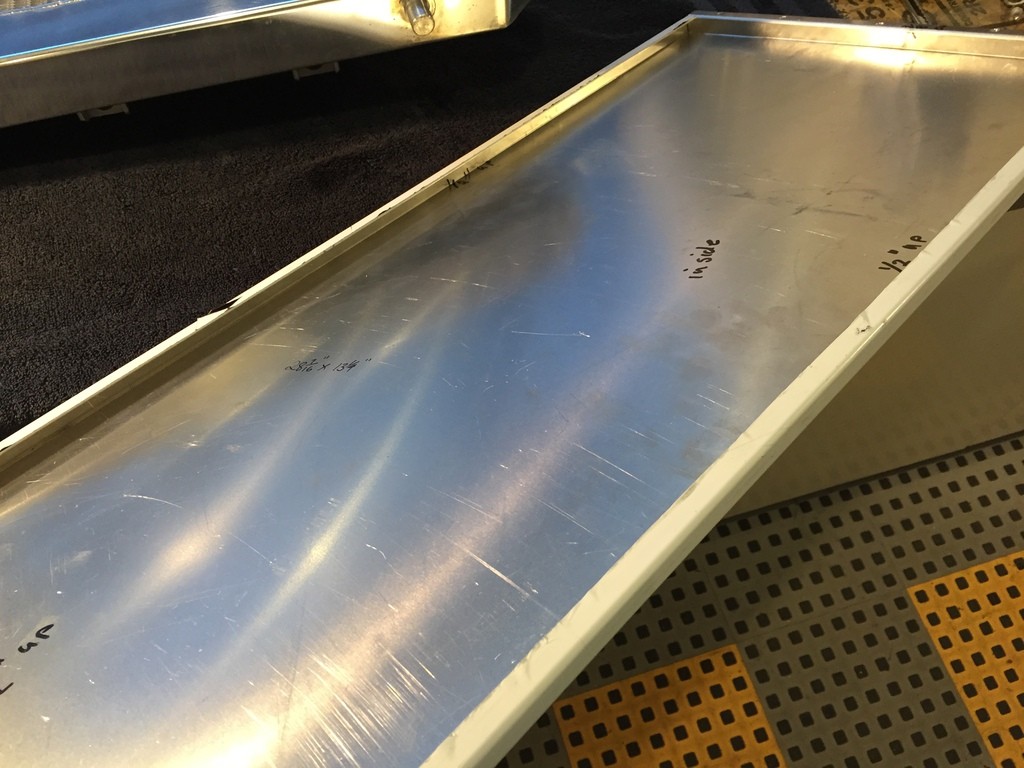
To start, I took some measurements of the PWR triple-pass radiator, and drew up a blueprint of what I needed. With material ordered, it was bent into shape to make the shroud.
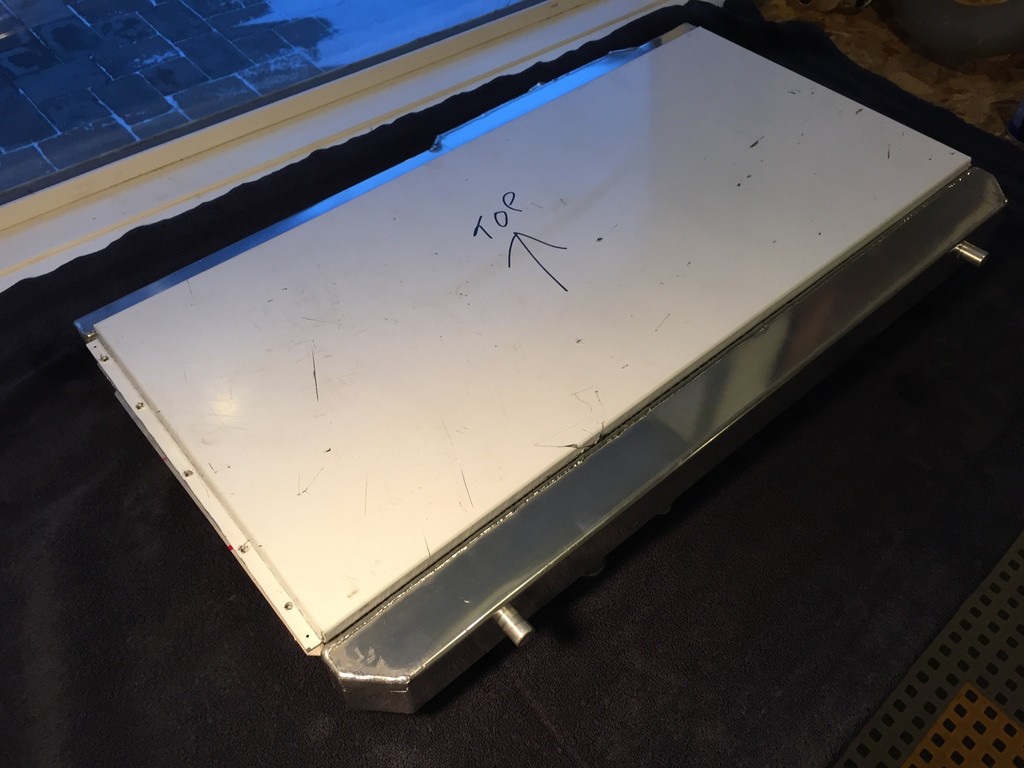
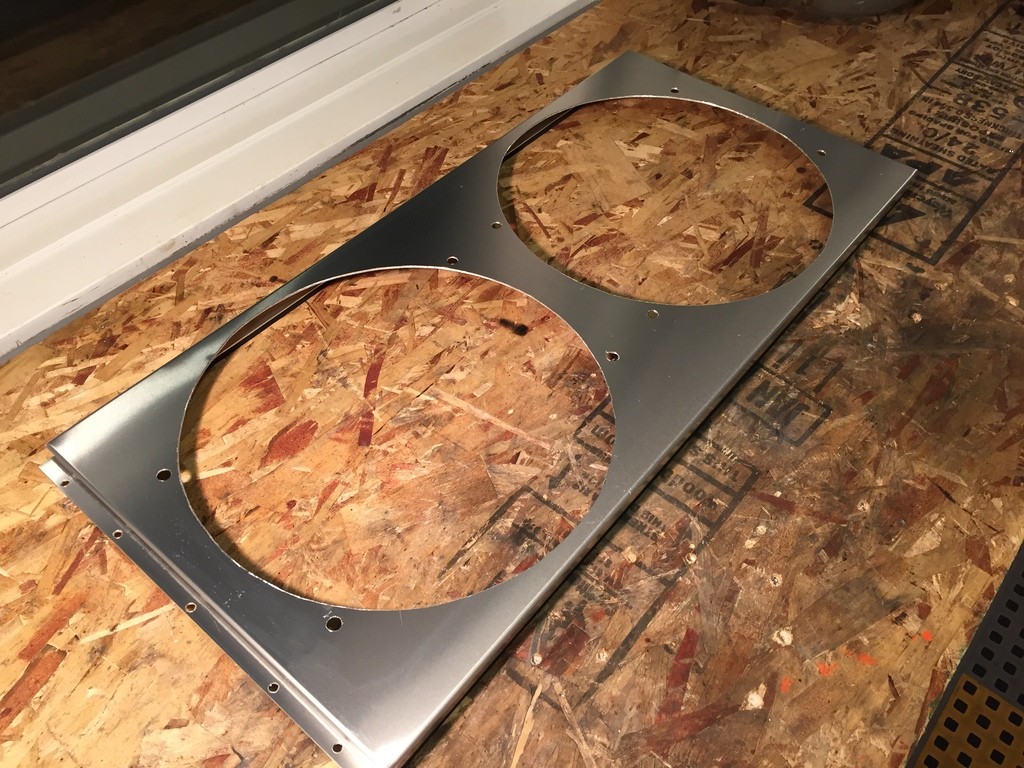
Debated on welding the shroud to the rad permanently, but I want to be able to remove it for cleaning, etc. So, using weatherstrip around the edges to protect the rad as well as provide an airtight seal, I drilled mounting holes for rivets.
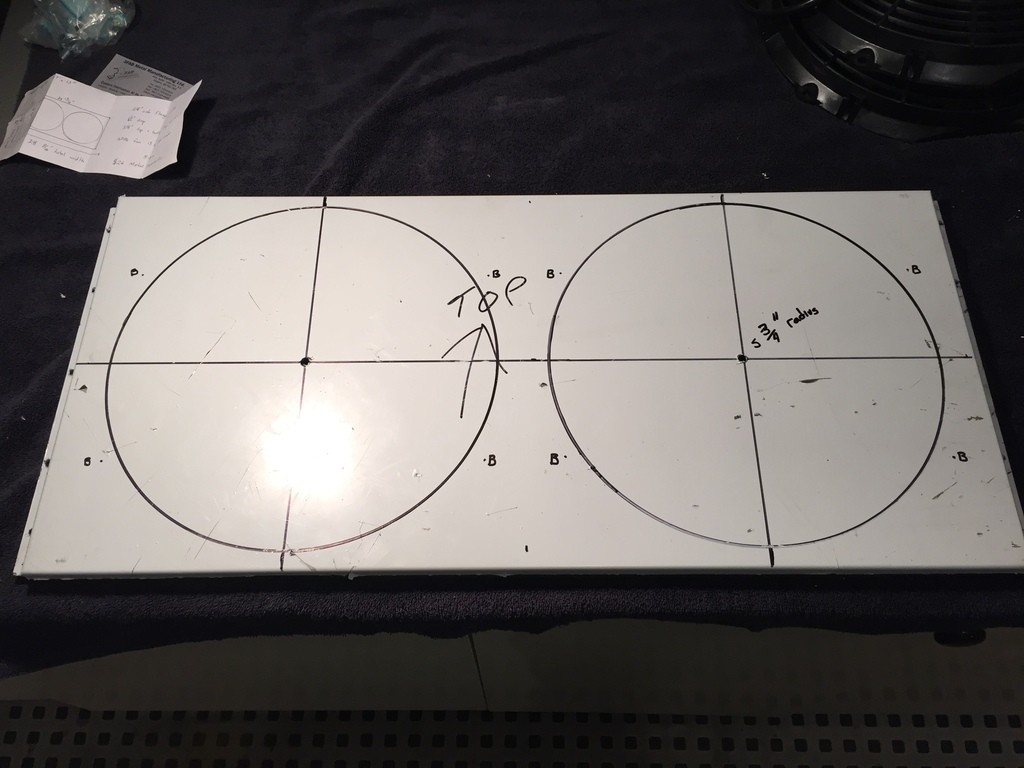
Fan holes measured and cut out
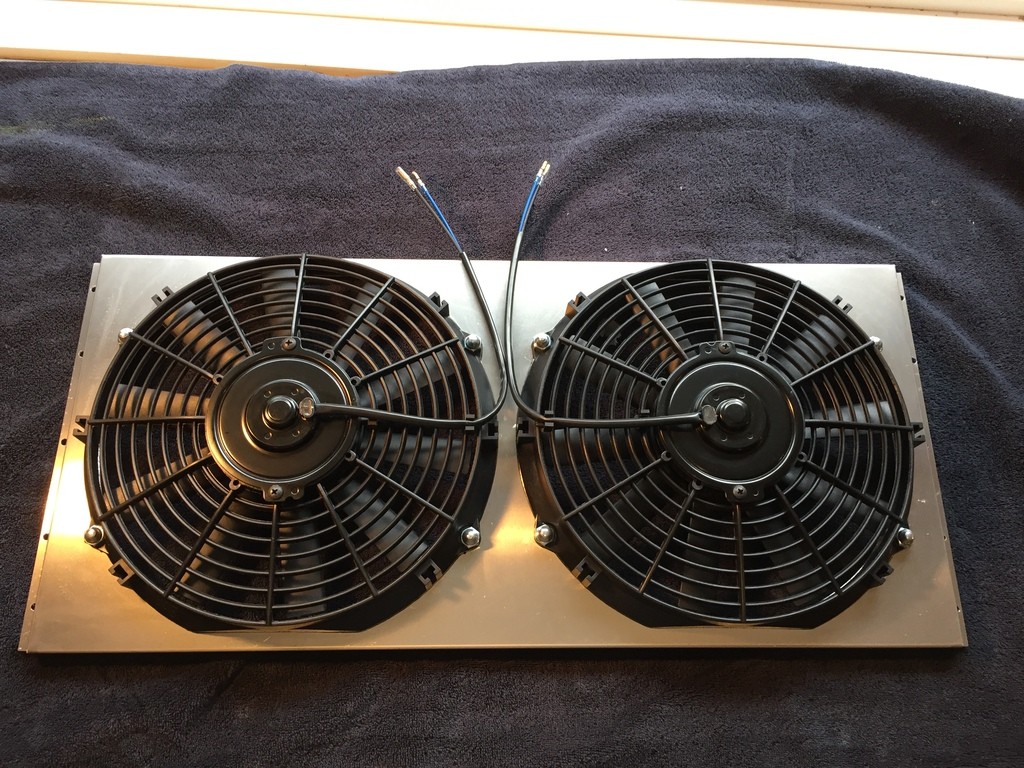
Decided to use some chrome acorn nuts (because they look cool) to mount the fans, and riveted the finished shroud to the rad.
...
Registered User
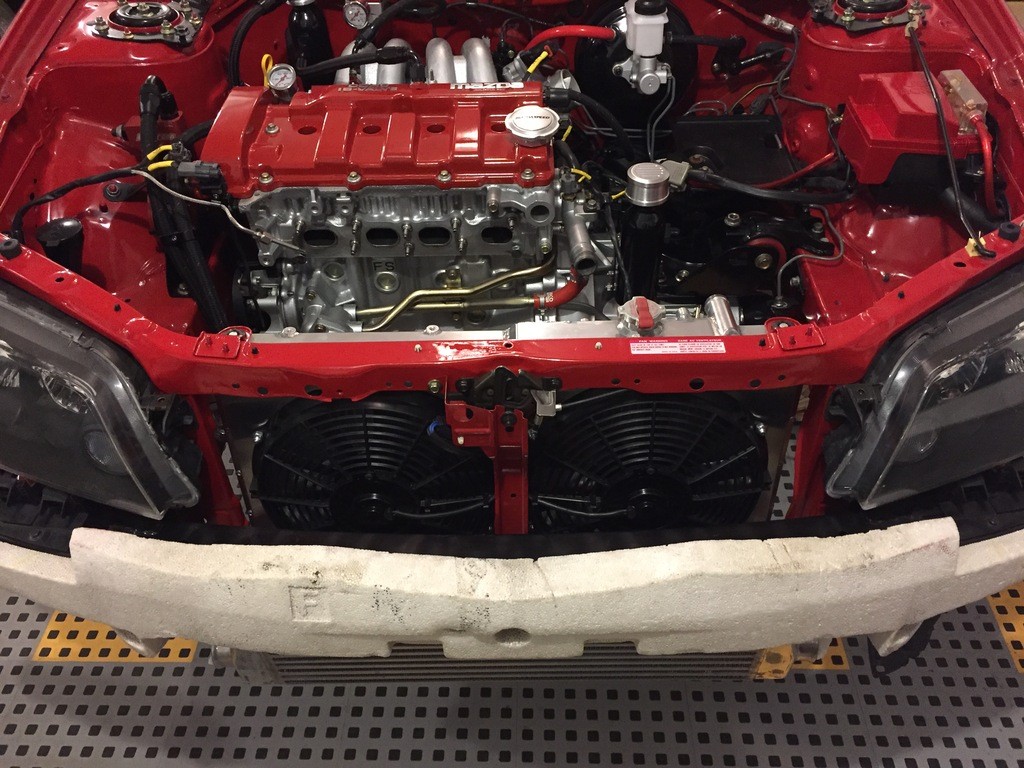
Built up a 4 pin weatherpak connector and mounted the completed rad into the vehicle. Very pleased with how it turned out.
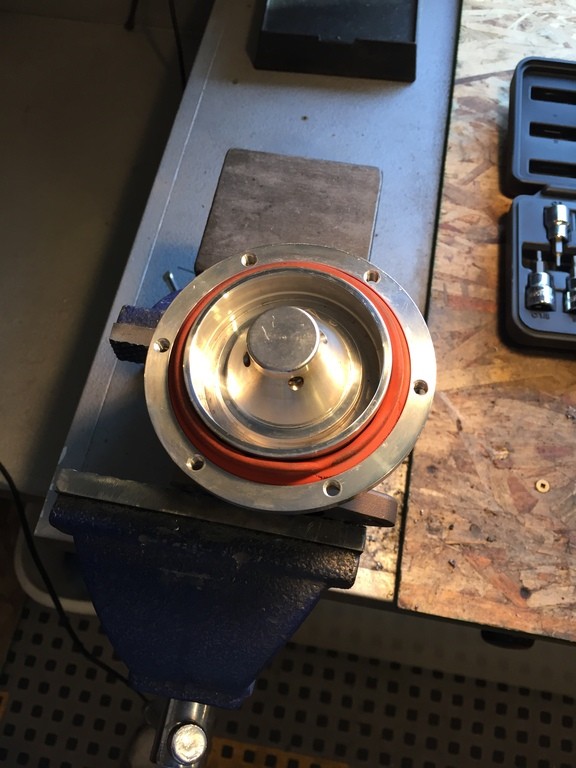
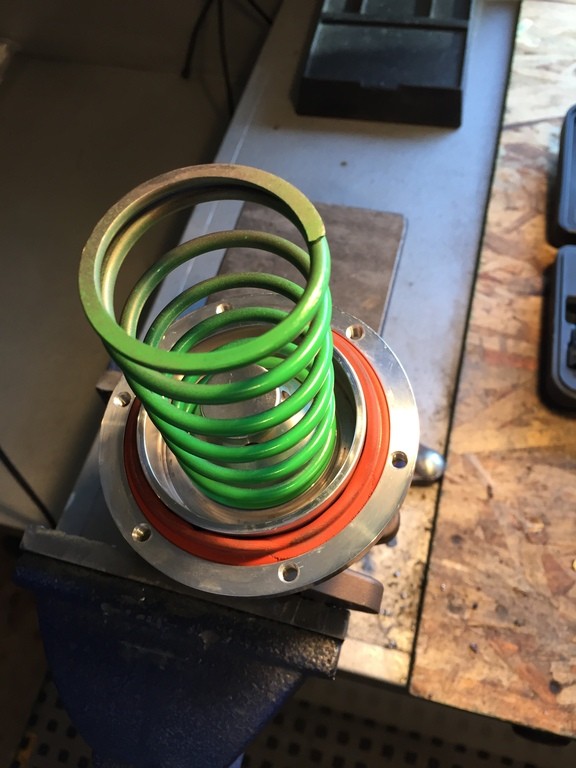
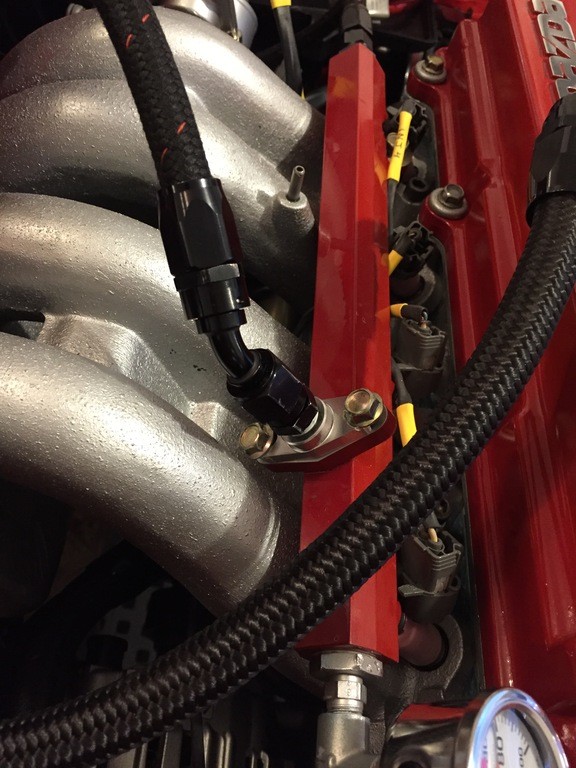
Turbosmart billet fuel rail adapter.
...
 Posting Permissions


 Quote
Quote