Quantcast
2005 Dodge SRT-4 ACR - Page 2 - Beyond.ca - Car Forums
Page 2 of 2 FirstFirst 1 2
Results 21 to 27 of 27

Thread: 2005 Dodge SRT-4 ACR

  1. #21
    Join Date
    May 2003
    Location
    Calgary, AB
    Posts
    2,340
    Rep Power
    23

    Default

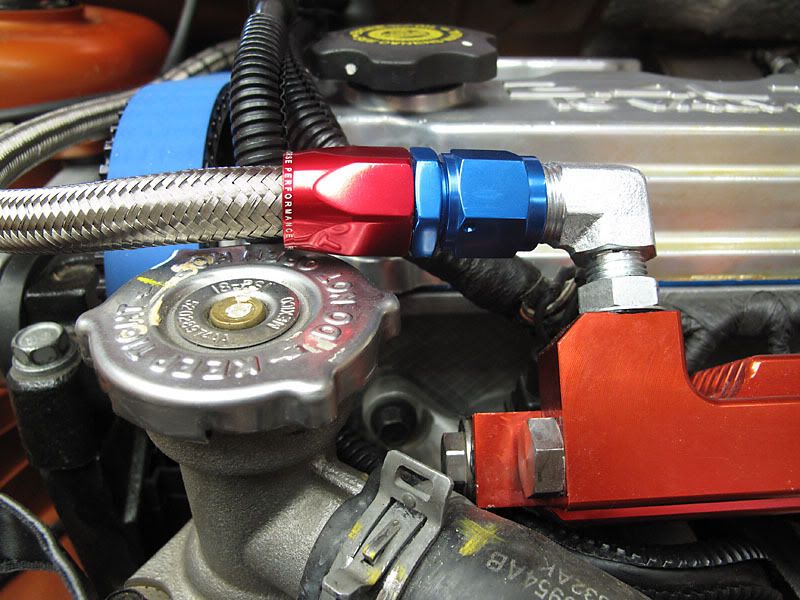
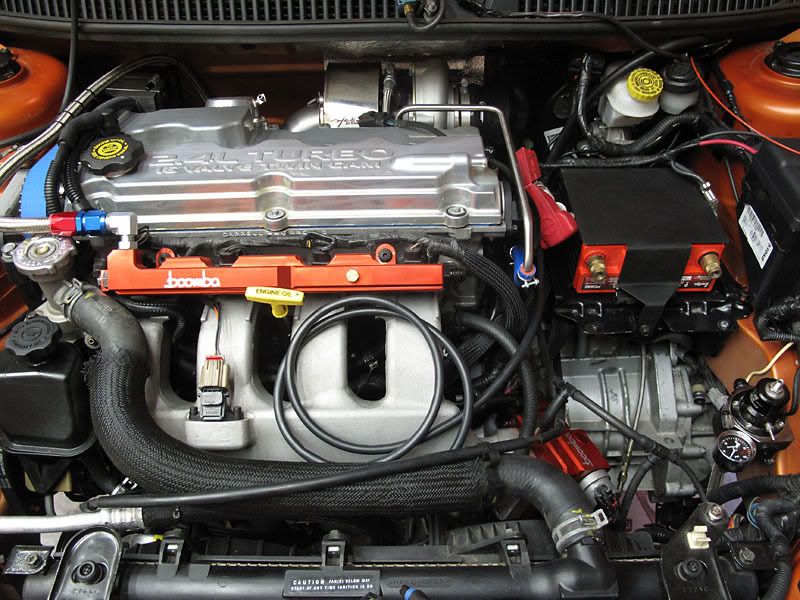
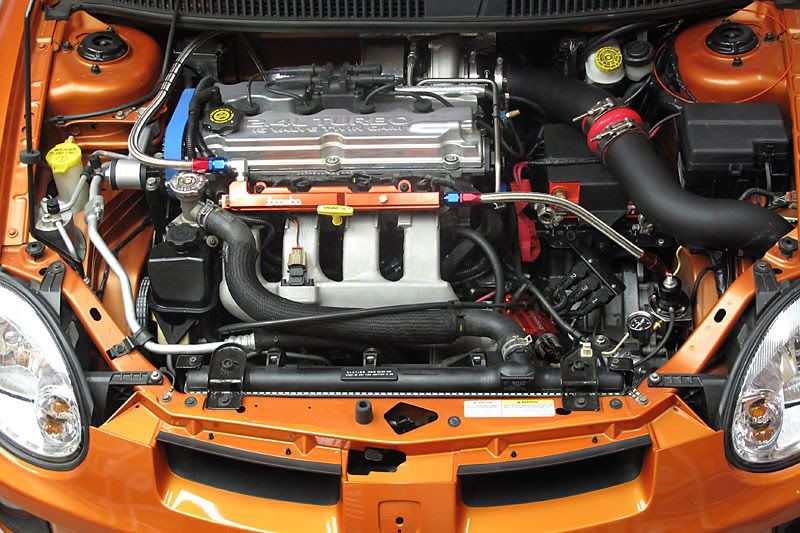
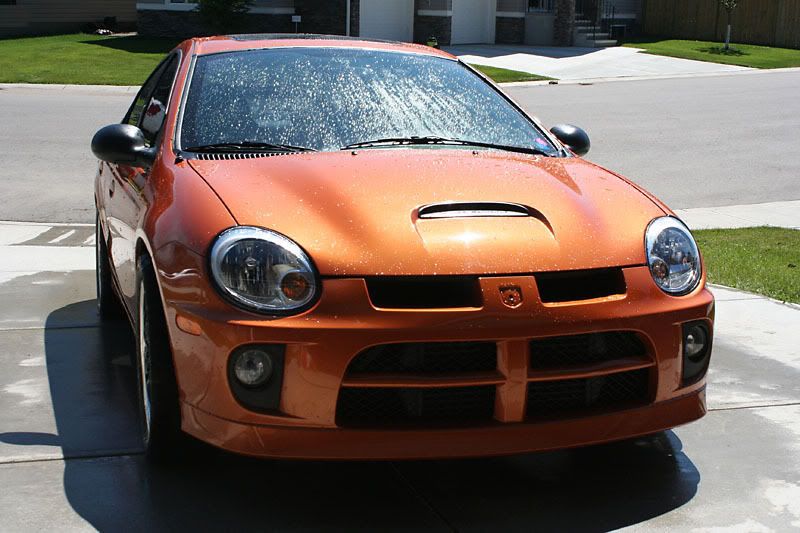
    I had wanted to add a couple of gauges to the ACR. The first was a fuel pressure gauge attached to the regulator so I can get a visual reading of the fuel pressure while it is idling and/or on the dyno at WOT. The other gauge I wanted to add was an in the cabin oil pressure gauge. I bought an AEM pressure gauge so it would match the existing AFR and Boost gauges already in the vehicle. I also bought a new gauge pillar that will hold 3 gauges.

    I decided to feed the wires through the grommet that is tucked up and away on the drivers side. The thing is absolutely stuffed with wires already! But I managed to get the huge pressure sensor plug through – it took a long time and was quite annoying. Unfortunately the annoyance didn’t stop there, as I had to do quite a bit of messing with wires, cutting tie wraps and pulling wires back and forth just to remove the existing gauges from their pods and then get all the gauges back in to the new pillar. Anyhow, it’s all worked out now, and the gauges are in place. I’ve got to get some double-sided tape to stick the new pillar over top of the OEM one to keep it in position. Then I’ll have to neat up all the wires and finish hooking up the oil pressure sensor wires for power, etc. Funny how this kind of shit eats up so much time.

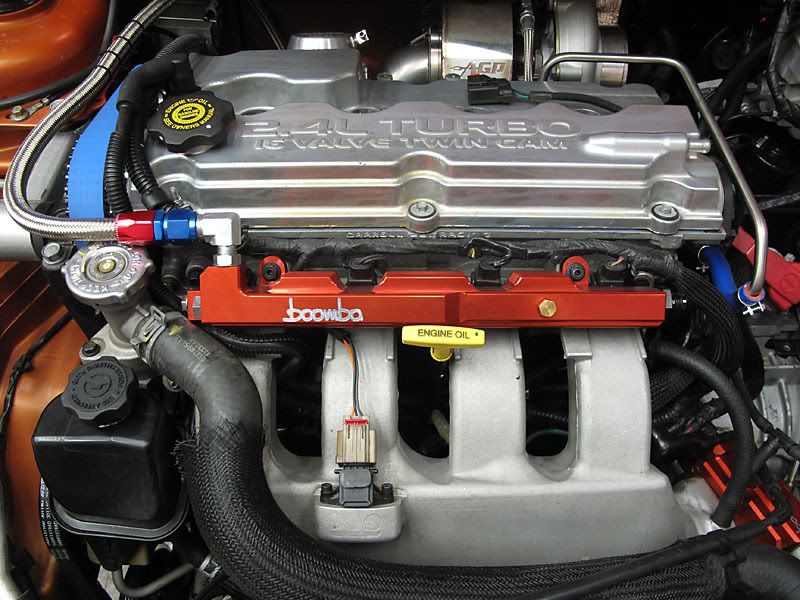
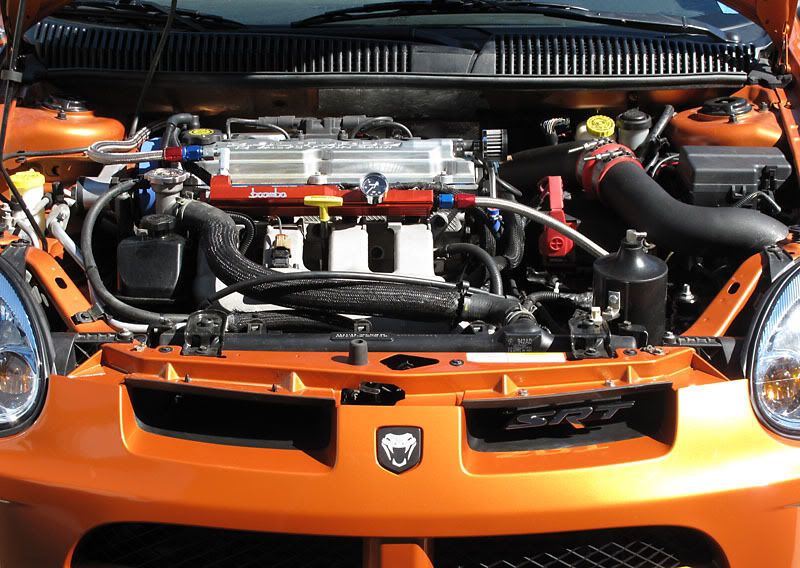
    On the mechanical end of things, I removed the fuel rail briefly because the upper coolant pipe clamp would not go on with the fuel rail attached. Additionally, I did not put in the oil dipstick previously, and found that difficult to do with the fuel rail fastened. I also hadn’t routed the hosing for the PCV valve nor did I put the PCV valve in to the valve cover. Decided that I should maybe consider putting the main crank pulley on. Alas, the mysterious bolt bucket has failed me. I’ve got no main crank bolt. Fortunately I’ve got a spare SRT-4 engine sitting in my garage. So I stole the crank pulley bolt from that engine. Then I fastened the main crank pulley. I slipped the alternator belt over the pulley (Alternator is not yet installed) and then I put on the accessory drive belt. At this point, I noticed the auto-tensioner was never properly fastened, so I fixed that up and put the accessory drive belt on.

    I retrieved the hood from my garage rafters, bolted that on and hooked up the windshield washer fluid supply line.

    Hooked up the shifter cables and fastened the mounting bracket. Went inside the car and verified that the car goes in to all the gears. Took note that the throw on the shifter seems ridiculously short. I have no idea what gear shifter I’m going to find in there when I remove it. But unless for some reason I really really really like this thing after I have this heap running, I will probably remove it in favor of a Mopar STS. That is what I am used to in my other SRT-4, and I really like it a lot. We’ll see what happens.

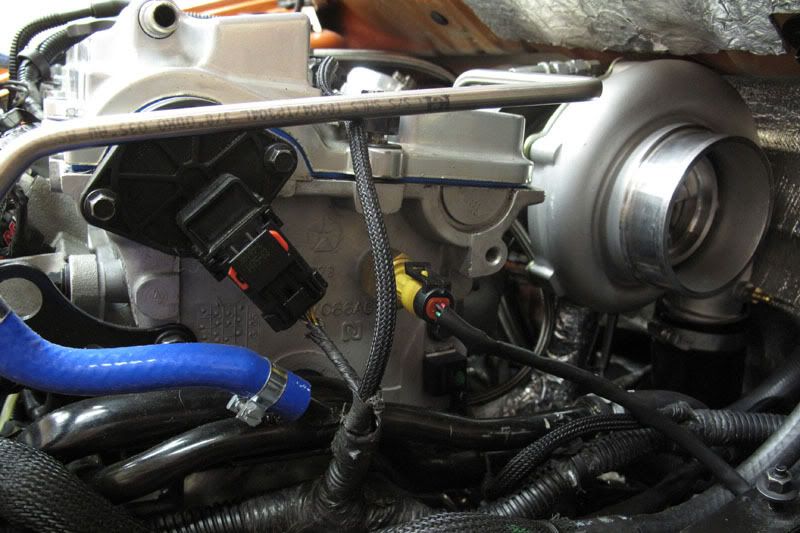
    I installed the oil pressure sender unit in to the head. I used aviation liquid sealant w/teflon on the threads. Tightened that up, and routed the wire connector to it and installed it. Also hooked up the camshaft position sensor, speed sensor, and the other sensor at the rear of the block.


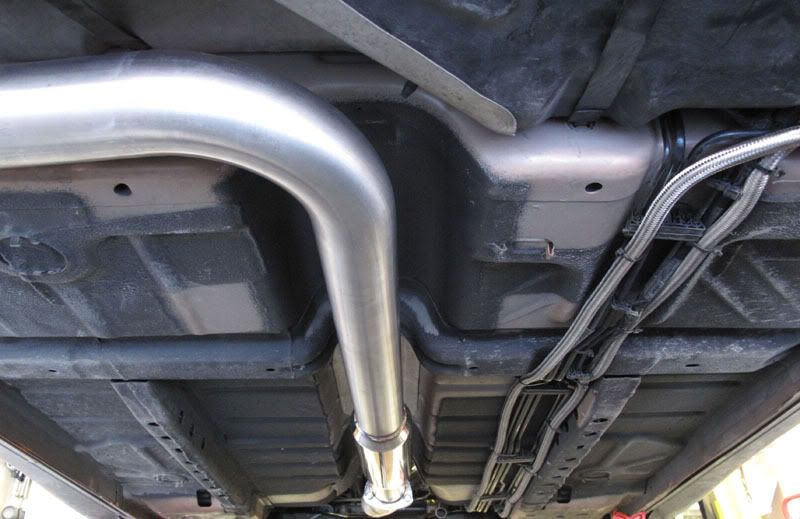
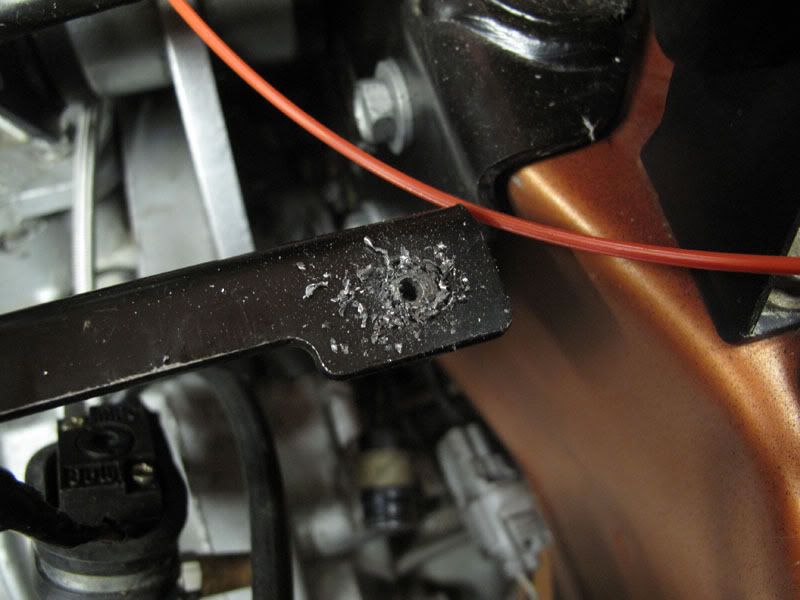
    Next I went under the car to route the fuel feed line. I bought the fittings and hose and just made the line myself. [Let’s pray it doesn’t leak, right!] So, plenty of black zip ties later, the fuel feed line has been secured.


  2. #22
    Join Date
    May 2003
    Location
    Calgary, AB
    Posts
    2,340
    Rep Power
    23

    Default

    This picture just shows the routing of the fuel feed and return line. Also shows the exhaust that will be going on.


    I had to remove the fitting that came with the Boomba rail, as I could not find a connector like the OEM one to use with my custom fuel feed hose. I managed to find a fitting that would go in to the rail, but it is quite short. Once the hose is fastened, the coolant cap can not be removed. Kind of sucks, and I might have to figure something else out here before I actually pressure up the fuel system.


    (NEXT DAY)

    Installed the alternator today, got that all sorted out, put the belt on and set the tension (approximately). So if it squeaks I’ll tighten it up a bit more. I removed the down pipe to get the alternator in…

    While I am at this point, I decide to open up the “Fuel Pump Re-Wire Kit” I ordered a while ago. I ordered this because I read somewhere that it could be used to power the second fuel pump.

    I have followed the instructions included in the kit up to the point where it asks you to tie in to the OEM connector on the canister. I’m going to have to search for that thread on srtforums about this…as I’m sure I read one a while back, but it seemed incomplete with respect to wiring. In any case, if you’re familiar with how this should be done, please reply or post a URL to the info if it is already online. But basically I’ve got a connection directly to the alternator and that wire contains a space for an inline fuse, and then the wire continues back to the fuel canister where I’ve simply cut it until I can determine precisely what I am to do here…

    I’ve hooked up the ground connection to the back of the head over on the passenger side. Couldn’t locate the proper bolt, and just by chance this bolt was on my spare block as it was gently threaded back in. So I stole it! Damn thankful I’ve got that block sitting here to occasionally pillage.

    I’ve noticed that the transmission is leaking. It is leaking at the drain plug itself. Haven’t checked yet if it is just loose, so I’m going to do that, and I am going to drain the transmission fully at this point. If there is fluid in there, I want to get it all out and put in brand new fluid. I drained the fluid, and it turns out that the plug was just loose. There are no problems here. I’ll fill all fluids later.

    Last thing I decided to do today was get some miscellaneous fasteners that I was missing. I fixed all the fins on the oil cooler (lots of bent ones) and then fastened it. I put the charge pipe on, decided roughly where I was going to chop it off. Took my reciprocating saw with a bimetal blade and chopped it. Roughly it fits pretty good. I will take this to a muffler shop tomorrow to get it flared.


    Yeah, so this is where we’re at now. Lots still to do, but not really. Just got to find the time to deal with it.


  3. #23
    Join Date
    May 2003
    Location
    Calgary, AB
    Posts
    2,340
    Rep Power
    23

    Default

    So not too much to report.

    I've dealt with a few of the problems, and I've got a few more.

    I had the charge pipe beaded at the location at which I cut it. So it should be good to go. I started messing around with the battery, and the CAI. Could not figure out how it worked (other than what seemed to be obvious, and turned out to be correct!) But basically until I realized that the CAI was an JMB Ultimate 3" CAI, I was unable to make much sense of it. [I'm used to the more traditional intakes that do not go across the battery location on an agle.]

    Once I had it figured out, I proceeded to locate and install the battery tray. The tray had a fastener broken off in it (Of course!) so I had to drill it and pull the broken piece out. I was then able to fasten the battery tray.


    After my google search to finally find the JMB intake pictures which gave me the info I needed to confirm how these pieces go together…I was led directly to another problem. The vehicle had a 4 to 3 adapter on the 3076R turbo that was on it, but I sold it with the turbo. The AGP Zeta 3.2 kit came with a 4 to 3 adapter that had a 90 in it. Thus I required a new 4 to 3 adapter. So another trip to the parts store.


    So below is how the car is sitting right now:


    My things to do list:
    Tighten the turbo compressor housing which I clocked as much as possible for the charge pipe.
    Install the charge pipe.
    Tighten the o2 housing to turbo
    Install the down pipe.
    Fully connect and fasten properly the entire exhaust system.
    Install intermediate shaft. (Missing bolts to secure this to the bracket, must source)
    Install passenger side axle.
    Install driver side axle.
    Install the hot side intercooler piping.
    Install the cold side intercooler piping / BOV and related connectors.
    Install the coil pack.
    Connect the coil pack to wiring harness plug.
    Remove the spark plugs to see if they are any good. Replace plugs with new ones unless they are already new (possible!)
    Install the plug wires.
    Buy all fluids.
    Fill motor with oil.
    Fill power steering reservoir.
    Fill coolant.
    Fill transmission.
    Fill clutch fluid. (DOT 3 Brake Fluid)
    Determine WTF is needed for the Rage-Tek Hydraulic Throwout Bearing
    (Need to know how to bleed, etc.)
    Check brake fluid. Bleed brakes if necessary.
    Wire up the second fuel pump.
    Wire up the oil pressure guage.
    Throw on the axle nuts, wheels, etc.

    Double check. Triple check. Then think about prepping for first start.

  4. #24
    Join Date
    May 2003
    Location
    Calgary, AB
    Posts
    2,340
    Rep Power
    23

    Default

    I cleared off a fairly large chunk of my things to do list. The car is getting quite close to being finished and I’m really looking forward to getting this car out of my garage. It’s been sitting here for nearly 4 months.

    I did remove the spark plugs and noted they are brand new. The plugs were gapped very tightly. All pretty much identically, so I contacted the previous owner and asked if he had installed the spark plugs, at which point he said no that the head/long block came this way. So, apparently that’s how it came from DCR as he did nothing to it. This is what I expected to hear from him when I saw the plug gap. So the plugs are good to go, I re-gapped them all to 0.030 as that will be fine for my initial purposes. I’ll guess they were gapped at 0.020 or even less from DCR as my gauge at 0.024 wouldn’t even fit through the plug gap. They were all very tight. But hey, DCR would know. So we’ll assume that’s how they should be once I crank the boost up.


    I did a quite lot of stuff really, and one of those things was installing the external waste gate vacuum lines, boost controller vacuum lines, etc. Just tried to neat it up, and only had to cut one new line to make it work with the new turbo.


    I sort of mocked up the installation of the JMB Ultimate 3” CAI. It’s essentially installed properly. Just needs to have clamps tightened and the air filter installed. It’s on my to do list.

    I removed the emblem at the front of the car. I’ve got my own rice to add later.


    I installed the fuel return line from the rail to the fuel pressure regulator. Tightened that up. Did a bunch of zip ties on the small vacuum lines. Basic house cleaning and I will be sure to do a more thorough check later.


    Things I scratched off my list of things to do, as well as some other details that were taken care of:

    [Complete] Tighten the turbo compressor housing which I clocked as much as possible for the charge pipe.
    [Complete] Install the charge pipe. Fastened at turbo coupler.
    [Complete] Tighten the o2 housing to turbo
    [Complete] Install the down pipe.
    [Complete] Fully connect and fasten properly the entire exhaust system.
    [Complete] Install intermediate shaft. (Missing bolts to secure this to the bracket, must source) – Whoa! I found some bolts that work.
    [Complete] Install driver side axle.
    [Complete] Install driver side axle nut, etc.
    [Complete] Install the hot side intercooler piping.
    [Complete] Install the cold side intercooler piping / BOV and related connectors. Hook up misc. vacuum lines as well.
    [Complete] Install the coil pack.
    [Complete] Connect the coil pack to wiring harness plug.
    [Complete] Remove the spark plugs to see if they are any good. Replace plugs with new ones unless they are already new (possible!) [And they were new.]
    [Complete] Install the plug wires.
    [Complete] Hook up external waste gate vacuum lines, boost controller lines, etc. Used some heat wrap and ran them along back side of valve cover.
    [Complete] Installed the large ground wire near the starter.
    [Complete] Hooked up the throttle cable.
    [Complete] Installed protective cover on passenger side. Re-route return line and fastened it carefully as it runs over here.

    My “when will it end” to do list:

    Make a list of the cars modifications to LOL at...
    Disconnect the power wire that I hooked up to the alternator to power the second fuel pump until I decide how I’m really going to hook that pump up.
    Install passenger side axle.
    Install passenger side wheel nut, etc.
    Install passenger side wheel.
    Install CAI filter.
    Install driver side wheel.
    Install all clamps for the CAI up to the turbo.
    Install both o2 sensors in the downpipe. OEM one and the AEM wide band.
    Get coolant.
    Get power steering fluid.
    Get gasoline. (94 octane for now)
    Get brake fluid for brakes and clutch reservoir.
    Get motor oil. (Will use AGP recommended 20w50 oils)
    Get transmission fluid.
    Fill all fluids properly.
    Get an adapter for the fuel rail that sticks up further, may have to make something, but need this to not interfere with coolant reservoir cap.
    Re-install new fuel fitting, tighten all fuel lines
    Read install instructions for AEM oil pressure gauge, figure out how to wire that gauge up for power.
    Adhere the 3-pod pillar properly so it doesn’t fall down.
    Determine how to fill/bleed the Rage-Tek Hydraulic Release Bearing for proper engagement of the clutch.
    Then prep for first start I suppose. Maybe pray a little.

  5. #25
    Join Date
    May 2003
    Location
    Calgary, AB
    Posts
    2,340
    Rep Power
    23

    Default

    So this is the start-up video I took on my phone. Unfortunately it is blurry because I let it focus on the dash while I started it up. And the camera doesn't re-focus after it is started recording.

    http://youtu.be/WV9L-FDqDu8

    Other than I thought it was a little noisy (from the head area) it went pretty much as expected...

    I have a few more things to address with the car before I will feel comfortable taking it out on the street for a spin. I have driven it around my street (which is a large loop) a couple times just to make sure it worked.

  6. #26
    Join Date
    May 2003
    Location
    Calgary, AB
    Posts
    2,340
    Rep Power
    23

    Default

    A couple little things left to do. I did already install the coolant overflow bottle. I aslo relocated the fuel pressure gauge. I put it directly on the rail, and I'm not really sure why I'd put it anywhere else. So it's on the rail now where it should be.

    The car has been sitting collecting dust for 4 months. So I backed it out yesterday and took the high pressure sprayer to it. Just to get most of the dust off it quickly.


    And here is a picture of the car from the side. So you can see the wheels that are on it, as well you can see that it has fully tinted windows. I'm going to have the window tint on the front driver / passenger side removed. I guess I'll keep the tint around the back, since that is legal here. The front sides are not and 20 years ago, I'd have kept it that way anyhow. But now I'd rather be able to see than look cool. Hahah.


  7. #27
    Join Date
    May 2003
    Location
    Calgary, AB
    Posts
    2,340
    Rep Power
    23

    Default

    August 5th, 2012

    Pretty much finished off the car today. Spent about an hour or so on it. On my drive around my street I noticed the speedo didn't work. The fuel gauge didn't work. The odo didn't work. It was a 0.6km trip and the odo read 0.0km.

    After trying to seat the clip for the speed sensor on the tranny, it was clear I was not going to be able to get it on properly. I thought I had possibly damaged this when I was installing it - and in fact I did. (I tried to jam the wrong plug in to it, and pushed with pretty reasonable force before I realized I was using the wrong connector - so this damage is totally my stupidity!)

    I jacked up the car, removed the oil cooler bolts and let it dangle down. Then I removed the speed sensor. Inside I found a nice little mess. One of the pins was bent right to the ground, folded twice and flattened. As opposed to pissing with that, I went to my '04's OEM tranny in my shed, removed the speed sensor and installed that sensor in to the vehicle. Hooked it up, plug seated nicely, and around the block I went again. A trip for which the speedo worked, the fuel gauge worked, and the odo read 0.6km after my trip.

    I wired up the AEM pressure gauge [used for my oil pressure reading at the head] for power and a ground. I used the fused power from the windshield wipers. It works great. Gauge reads nicely and it's good to have the oil pressure reading at my disposal.

    I used some adhesive backed velcro to hold the triple gauge pod pillar overlay on. Works well. Should be easier to get off than double-sided foam tape.

    Here is the very first engine bay picture I've taken of the car outside in the sunlight! Ooohh. Aaaaah.


    As you can see, I have added my little rice items. The angry viper CNC emblem, and the SRT logo.

    Looks like it's ready to roll out. Sounds like an absolute beast. It's going to be fun.

    UPDATE: I've had the car 4 years and have not really used it. So it's not listed for sale but I'd sell it.
    Last edited by Z_Fan; 04-27-2016 at 12:09 PM.

Page 2 of 2 FirstFirst 1 2

Similar Threads

  1. FS: 2005 Dodge SRT-4 ACR

    By Z_Fan in forum Cars, Trucks, Motorbikes, and Trailers
    Replies: 6
    Latest Threads: 07-13-2014, 06:30 PM
  2. 2005 Dodge SRT4 ACR

    By SRT4Pheez in forum Dodge
    Replies: 0
    Latest Threads: 08-15-2012, 01:18 PM
  3. FS: 2005 Dodge SRT-4 ACR

    By heavyD in forum Cars, Trucks, Motorbikes, and Trailers
    Replies: 26
    Latest Threads: 09-26-2007, 07:18 PM
  4. Track Test: 2005 Dodge Viper SRT-10 Vs. 2005 Ford GT

    By Ekliptix in forum General Car/Bike Talk
    Replies: 39
    Latest Threads: 03-03-2004, 12:23 AM

Posting Permissions

  • You may not post new threads
  • You may not post replies
  • You may not post attachments
  • You may not edit your posts
  •