Quantcast
Watch me transform the gixxer! - Beyond.ca - Car Forums
Page 1 of 2 1 2 LastLast
Results 1 to 20 of 30

Thread: Watch me transform the gixxer!

  1. #1
    Join Date
    Oct 2004
    Location
    Mars
    My Ride
    A car, a truck, and a bike
    Posts
    977
    Rep Power
    30

    Default Watch me transform the gixxer!

    Ok, first off welcome to my progress thread. Some of you may be interested, some of you may not give a shit, others yet may sit back and think "why?". I've always failed at documenting everything I've done to my other vehicles, so for once, just this once, I am going to stick with updating this thread as my bike turns from a "gently used" Gixxer, to a pseudo one-off appearance!

    I'll hopefully post tear down and progress pics as I go, don't feel obligated to respond in any way shape or form to this thread. If you have criticism , please make it constructive and don't be mad if I don't accept it! Questions are accepted, and discussion pertaining to this buildup will remain, all irrelevant info I will ask to be removed. I hope this is informative for someone on some level. Thanks for looking and ENJOY!

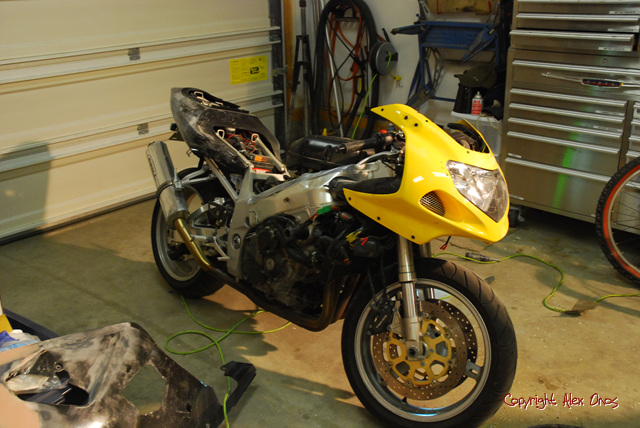
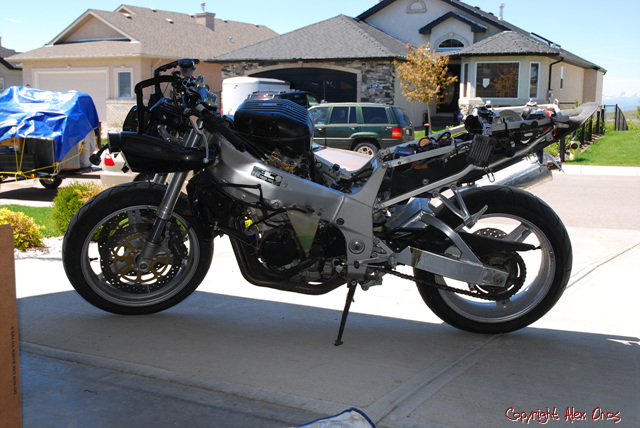
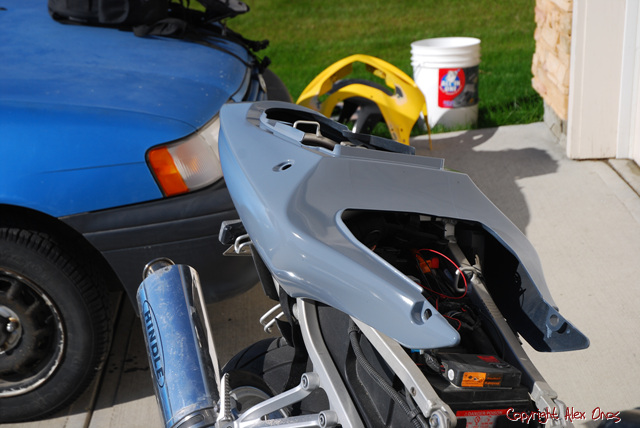
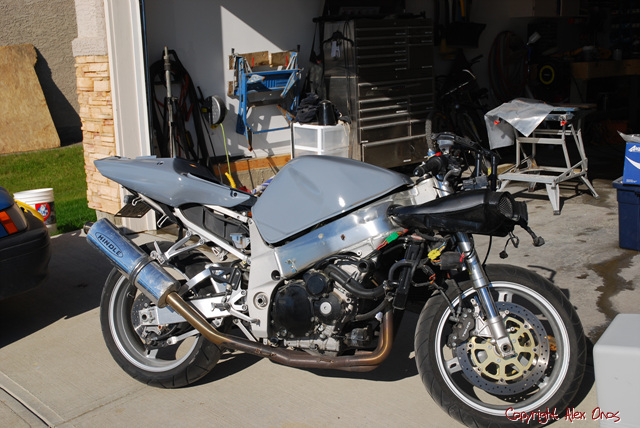
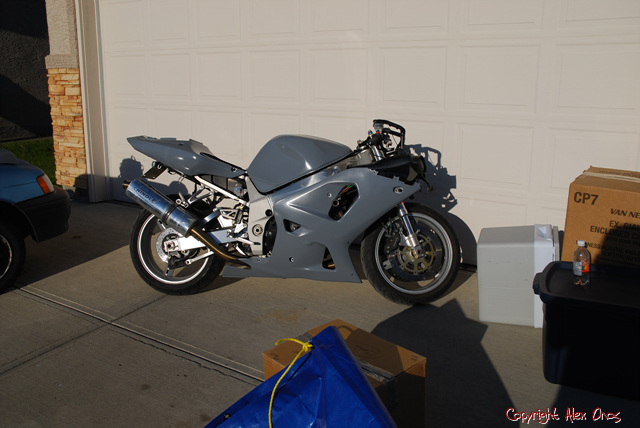
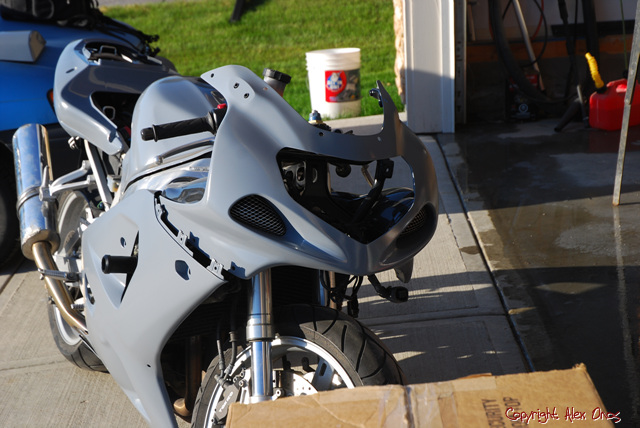
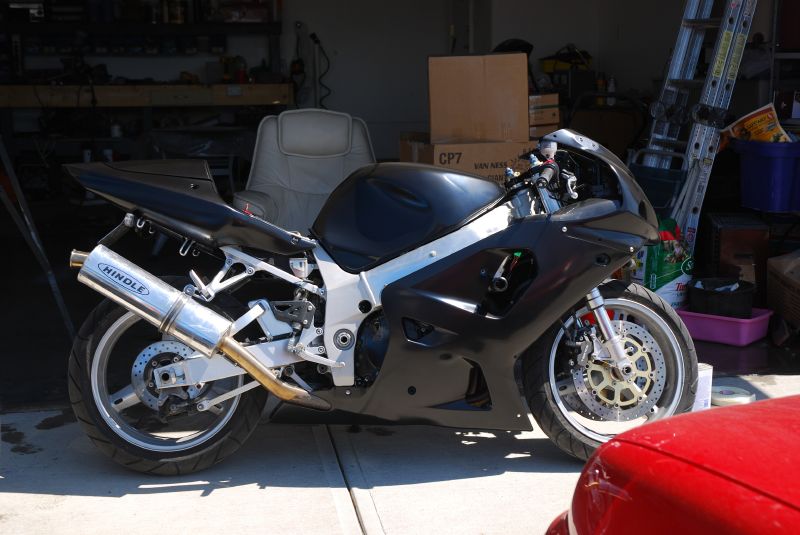
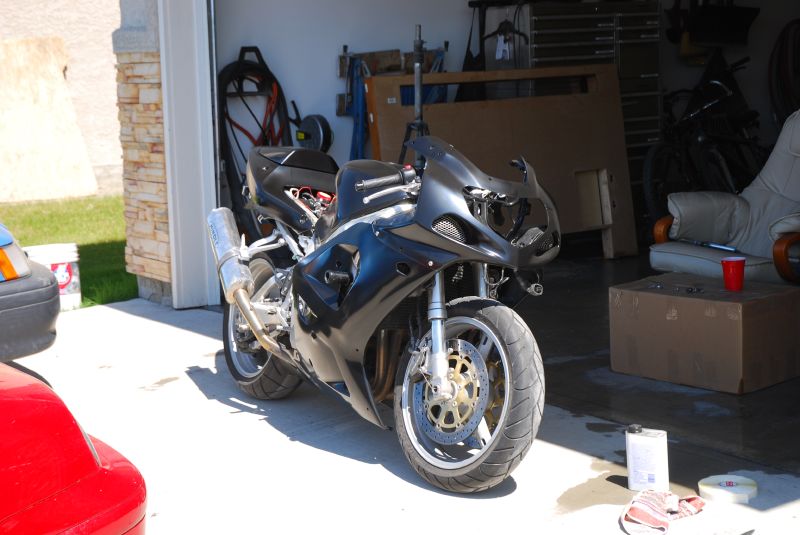
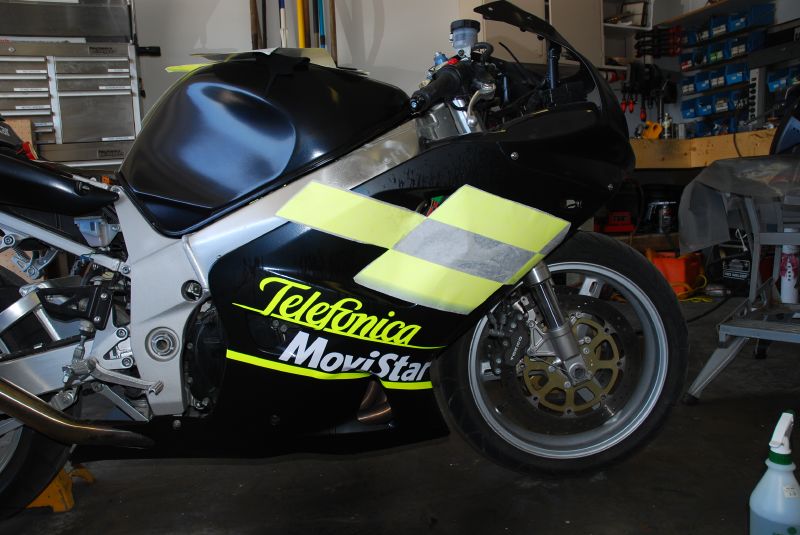
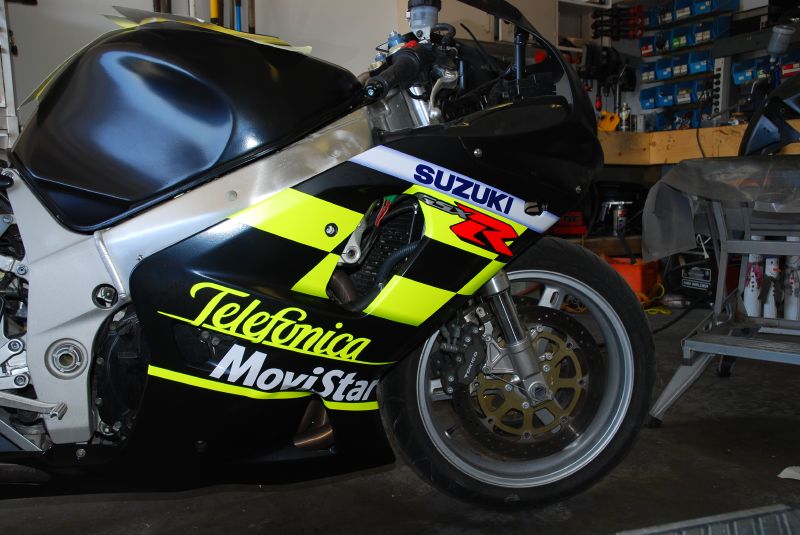
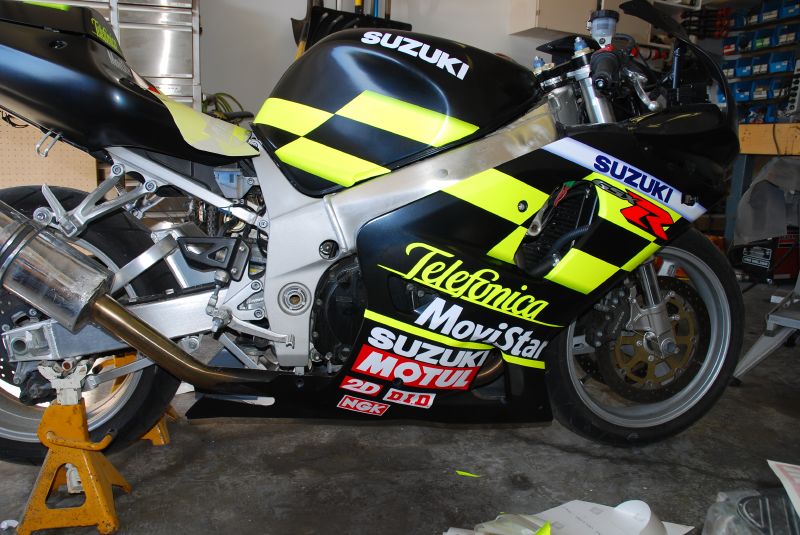
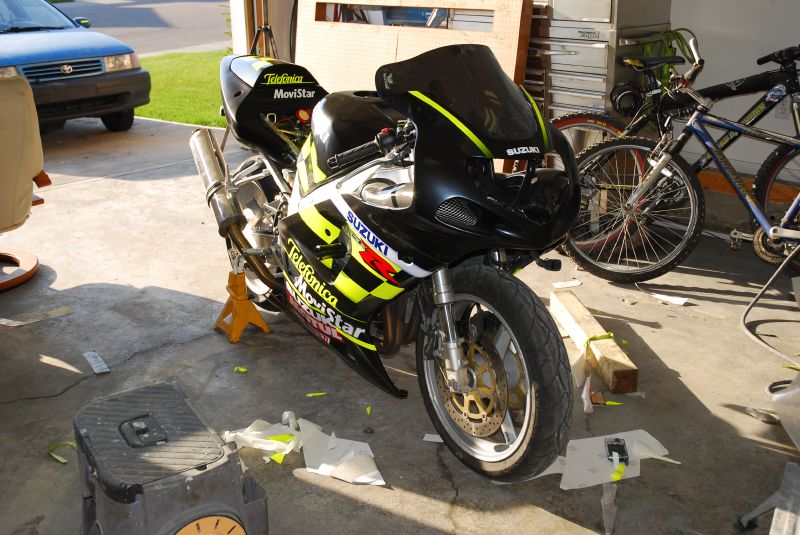
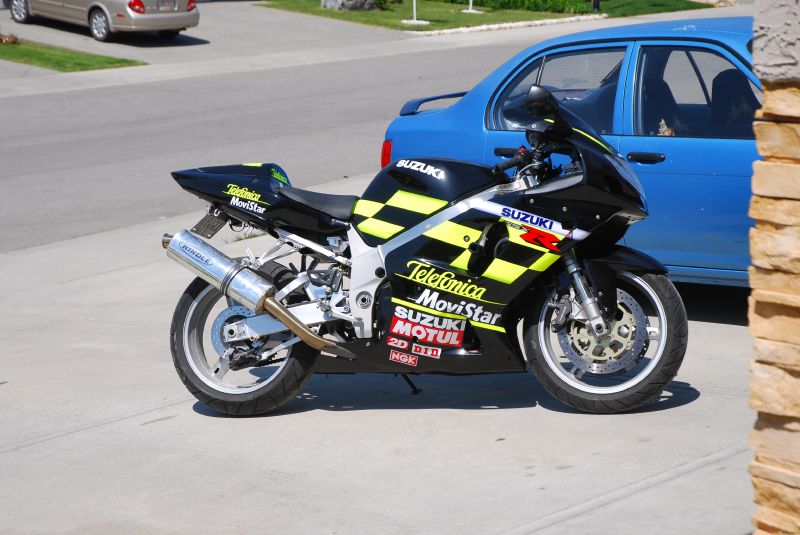
    For reference, here is the bike as it sits now. Its an 00 750 with 50% 01 600 plastics and 25% 02 750 tail! Hence my desire to start over:


    Here are the current list of parts and mods to be done:

    • Smoked DB windscreen
    • Straight upper fairing stay bracket
    • Blue and White LEDS in cluster
    • Carbon look RAM air tubes
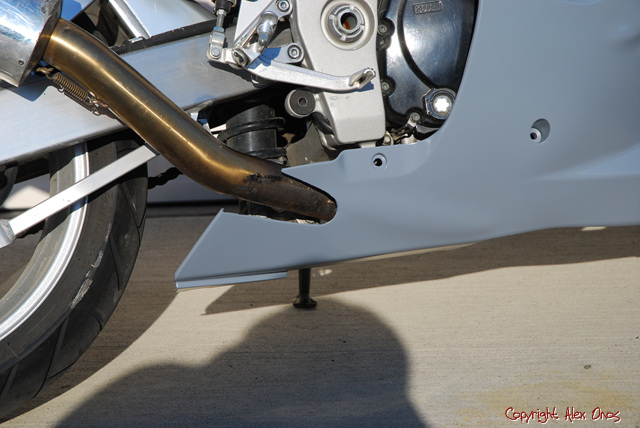
    • Chop the Hindle monster down to size
    • Total respray of all painted parts
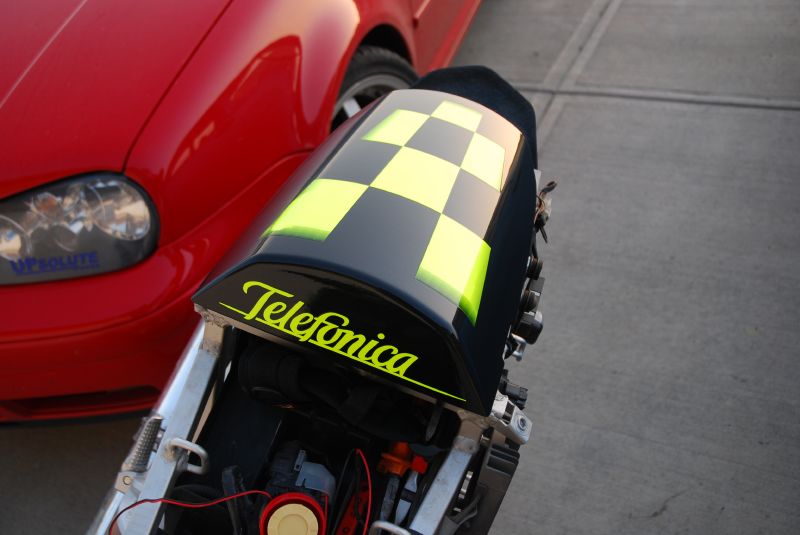
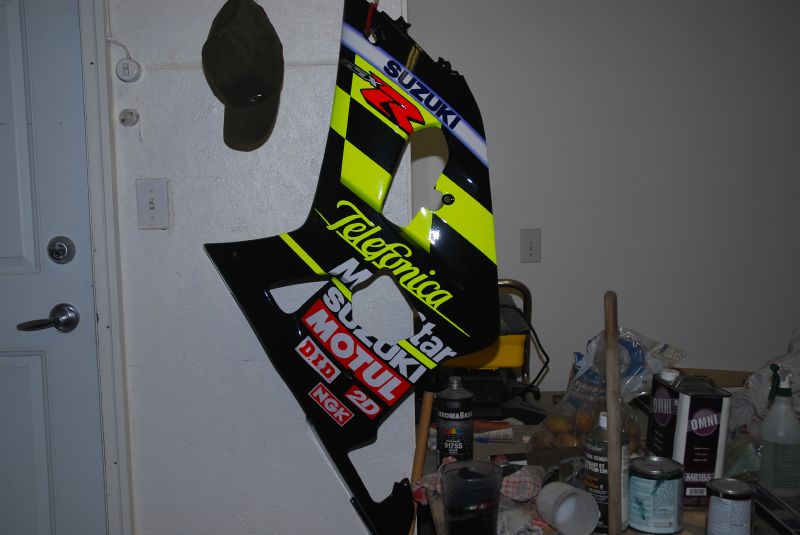
    • Telefonica replica kit
    • *possibly* get rims powdercoated, need to see after paint..


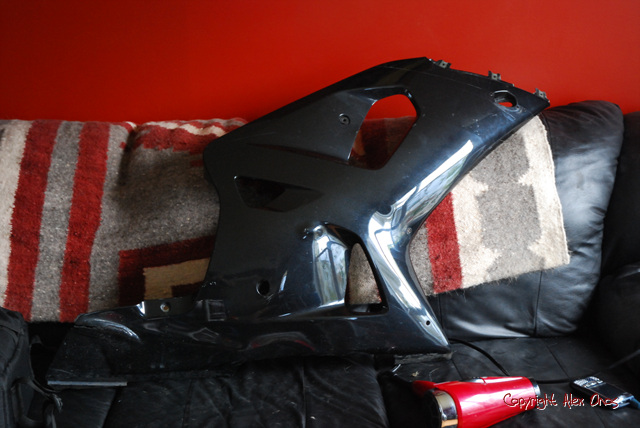
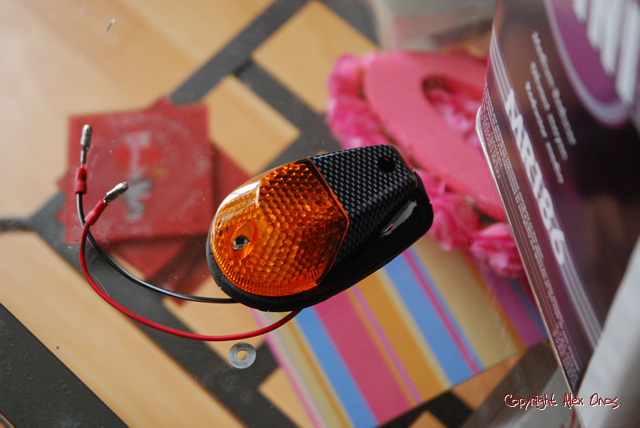
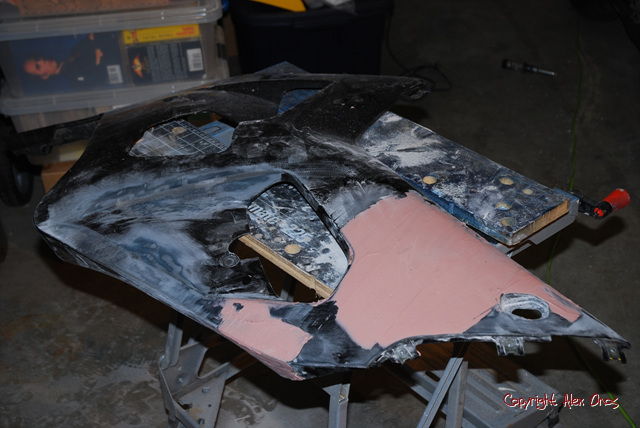
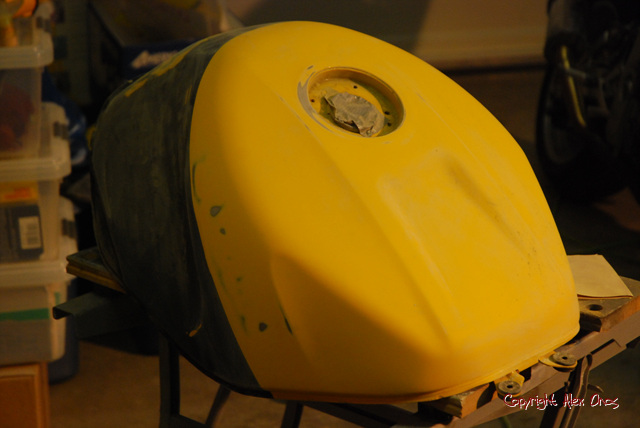
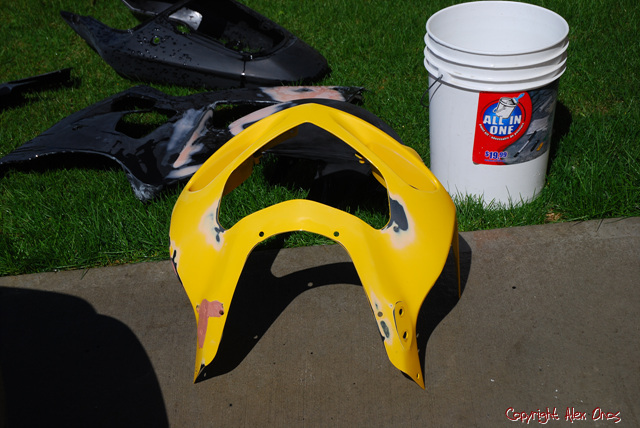
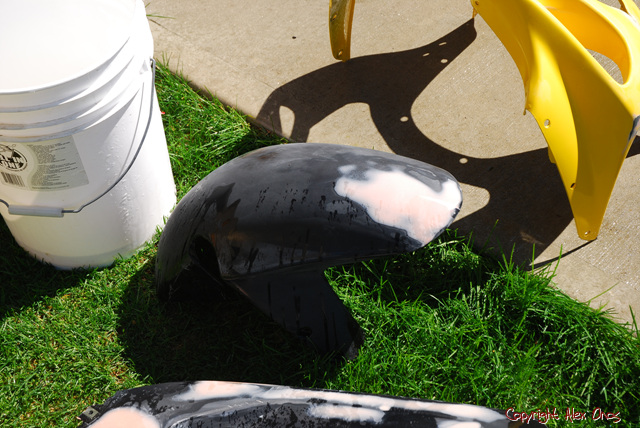
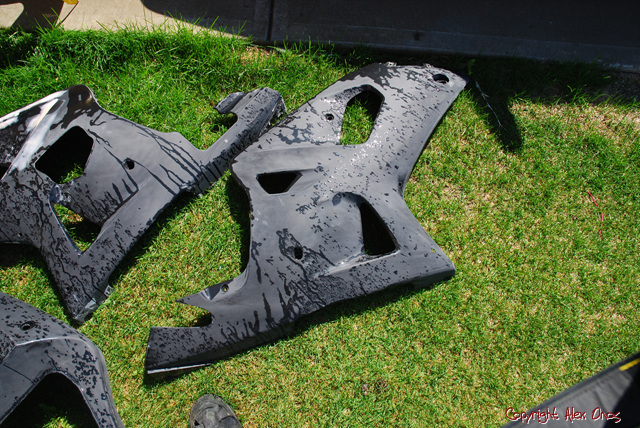
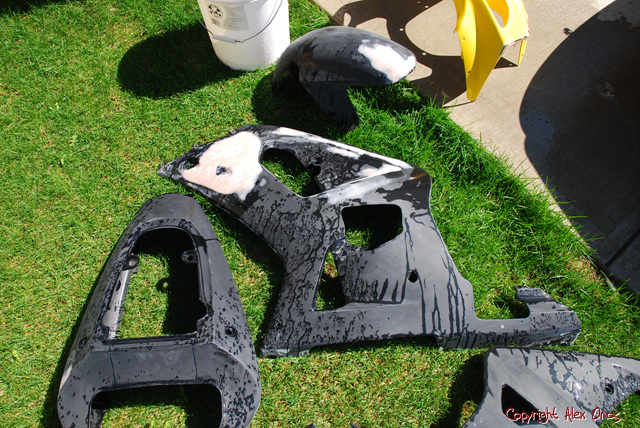
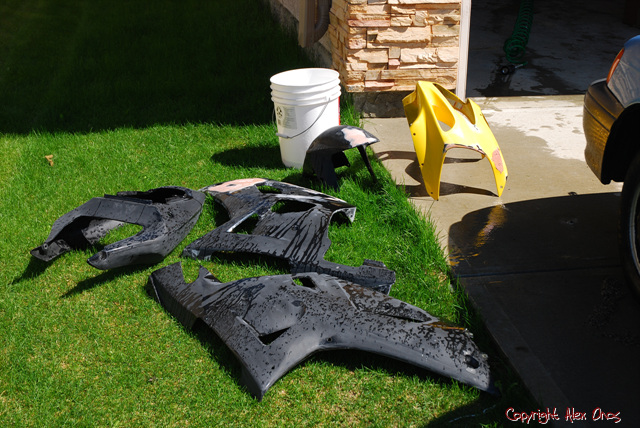
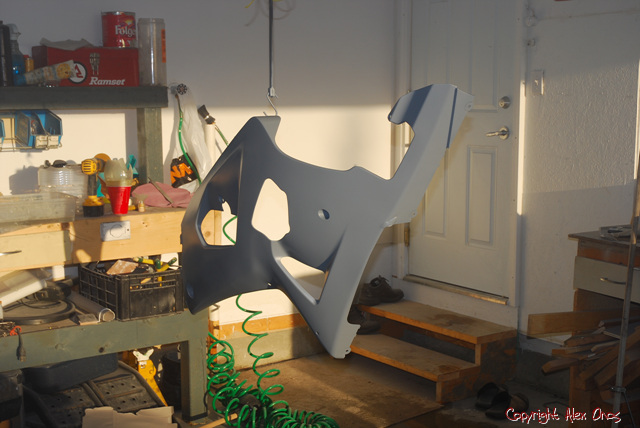
    Here are some of my parts and paint awaiting install!

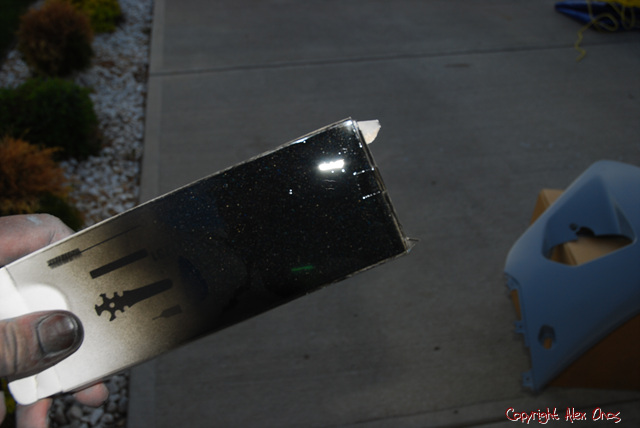
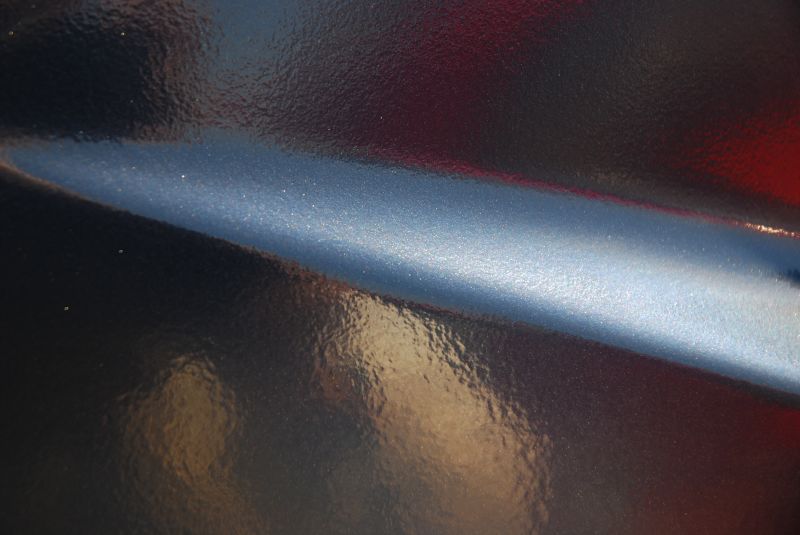
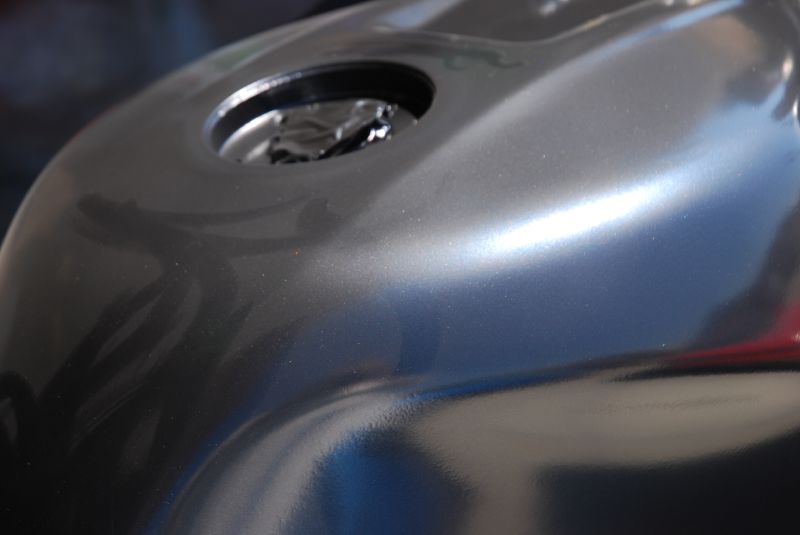
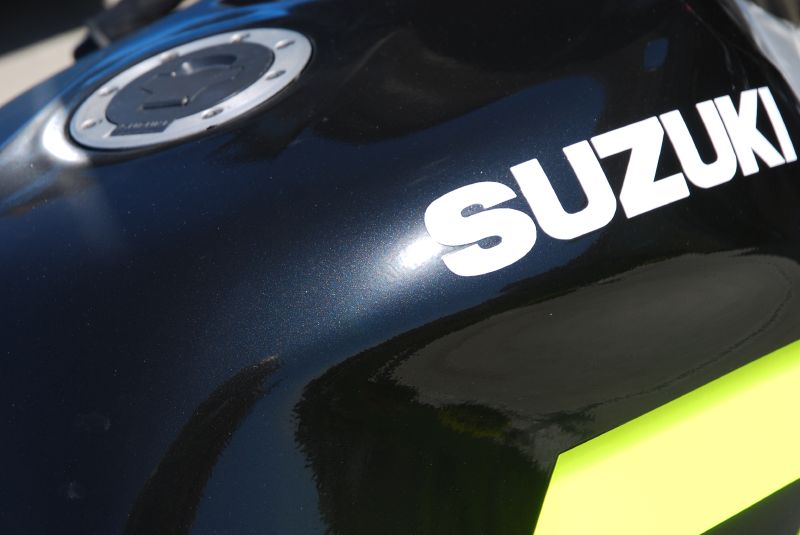
    Paint; 2 stage base coat/clear coat system, with flex agent. Colour: Black Magic Pearl (VW origin)....total cost? Less than the decals! All decals will be UNDER the clear coat


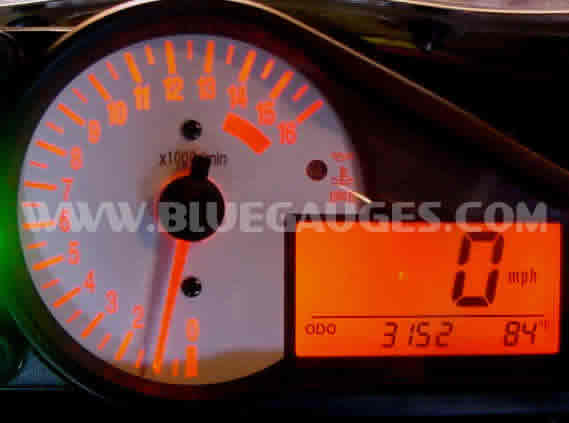
    Cluster and LED's (part way finished, waiting for more White LEDs in the mail. Blue LCD panel, white tach, and red under the redline


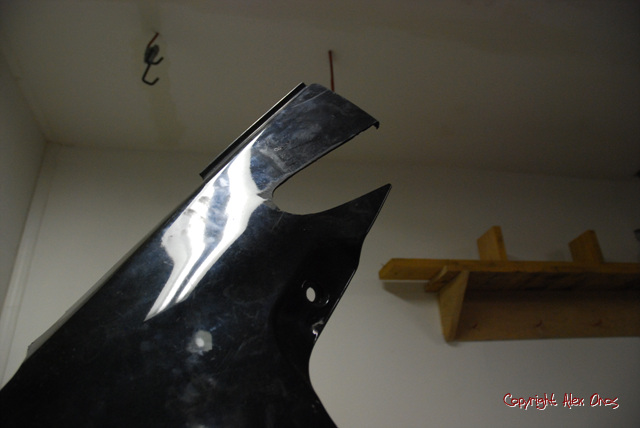
    Dark smoke DB windscreen, it doesn't look see-thru, but it is


    Carbon tubes, OEM but my current ones are black and fibreglass so its a step up


    This kit, posted in another thread by me, but worth another look. Should look good with this black (thanks eclipse for the suggestion)...total cost? $270....ouchers...should be here in a week
    sig deleted by moderator, click here for info

  2. #2
    Join Date
    Jan 2005
    Location
    Calgary
    Posts
    581
    Rep Power
    20

    Default

    Are you going to color the rims and all the other silver parts. It would be nice to see that all black with those green decals..

  3. #3
    Join Date
    Oct 2004
    Location
    Mars
    My Ride
    A car, a truck, and a bike
    Posts
    977
    Rep Power
    30

    Default

    Not all the silver parts, thats far to intensive to do. The rims, I'm deciding on black or the yellow on the decals. Not sure yet. I'll decide that after I paint and reassemble.
    sig deleted by moderator, click here for info

  4. #4
    Join Date
    Oct 2004
    Location
    Mars
    My Ride
    A car, a truck, and a bike
    Posts
    977
    Rep Power
    30

    Default

    A little peek at what came in today! Can you believe 4 days from ITALY?? Wow....And the yellow just does not translate onto photo, its electric! I love it....a whole big bag of great looking decals

    sig deleted by moderator, click here for info

  5. #5
    Join Date
    Jan 2004
    Location
    Calgarian Living in Edmonton
    My Ride
    93 240sx SE, 17 Infiniti Q50S, 2008 Highlander
    Posts
    6,693
    Rep Power
    35

    Default

    I'm not too familiar with bikes and such but why so many decals?Is it a popular thing to do with bikes?And I aint flaming I am curious to know...
    Originally posted by GTS Jeff
    You know those bored stay at home moms who's entire lives revolve around driving their kids to soccer, various cleaning accessories, and worrying about neighbourhood rapists? The kind of people that watch the View and go "uh huh..." Those unfulfilled people who try to fill the void in their empty lives by writing whiny letters to the editor complaining about shit that no one really cares about?

    Well imagine if instead of writing that letter to the editor, she just posts on a car forum for car enthusiasts. That's Kritafo.

  6. #6
    Join Date
    Oct 2004
    Location
    Mars
    My Ride
    A car, a truck, and a bike
    Posts
    977
    Rep Power
    30

    Default

    Well, Suzuki made their own Telefonica replica in '02 on the 600's, and an Alstare replica for a few years (also on the 600's). This is simply a replica kit of the actual GSV-R 600 (the GP bikes had V engines in them instead of I4's which are designated by the X in the name) used in 2002. While it isn't common, they are out there. Everyone strips stuff off the bike, I'm going with unique because its different. Not for everyone, but truly what custom job is?
    sig deleted by moderator, click here for info

  7. #7
    Join Date
    Jul 2005
    Location
    Alberta
    My Ride
    SlowBalt
    Posts
    1,258
    Rep Power
    20

    Default

    Looking good, keep us updated...

  8. #8
    Join Date
    Oct 2004
    Location
    Mars
    My Ride
    A car, a truck, and a bike
    Posts
    977
    Rep Power
    30

    Default

    Cluster is done and back in place, will put a pic in this post when it gets dark enough to see the illumination!

    Here is the pic! I love it!!!! Again, its white up the tach, red at the top, and blue for the LCD


    And this was the stock colour:

    Last edited by TurboMedic; 03-28-2007 at 03:00 PM.
    sig deleted by moderator, click here for info

  9. #9
    Join Date
    Oct 2004
    Location
    Mars
    My Ride
    A car, a truck, and a bike
    Posts
    977
    Rep Power
    30

    Default

    Back on it again....Decided to swap out the hard parts now, as they won't be needing to be touched hen I pull plastics to repaint, which should hopefully be soon.....I could strip the decals too, just need to commit the time to do it.... So this was the DB windscreen install, the new fairing stay bracket, and the carbon air tubes.......This also allowed me to clean up the wiring routing inside the nose! Plus the new air tubes have the mounting location for the fusebox (the old tubes were aftermarket....crap!)... All in all I'm super happy with how this went, all took less than an hour, and I took my time! At least everything lines up now, that old fairing bracket was a little off in the straight department! At least I can get some cash selling them as stunt parts on ebay, thats all they're good for.....

    Onto the pics.......Never took a before shot, just look up above for that.....enjoy!


    sig deleted by moderator, click here for info

  10. #10
    Join Date
    Apr 2003
    Location
    Calgary, Alberta
    My Ride
    00 Honda CR-V, 02 IS300
    Posts
    2,195
    Rep Power
    26

    Default

    Wow, thats gonna look crazy... props on undertaking a huge project... i think it'll look great...

    I took pics of my buddys 600M a few years ago, I will find better pics if it'll help you, just let me know... here was his thread here...

    http://forums.beyond.ca/showthread.p...ght=telefonica

  11. #11
    Join Date
    Feb 2005
    Location
    Chesterslew
    My Ride
    obnoxious bikess.
    Posts
    1,111
    Rep Power
    0

    Default

    wow i think that the telefonica decals and ish will look sick on black.

    Great idea man, cant wait too see how it turns out!

  12. #12
    Join Date
    Oct 2004
    Location
    Mars
    My Ride
    A car, a truck, and a bike
    Posts
    977
    Rep Power
    30

    Default

    Alright, its been slow, but dammit mother nature isn't cooperating with me at all. All I ask is some warm ambient temps, plus me not being tempted by riding the damn thing! Anyhow, some of you may recall the factory Gel seat I purchased was the wrong one. Up on ebay it went, and I was messaged by a guy from the states who had a brand new Sargent seat he ordered, and the company would not take back. Coincidentally he had an 04 1K, so we were able to do a straight swap. In the ed I still lost some cash on the deal, so I was bummed, but hey, I have a brand new seat! It came in today, so I threw it on to see what it would look like, and sit on it (haven't ridden on it yet).....

    First impressions? Sargent builds a nice seat......fit is tight (very tight, almost 2mm short on the mounting holes, but it worked because its flexible to an extent), finish is very good looking....Overall build quality is great, with metal mounting harware. It does feel more firm than the stocker, but sits roughly the same height. It isn't a gel seat, its "atomic foam" whatever the fuck that means, hopefully it breaks in (although some people swear firmer=more comfort on long trips?). Looks wise, I dunno, its small like the stocker, but still looks a little saddleish to me, wish it didn't have that piping....Have to see it with the whole cover off the bike to get the full effect (no pics of it mounted yet, those will come in later updates)...If its comfy, I'll keep it for the trips, if its not, well, ebay again *sigh*....Anyhow, here are some comparo pics, so you can see the differences in the seat pan and contours! FYI, this seat sells for around $270 on the sargent website.....not sure its worth that, but whatever!


    sig deleted by moderator, click here for info

  13. #13
    Join Date
    Sep 2004
    Location
    .
    My Ride
    .
    Posts
    749
    Rep Power
    20

    Default

    The bike is starting to look good. Thats a huge upgrade on the speedo I think. Makes me want to do something like that as well.

    I noticed you have the Canadian Tire Stand. How do you like it? I bought it but was too paranoid to put my bike in a cheap Cdn Tire stand so I returned it.

  14. #14
    Join Date
    Oct 2004
    Location
    Mars
    My Ride
    A car, a truck, and a bike
    Posts
    977
    Rep Power
    30

    Default

    Whew, slowest transformation ever.......Thanks to mother nature and my job finally coming to an agreement, I got a little bit done today. I took off a bunch of decals, in prep for some sanding and a couple repairs on my left side lower fairing.....Also picked up the kitty hair and light filler for some scratches.....Here are some pics....

    Lesson learned: decal removal wheel + drill on high speed = bad for plastic bodywork.....No pics to evidence this, just remember that.
    It wasn't necessary to use the drill/wheel except on the GSXR logo cause it was a chrome decal, and they don't like peeling at all.....For the coloured decals danielle's new hairdryer worked wonders! I left the suzuki on there for now because one of my drill batteries shit the bed, and I didn't want it to look too empty (Its 10 minutes to take those letters off...) . I also realized that suzuki black is actually black with blue metal flake in it, looks nice....


    sig deleted by moderator, click here for info

  15. #15
    Join Date
    Oct 2004
    Location
    Mars
    My Ride
    A car, a truck, and a bike
    Posts
    977
    Rep Power
    30

    Default

    And just like that all my images are gonzo.....I hope my PAID webspace brings it back NOW......I'm moving on to flickr now....

    Aside from that, I'm on vacation now, and working on the bike in bits and pieces.....Here are a few!

    First off, completed removal of decals on side fairings. Oddly enough, they are almost identical in colour to what I am painting them...never realized that before....Also, there are photos showing the damage to the left fairing that needs to be repaired....right this minute I am fibreglassing that big ass crack with kitty hair! Also, there is an image of my right fairing where my midpipe passes through, literally.....Modification coming up there aswell.....


    Next up, proper flushmount signals, get rid of these ugly things.....I'm thinking watsen flushmounts....ebay here I come!


    I also started sanding....


    Get a die grinder for proper surface prep for structural type fillers like kitty hair, gives it more to grab onto! Also, being the backside of the panel, I can use alot of surface area to ensure strength, and less surface area on the frontside so it doesn't get that "fixed" look when its completed!

    I'll add more pics from today as I get them....
    sig deleted by moderator, click here for info

  16. #16
    Join Date
    Oct 2004
    Location
    Mars
    My Ride
    A car, a truck, and a bike
    Posts
    977
    Rep Power
    30

    Default

    Ok....so I see my old photos still aren't up....shitty....Anyhow, got a bunch of work done today! I want it done by the end of the week, I see no problem with that as of yet.....Was hoping to get farther today, but as you sand you find little imperfections and you fix them....all of them....

    Small amounts of fiberglass work add alot of structure to small cracks. I also filled the holes from the old signal lights, as the new ones I have coming fit right into the factory hole!


    Then after you've sanded it all down you use plastic filler to fill any pinholes, sanding marks, etc. You use quite rough sandpaper with fiberglass, 80-120 grit, so the filler fills those in well, as you sand the filler with 180 to start, and then 320 to feather the edges, and then 400 by hand and finish with 600 (I do this as a personal thing, not needed but I like to be sure its not going to show through, especially when shooting metallics..)... I forgot to take after pics on the panel when its all sanded and finished, I'll try to on wednesday or so....here was the before pic with the filler on it...


    I sanded the tank and filled a couple very small dents I didn't even know where there. I used the pinstrip wheel again on the decals, and even though they were under the clear, the wheel and the drill took them right off no problems.....Saved alot of hassle....Of importance though, when doing the tank, there will be edges where the decals were, and where the colour line is, so you want to sand and feather them all down to ensure its smooth and you don't see the outline when you repaint!! Sorry for the poor photos, you can't see the different layers of paint after sanding in them...


    Just another step in the road....the whole bike is stripped now, and the panels are all sanded....I suck at remembering to take photos....I will later though


    Onse of the coolest parts, I made my exhaust cutout today aswell, it looks swell and fits even better!! It looks very unfinished in this photo....But I haven't cleaned up the edge yet...


    I also took time to straighten out the exhaust pipe, I'll order a new sleeve for it soon, 16" this time and cut down the internals....
    sig deleted by moderator, click here for info

  17. #17
    Join Date
    Oct 2004
    Location
    Mars
    My Ride
    A car, a truck, and a bike
    Posts
    977
    Rep Power
    30

    Default

    Here we go again....another day, another bunch of work. I got the sanding finished, and aswell the primer. I shot the solo cowl in colour to see how well it covered, the paint is great!

    The bike when it was pulled out of the garage this AM


    The parts in between bouts of wet sanding (no edges done in these pics, they were done before priming though.... Wet sanding is the way to go for anyone trying to sand automotive stuff....keeps the paper clean, and also really bites harder! Smoother finish, less sanding marks aswell. You can see some of the work done to the left fairing


    After all the sanding the priming starts. This is just standard grey epoxy primer single coat stuff. Unfortunately I had to paint them all one by one due to hanging space, but it worked out ok because it sets up fast.

    first the tail section


    Then the tank


    The right fairing


    The exhaust cutout again....the fairing is hanging loose so it doesn't look like it lines up aswell, but it does when its snug


    The nose piece....This part sucked, had to do inside and out much better than the sides because you can see it all....and the paint gun spins this when you're spraying and you can't hang on!


    And lastly the left fairing


    Here is a small swatch of colour I sprayed when I painted the solo cowl...tomorrow the rest is done...can't see it too well because it didn't focus but you get the point...


    till tomorrow
    sig deleted by moderator, click here for info

  18. #18
    Join Date
    Oct 2004
    Location
    Mars
    My Ride
    A car, a truck, and a bike
    Posts
    977
    Rep Power
    30

    Default

    Alright y'all.....Here it is....FINAL update....Bike is done, and this post will cover colour basecoat, decals, clear and final reveal.....You know what that means, haters, get your hate engines started.......heehee....Oh and to answer a question above, I have about 60-70 hours of labour plus a running cost of $550 into this.....pretty cheap!


    So first off, after the primer, I shot colour coats. The colour was Black Magic Pearl, a VW colour used on anniversary GTI's. Its a black with gold and silver flake in it that shows well in the sun. Why black? I dunno, it was different than blue, less boring than grey, and I wasn't going with pink!

    Basecoats are always dull in finish, as the photos show....I used alot of colour, way more than I needed....I shot a whole pint of base (thats 2 pints reduced!!). The colour laid down nice, the paint is good stuff as far as I'm concerned, and I used to shoot R-M which is top of the line!

    Here is the base coat, and the panels hung on the bike in just base....You can see here how that exhaust cutout fits nice!!! This actually looks cool


    Next step was decals.....This too about 4 hours to complete!!!! They were a bitch to say the least, and getting things lined up, deciding where to put things, I didn't get a road map with these decals so I used photos of the 2002 MotoGP bike as a reference!!

    My sister helped a bit, she used to decal buses so I figured she'd know what she was doing!


    Slowly coming together!! I was doing it alone at this point


    The tank part looks crooked, but thats the tank angles playing with your eyes....It was lined up with a string line to ensure the same angle as the side panel


    Now, onto clear coat.....I did this immediately after graphics, on thursday night. I had to in order to ride it to Three Hills on saturday (clear coat needs 16 hours of setup time at 21 degrees......Plus I have flex agent in it so be safe!).

    First up is a shot of the solo cowl cleared in the sunset so you can see how glassy it is...Pretty sweet eh? The clear was AMAZING to shoot....


    ANd here is the colour, sortof up close.


    AAAANNNNNDDDDD.......the final reveal!!! This is BEFORE I polished it when I got home, so its a little dull in this photo from overspray......I think it looks killer! ..Let me know what you think!


    Thanks for following this buildup all!
    sig deleted by moderator, click here for info

  19. #19
    Join Date
    Sep 2004
    Location
    .
    My Ride
    .
    Posts
    749
    Rep Power
    20

    Default

    wow that is coming along nicely

    how much time have you put into it so far?

  20. #20
    Join Date
    Feb 2003
    Location
    Chestermere, AB
    My Ride
    01 Integra SE / 07 Lexus GS 450H
    Posts
    2,023
    Rep Power
    24

    Default

    Nice the bike looks awsome

Page 1 of 2 1 2 LastLast

Similar Threads

  1. FS: Seiko Watch and Casio Baby G Watch

    By Ariakas in forum Miscellaneous Buy/Sell/Trade
    Replies: 2
    Latest Threads: 03-16-2005, 08:48 PM
  2. R6 or gixxer 600

    By boi-alien in forum Bike Talk
    Replies: 11
    Latest Threads: 08-07-2003, 10:23 AM
  3. my new 03 gixxer

    By frenchdriver in forum Bike Talk
    Replies: 39
    Latest Threads: 07-26-2003, 11:09 PM
  4. Can someone help me transform this car PLZ!!

    By teg_star in forum Photoshop Gallery
    Replies: 10
    Latest Threads: 05-14-2003, 05:53 PM
  5. Somebody help me find a Gixxer (blue & white)..!!!

    By LaughingTiger in forum Bike Talk
    Replies: 5
    Latest Threads: 02-13-2003, 11:36 AM

Posting Permissions

  • You may not post new threads
  • You may not post replies
  • You may not post attachments
  • You may not edit your posts
  •