
Damn you went hard! not sure if you've stated, but how long do you think the car will be ready in ?
keep up the good work!


 Registered User

Damn you went hard! not sure if you've stated, but how long do you think the car will be ready in ?
keep up the good work!
.
Registered User
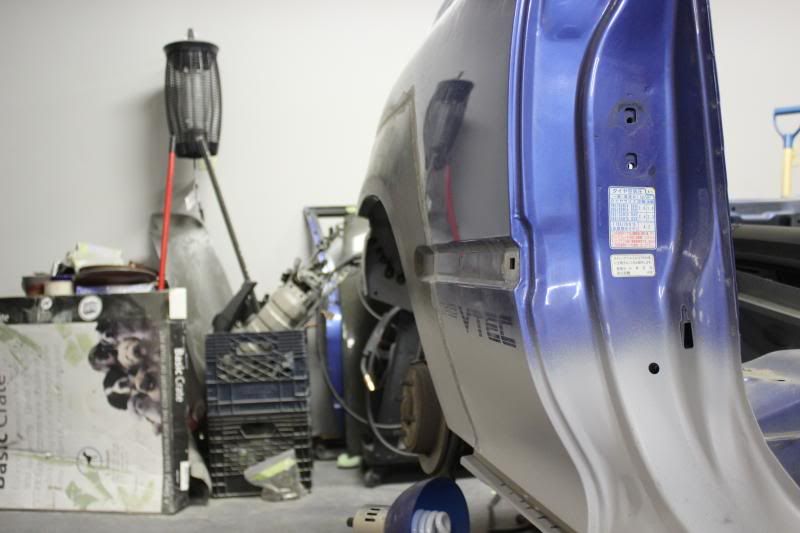
I hope to have the car ready by summer, if all goes as planned, I am still undecided on what parts I want to buy for it, but I have to replace every single bushing in the car as they aren't even connected anymore, for basically every bushing I can just pull them apart with my hands, prolly the most unsafe vehicle I've ever seen, sway bars were hooked up improperly. I was quite shocked at how the car was put together, none the less I got lots of time to put into the car still. I have the right side quarter panel installed now, just gotta do the rocker panel on that side, repair the door, and get a new fender, some sand blasting then move onto the other side after.
I most definitely want the car done by August, which does seem very possible to me.
Registered User
Gone
Last edited by derek_k; 04-30-2014 at 09:20 PM.
Registered User
Damn shitty deal! some people man!Originally posted by derek_k
I hope to have the car ready by summer, if all goes as planned, I am still undecided on what parts I want to buy for it, but I have to replace every single bushing in the car as they aren't even connected anymore, for basically every bushing I can just pull them apart with my hands, prolly the most unsafe vehicle I've ever seen, sway bars were hooked up improperly. I was quite shocked at how the car was put together, none the less I got lots of time to put into the car still. I have the right side quarter panel installed now, just gotta do the rocker panel on that side, repair the door, and get a new fender, some sand blasting then move onto the other side after.
I most definitely want the car done by August, which does seem very possible to me.
August seems doable at the pace your working at!
Did you decide what color you'll be painting it?
so stoked to see the finished product!
.
Registered User
Hello Beyond, so I have been slowly working away on the car, and I am at the point to install the rocker panel. I decided to not replace the whole rocker as it was not required, the rust on the parts I didn't remove sandblasted away, so no need to remove the whole thing. I have it primed up so the bare metal exposed is protected now, just need to weld the patch in place. I ground down a little of the quarter panel where was gonna get sprayed with primer and it turned out very good, I outdid my expectations considering my skill level in doing such a task is minimal, it made me more confident with my work lol. Anyways here are some pics of what I got completed over the week.
Nice rusty rocker
Cut out, rust in the seam, it all sandblasted out, it actually disappeared at the edge of my cuts as well, if there is any rust in the seam where I didn't replace, it is very very minimal, keep in mind some of the discolouring in the pic is dirt
Rough cut out of the patch panel
Started to sandblast
Sand blasting completed
Cut out all the holes for my side skirt and fit it properly
Primed
Anyways that is all for now, I should have the rocker welded in sometime this week, then I will grind all the welds down on this side, and get it all in some primer. I think I am just gonna replace the door on this side as it has a gouge in it and quite a bit of rust on the bottom. But other than that a little more sand blasting on this side and soon it will be rust free, it is slowly disappearing from this car lol. Is say I got close to half of it now.
Registered User
Are you applying an epoxy primer to the bare metal?
If not I would highly suggest it, you can apply a high build primer over top of it, but for bare-metal epoxy is king. It's the only primer that won't let any moisture get to the metal.
Last edited by Modelexis; 01-13-2014 at 12:40 AM.
"Anarchism is not a romantic fable but the hardheaded realization, based on five thousand years of experience, that we cannot entrust the management of our lives to kings, priests, politicians, generals, and county commissioners."
Registered User
The paint I am using is a new breed of primer, it's like epoxy and high build in one, it is meant for bare metal. I like it so far, sprays nice and sands nice.
Registered User
Interesting, keep it up!
"Anarchism is not a romantic fable but the hardheaded realization, based on five thousand years of experience, that we cannot entrust the management of our lives to kings, priests, politicians, generals, and county commissioners."
Registered User
what primer are you using brand? and what have you been using to do the sand blasting, just somwthing hand held?
Registered User
I am using a princess auto spot blaster, it takes a little bit but it keeps the mess somewhat under control lol. The primer is valspar dtm2004
Registered User
Hello beyond, so I have hit a milestone on this car, the driver side is now rust free!!! There is still some rust around windshield and on the back end, but that's not the driver side lol. I gotta prep some of that stuff before I spray some primer down on this side. But the rocker panel is installed and looks great. I did a bunch of sandblasting around the driver side/windshield/back end, but I still have some more to do. All the welds are ground down and I wax and greased the jams and panels. I don't have any pics of that stage as I just did it. But none the less. I'll get this side in primer and then it's time to move to the passenger side, which is gonna be a timely process. There is a lot of work to do on that side lol. Anyways the car looks way better than it ever has, just gotta roll the quarter panels after some primer, put some seam sealer on and this side is ready for fillers.
Here are some pics
Tacked in place
More welds down
All the seaming done, just need to complete all the spot welds
Spot welds completed
Ground down and looks great
Ground down the quarter panel
Registered User
After a bunch of sand blasting, the rust is gone lol
Anyways that is it for now, I should be getting this in some primer in the next couple of days. I still gotta spray inside the rocker like crazy and just coat it with primer lol. I am extremely happy with how everything is coming out, and progress is coming along quite well, I seem to be getting more done lately than I did at the beginning. Not too stoked on the wiring aspect of this build lol.
Registered User
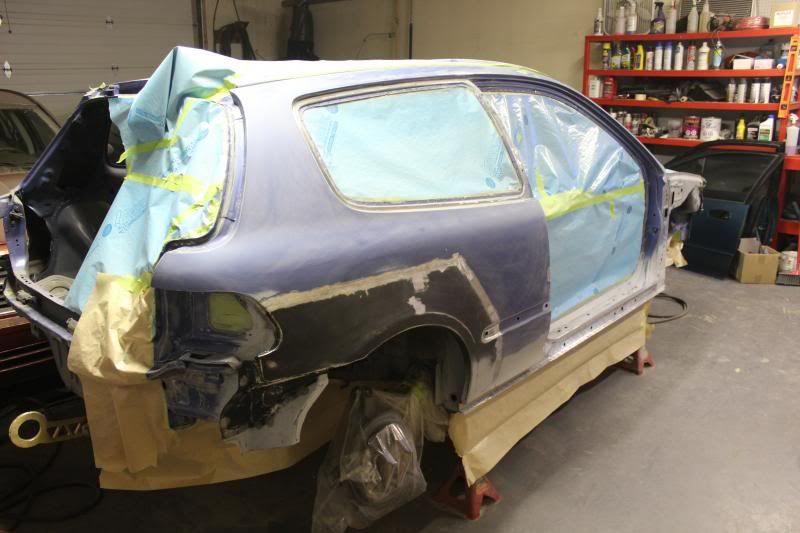
Hello Beyond, so I have made some progress on the car, and I now have all the rust removed from the driver side, and it is now in primer, I applied seam sealer to the quarter panel, and rolled it as well. I didn't put the car on the ground but I believe the fitment will be fine, the suspension was sucked up enough for me not to need to drop it on the ground to roll it. I have all the seam sealer smushed in the lip of the wheel well between the quarter panel, it worked great last time I built my rootbeer eg, so I did the same thing again. I applied some fiber glass to the quarter panel and put a guide coat on, I'll start blocking it out slowly, but my main concern now is to get onto the passenger side. The engine bay can wait currently, but as soon as the metal work is all done it'll be time to get serious on body work and as well start the wiring for my tuck eventually. I need to have a rough game plan before I paint my car incase I need to drill any holes. On another side note, I got a hell of a deal on a bunch of parts I needed, and some that are not needed. I got 2 complete doors, with everything attached(except hinges which I need), left side fender, integra front brakes non abs, head lights, tail lights, integra and civic brake mc, a d series tranny( I need a new one for the green car, mine grinds 3rd every time lol), stock civic rear brakes( drums, with everything attached though, a stock rad in great shape, with fan and hoses(just nice to have lol) stock control arms front and back lower and upper, rear hatch glass window. I think that is all lol, but I got all of that for $200, a few years ago I had to replace my friends door and paid $300 for one door cause I couldn't find one anywhere else. So I am happy with my purchase lol. Anyways here are some pics
I cleaned this part up a lot more, I didn't take a pic for some reason though
Windshield cleaned up
Testing fitment
Started sanding and taping off the car
Front wheel well cleaned up
Registered User
Primed
Time to roll quarter panels
Starting the fold
I sprayed some black primer along the seam before I seam sealed to ensure there was paint in there, with the gun it was hard to get it in there, so a spray bomb always comes in handy lol
Some fillers applied
And a guide coat
That is all for now, it is nice to see this car in some primer now and starting to fase out the blue lol, I have chosen my color for the car, it is not oem, but that's ok, I like colors that are not very common, although Lausanne green is uncommon, but I just don't want to use that color, I wish it was a little darker, but whatever maybe I'll paint another eg down the line Lausanne green. I don't think I'll reveal the color until I am ready to start painting some parts. I should have some updates in the next week or so, we will see how much I work on the car this week.
Registered User
Your PM box is full
I was gonna share a youtube vid (some inspiration):
http://www.youtube.com/watch?v=Xh19L_w2k2c
Guy is a metal working god.
"Anarchism is not a romantic fable but the hardheaded realization, based on five thousand years of experience, that we cannot entrust the management of our lives to kings, priests, politicians, generals, and county commissioners."
Registered User
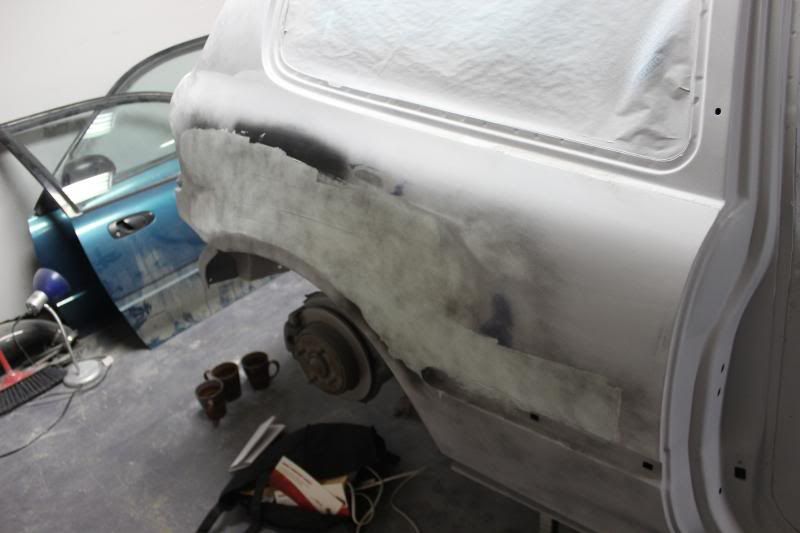
Hello Beyond, so it has been a little bit since I have last updated the thread, due to I was trying to recover from an injury that came out of no where in my hip and groin, it basically left me useless with little to no strength. So I have been resting at home and missing work due to this crap. But the last couple days I have been feeling better and able to stand for more than 5 minutes without curling into a ball from strain, I think it had to do with lymph nodes and a nerve. But anyways I am now able to start working on my car again and I have decided to quit being a pussy and start the other side. I almost have the driver side quarter panel in shape and straight. I just need to finish sanding a couple spots of filler, spray some more primer and a guide coat and check it out, I do have one spot that will need a little filler, it was a high spot I had to knock down so hopefully I can get it straight first try lol, shoot that spot with primer and be done with that quarter panel. As for the passenger side I have removed the door and started to split the replacment panel apart. I have all the seam sealer off, all the spot welds center punched and started to remove the spot welds, I am not very far into it yet as there are prolly a good 150-200 to remove, but I have about 25 or so done I think lol. But basically I need to blow this panel right apart into every piece separated so I can patch all the pieces in one by one in the layers I needs to be completed in. I will be starting with the inner rocker panel, get that re secured to the floor pans and the seams I'll be joining into. Then the front subframe and jack point panel will be replaced onto of the inner rocker, then onto the outer rocker panel and front door hinge, just the lower section. Then quarter panel. It should all go smoothly I believe, I have spent enough time staring at it trying to figure out what to do lol. Any ways here are some pics, I'll prolly go pretty hard on this soon as I wanna see some new progress, the passenger side is hella ugly lol.
Second layer of fiber glass, I forgot to take pics I guess between layers, I made sure no fillers were on bare metal finishing removing the filler, fillers contain water which means rust on bare metal.
Sanded and put down another layer of primer
Onto the much easier to sand body filler lol
A little more exposed, took some paper off
Started sanding but did not finish, got hurt that night somehow
And the horror side
Removed seam sealer
The layers of your door jam
Showing the layers of the inner rocker and jack point piece and floor pan
Inner rocker on the inside, removing it from door jam and floor pan
That is all for now, I got the rest of my black interior cleaned up, I also can another set of door panels to use, to get home and discover it had a nick in it, oh well I'll find another one lol. I hope to have an update soon with some cool stuff in it hopefully lol.
Registered User
your panel alignment has definitely improved.
Registered User
Hello Beyond, so I have been working on the car a little bit and have started the inner rocker panel. I almost have it welded in(as much as I can cause there is much more to replace), but I am atleast 75% complete what I need to do on it. The next step is to do the jack support, once I am done the inner rocker, I have some seam sealer to remove, some spot welds to drill out, then weld the jack support then onto the outer rocker panel followed by the quarter panel. I have more welded than what is in the pictures, just haven't taken one yet. I almost have the drivers rear quarter panel nice and straight, I have a little more filler to block out, then we will see it it's good, I think I am going to have one low spot that will need attention. But other than that it is looking good. I welded up some of the remaining patches in the engine bay, I have 4 more small patches and 2 holes left, some grinding, scuff the bay down and it's ready for primer, I will probably repair all the rust around the windshield and cowel area and spray that section at the same time, but the car is coming around to the point where metal work is completed. Anyways here are some pictures
Jack point removed, or subframe plate or whatever you want to call it
It will require a little attention on the inside
How the inside is structured for reference
Inner rocker removed
All apart, that was a lot of spot welds
Driver side quarter panel in some wet primer not quite right yet
Some fillers
Note the welding on left and right side of fire wall
Some finishing putty, I have not sanded this yet, hoping it comes out straight after this
Registered User
The nightmare
Removing the inner rocker from floor pan and cutting it out
It was hard to drill out the spot welds on such a crumpled up area
Good bye you beat to shit inner rocker
Test fitment
And we are good, I removed all the rust off the panel and sprayed it with some primer
Note the slot I had to cut in the piece to be able to slide it into place, because of the tight fitment, I needed to have some room to get it in enough to get the corner past the remaining rocker panel, it worked great and I'll be able to weld it up when I take the outer rocker off
Ground down the edges and ready for install
Don't mind the bent up jack point, it was so smashed in that was all I could do to get the new inner rocker in place lol
Back in shape, yay
Anyways that is all I have uploaded so far, should have a bunch more done in the near future, I'd like to get that side rust free and the engine bay done soon, I have some rust to fix on the floor in the car, I'll have to figure something out for that.
Registered User
Keep the updates coming!
 Posting Permissions

 Quote
Quote


