If you need a shifter extension, talk to me before mail ordering one. I can help you out (if it doesnt work for you out of the box)
Check out if rcts still has the RPS SYN-R-G flywheels. They were blowing em out for 400$ last time i bought one.

 Registered User

If you need a shifter extension, talk to me before mail ordering one. I can help you out (if it doesnt work for you out of the box)
Check out if rcts still has the RPS SYN-R-G flywheels. They were blowing em out for 400$ last time i bought one.
Registered User
Thanks! Luckily for me, the stock supra shifter is pretty much where the old Starion shifter sits, but I'm sure I'll be needing your service on a few things down the road.Originally posted by sr20s14zenki
If you need a shifter extension, talk to me before mail ordering one. I can help you out (if it doesnt work for you out of the box)
Check out if rcts still has the RPS SYN-R-G flywheels. They were blowing em out for 400$ last time i bought one.
I'll keep that in mind, I'm still waiting for Driftmotion to reply back about the flywheel situation.
Registered User
You lucky bastard lol. The most obscure swap, and it works better lolOriginally posted by N1vek
Thanks! Luckily for me, the stock supra shifter is pretty much where the old Starion shifter sits, but I'm sure I'll be needing your service on a few things down the road.
I'll keep that in mind, I'm still waiting for Driftmotion to reply back about the flywheel situation.
Registered User
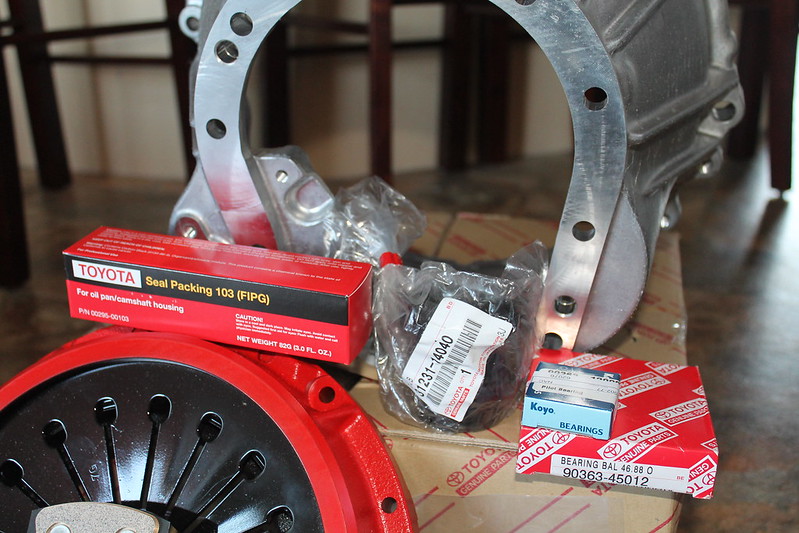
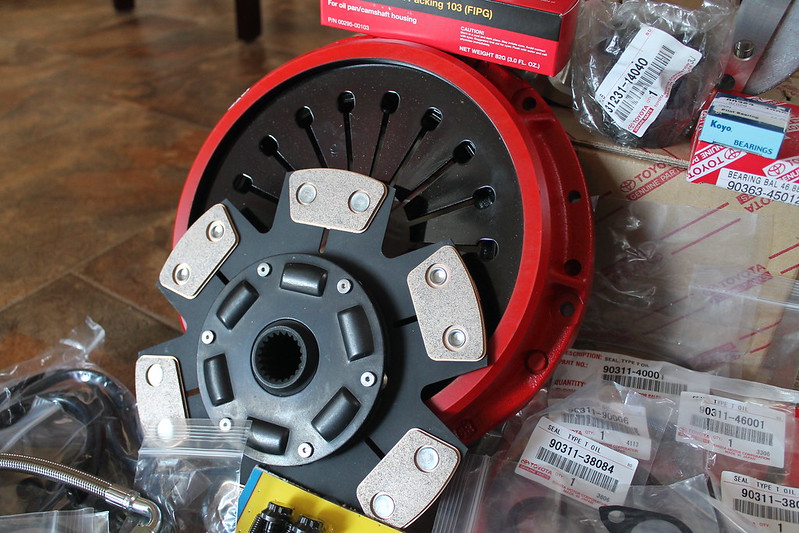
Parts from Driftmotion came in! Just waiting on the backordered Flywheel.
Various OEM Toyota gaskets and seals
1JZ/2JZ to R154 Bellhousing
ARP Flywheel bolt, 1JZ to Starion PS line, some fancy-ass thermal intake gasket and various fasteners
Action Clutch Stage something. Rated for ~500whp
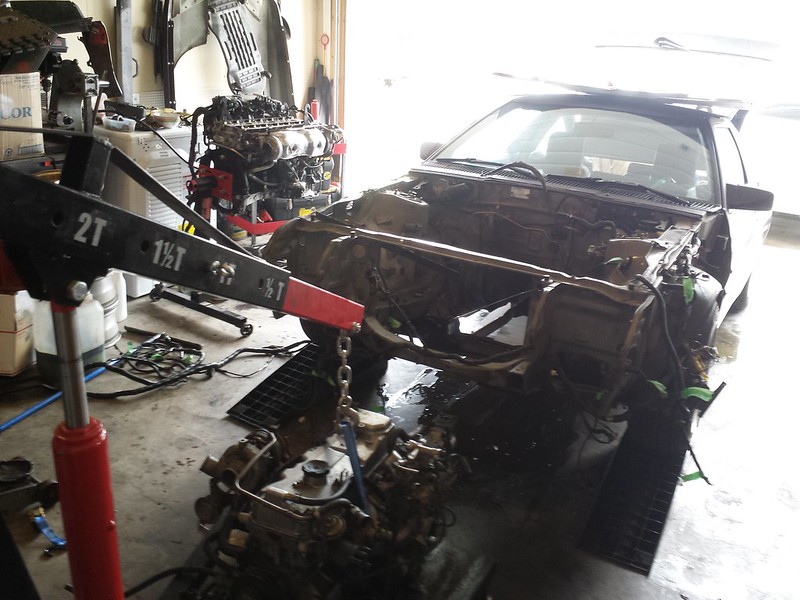
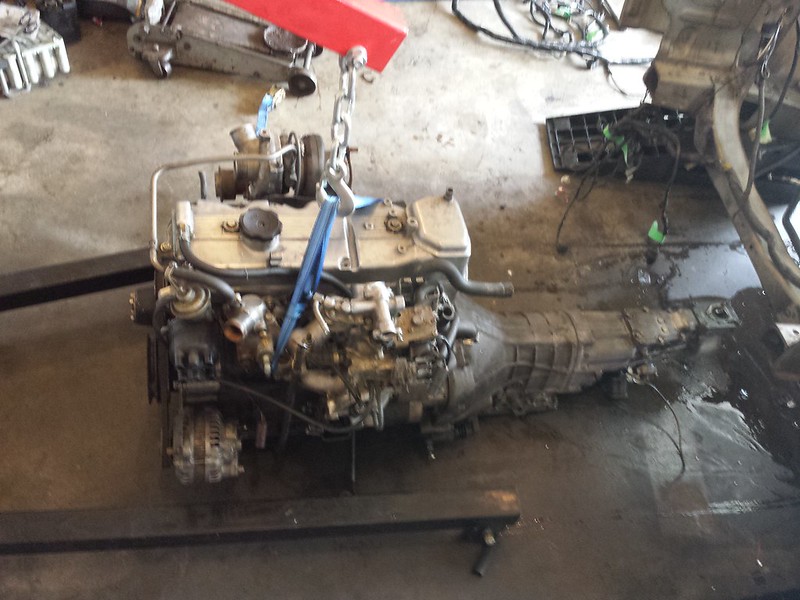
Pulled the G54B out with the help of Jltabot. Thanks bud!
OH HAAI!
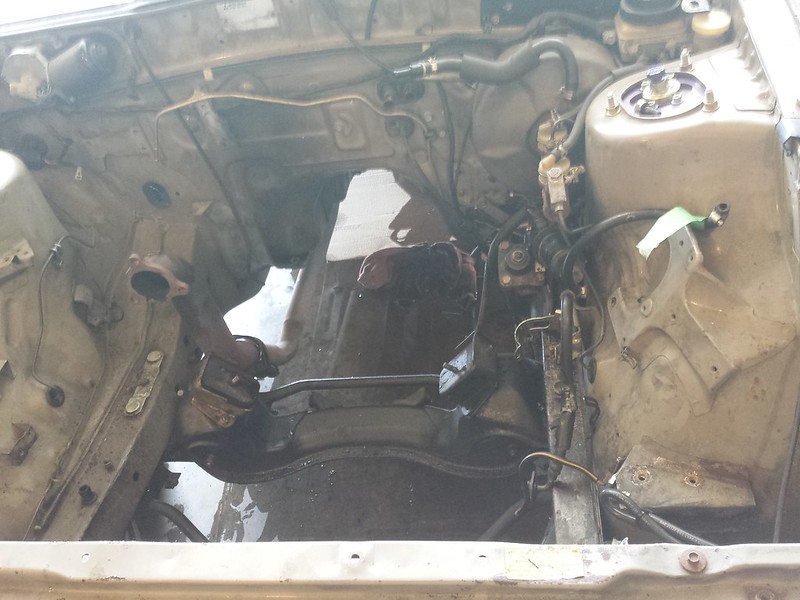
The plan is to clean the engine bay up, shave a few brackets, paint the booster and steering box, delete a few more lines, re-route a few more wires and finally paint the whole bay. Excuse the crappy cellphone photos and terrible lighting.
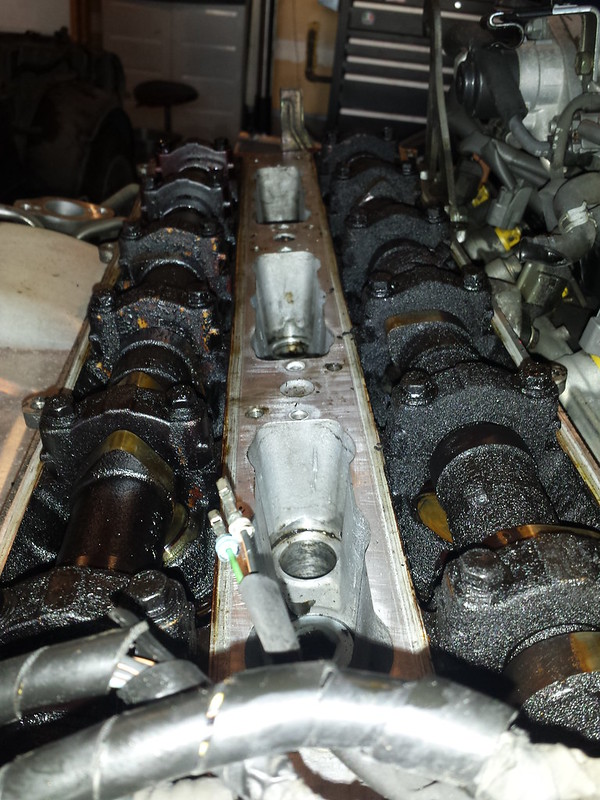
Finally started tearing the 1JZ apart. Not pretty. Not sure if not maintained properly, caused from sitting for a long time, a faulty PCV valve or a bit of all.
Registered User
Any news on the progress?
Registered User
So, after 4 years of silence, I finally have something worthy of an update!
BEHOLD!
Before:
After:
Before:
After:
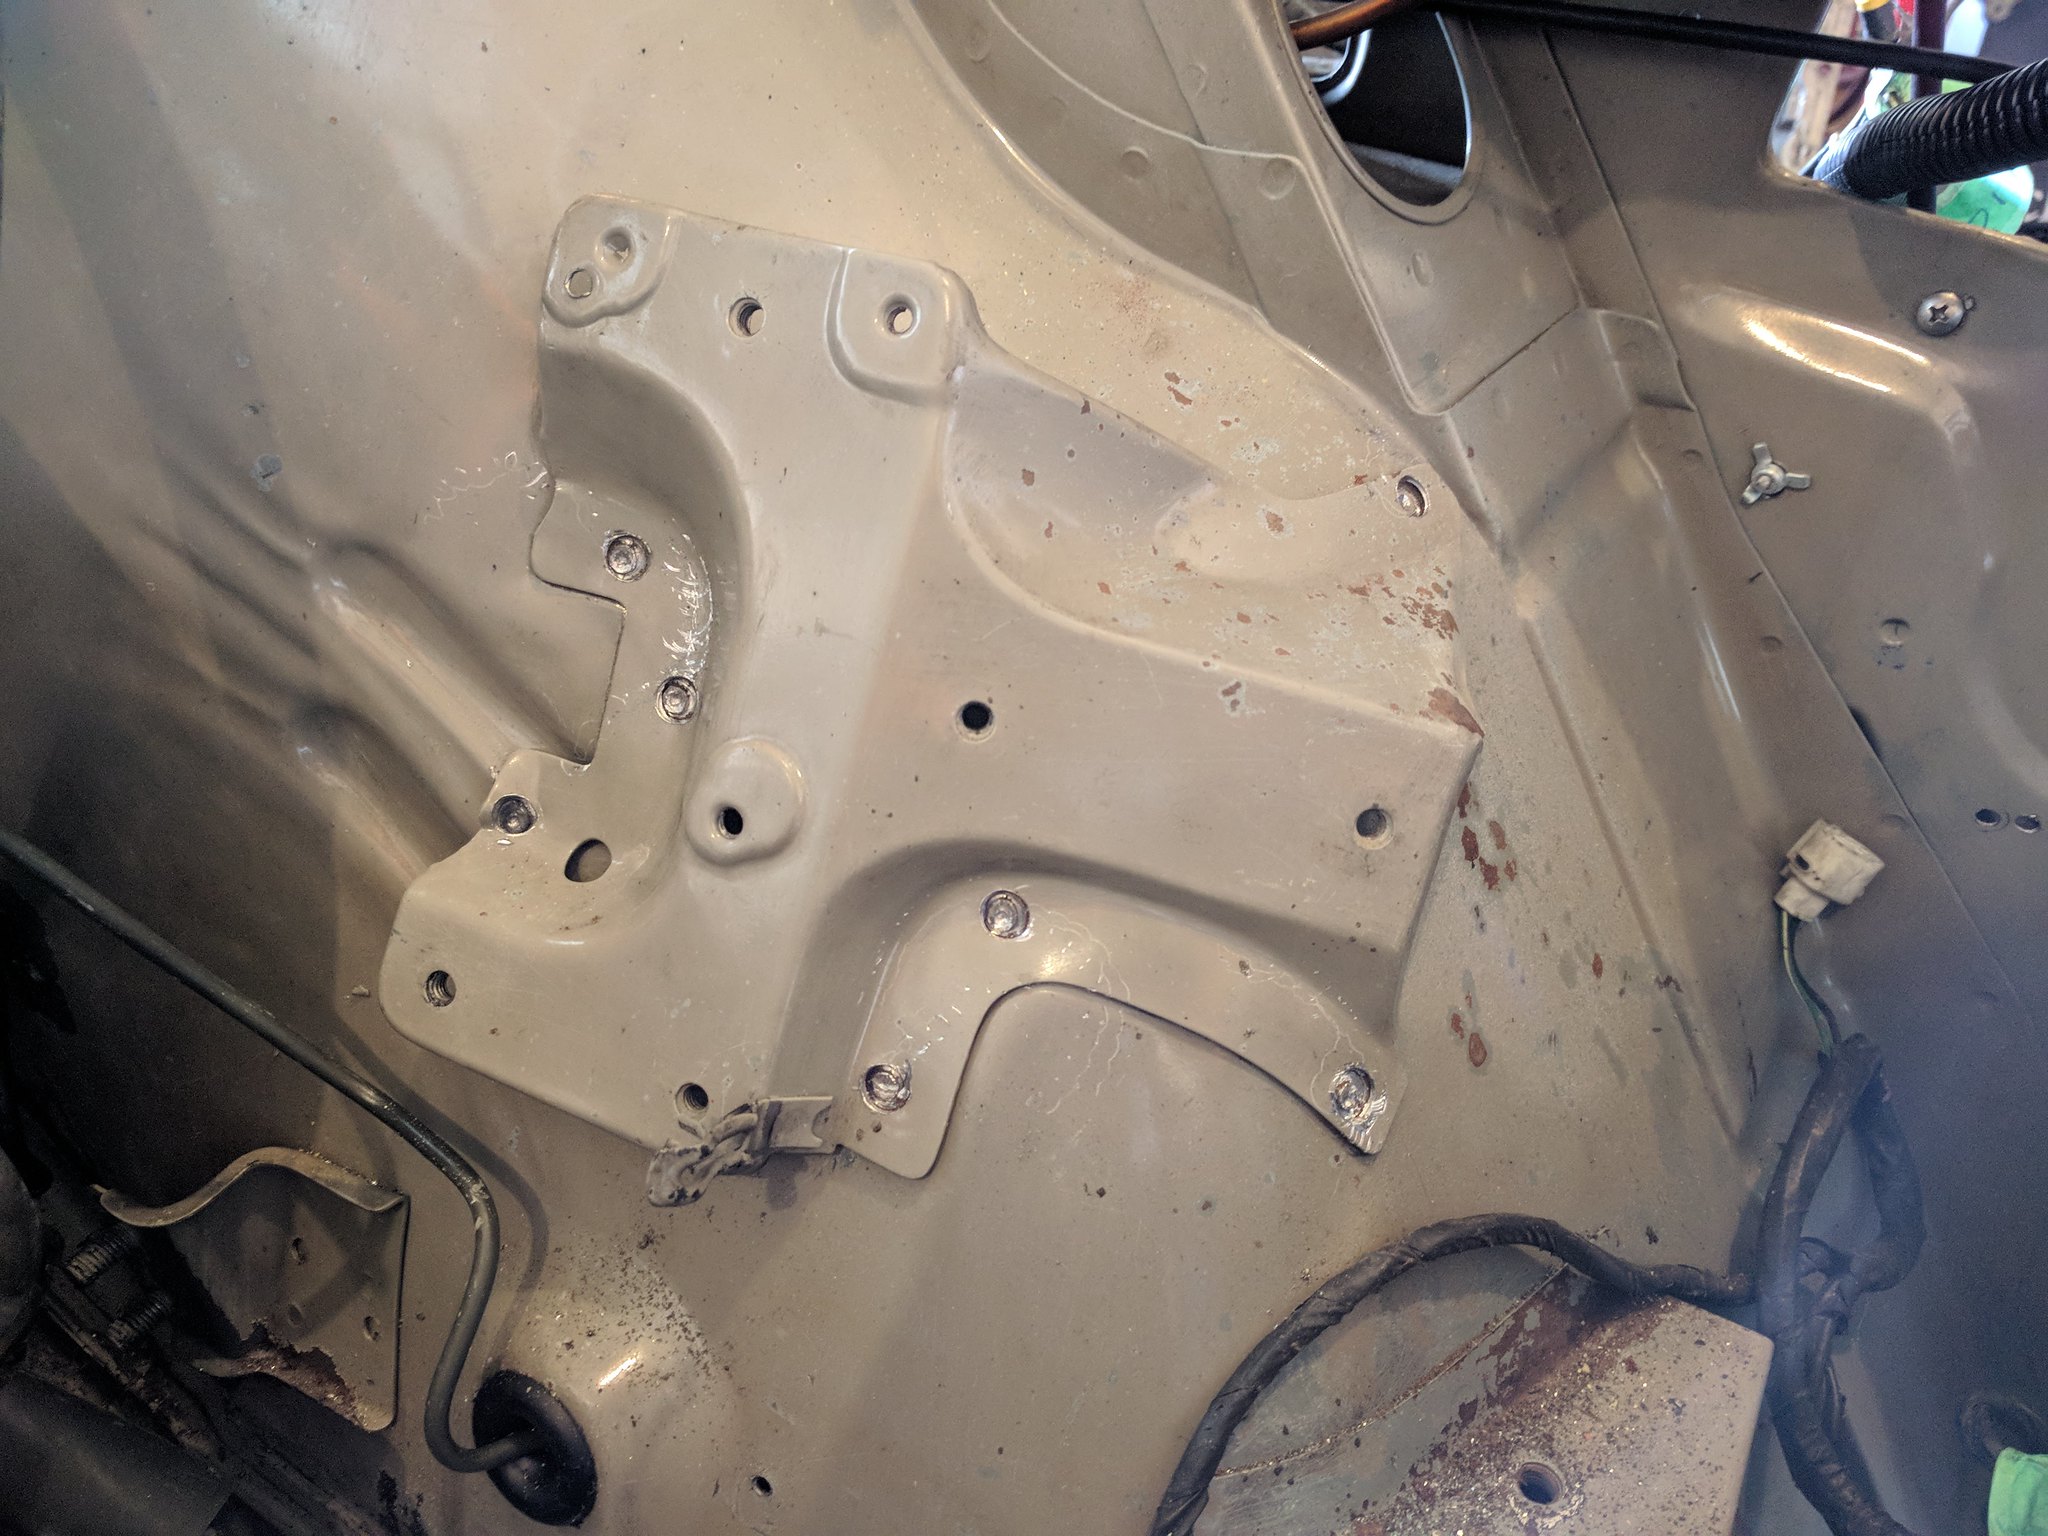
That's right fellas! Ya boi removed some brackets!
See ya'll in another 4 years!
Registered User

Y3ahhhhhh boyeeeee!
Originally Posted by killramos
 This quote is hidden because you are ignoring this member. Show Quote
Registered User
This is awesome! I must have missed this thread years ago
Registered User
Ya'll may be asking what REALLY happened to the project. Hold on to your seat fellas cause what i'm about to tell you will shock you! The reason why I put the project on hold was because...
I got a girlfriend.
That's right. Ya dude got a girl. Then life happened and the project was put on hold. Eventually, I got sick and tired of people asking when I was going to work on my car, so here you go you naggers.
ARE YOU HAPPY NOW?!?
In all seriousness though, I missed driving the car and I was slowly drifting away from my Dad so I thought it would be a good way to spend some time with him and finish the car. And really, working on the car without him just didn't feel right. Love you Pops!
So, without further ado, Some real updates!
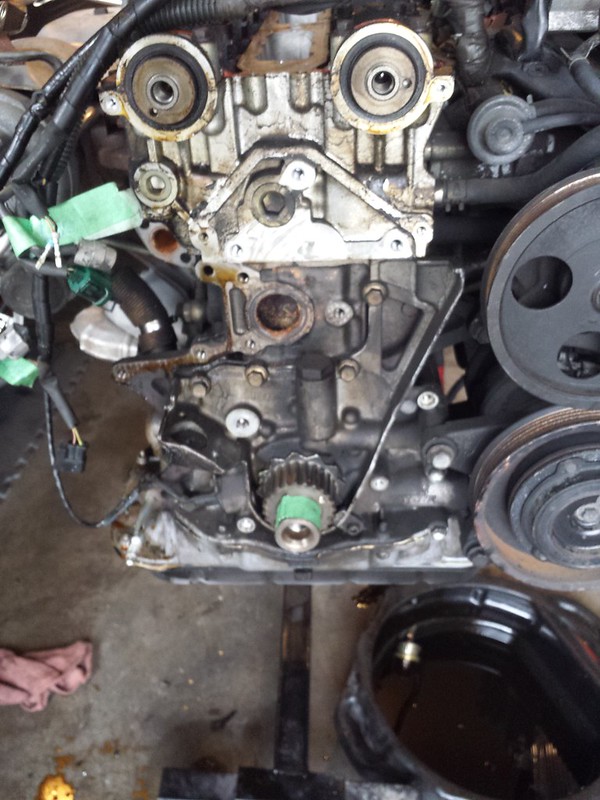
Decided that only real way to see the condition of the engine/clean it was to take it apart. Re-lapped the valves just incase and installed new valve stem seals.
The block looked alright, some pitting on the surface near one of the coolant passageways, but hopefully it's nothing.
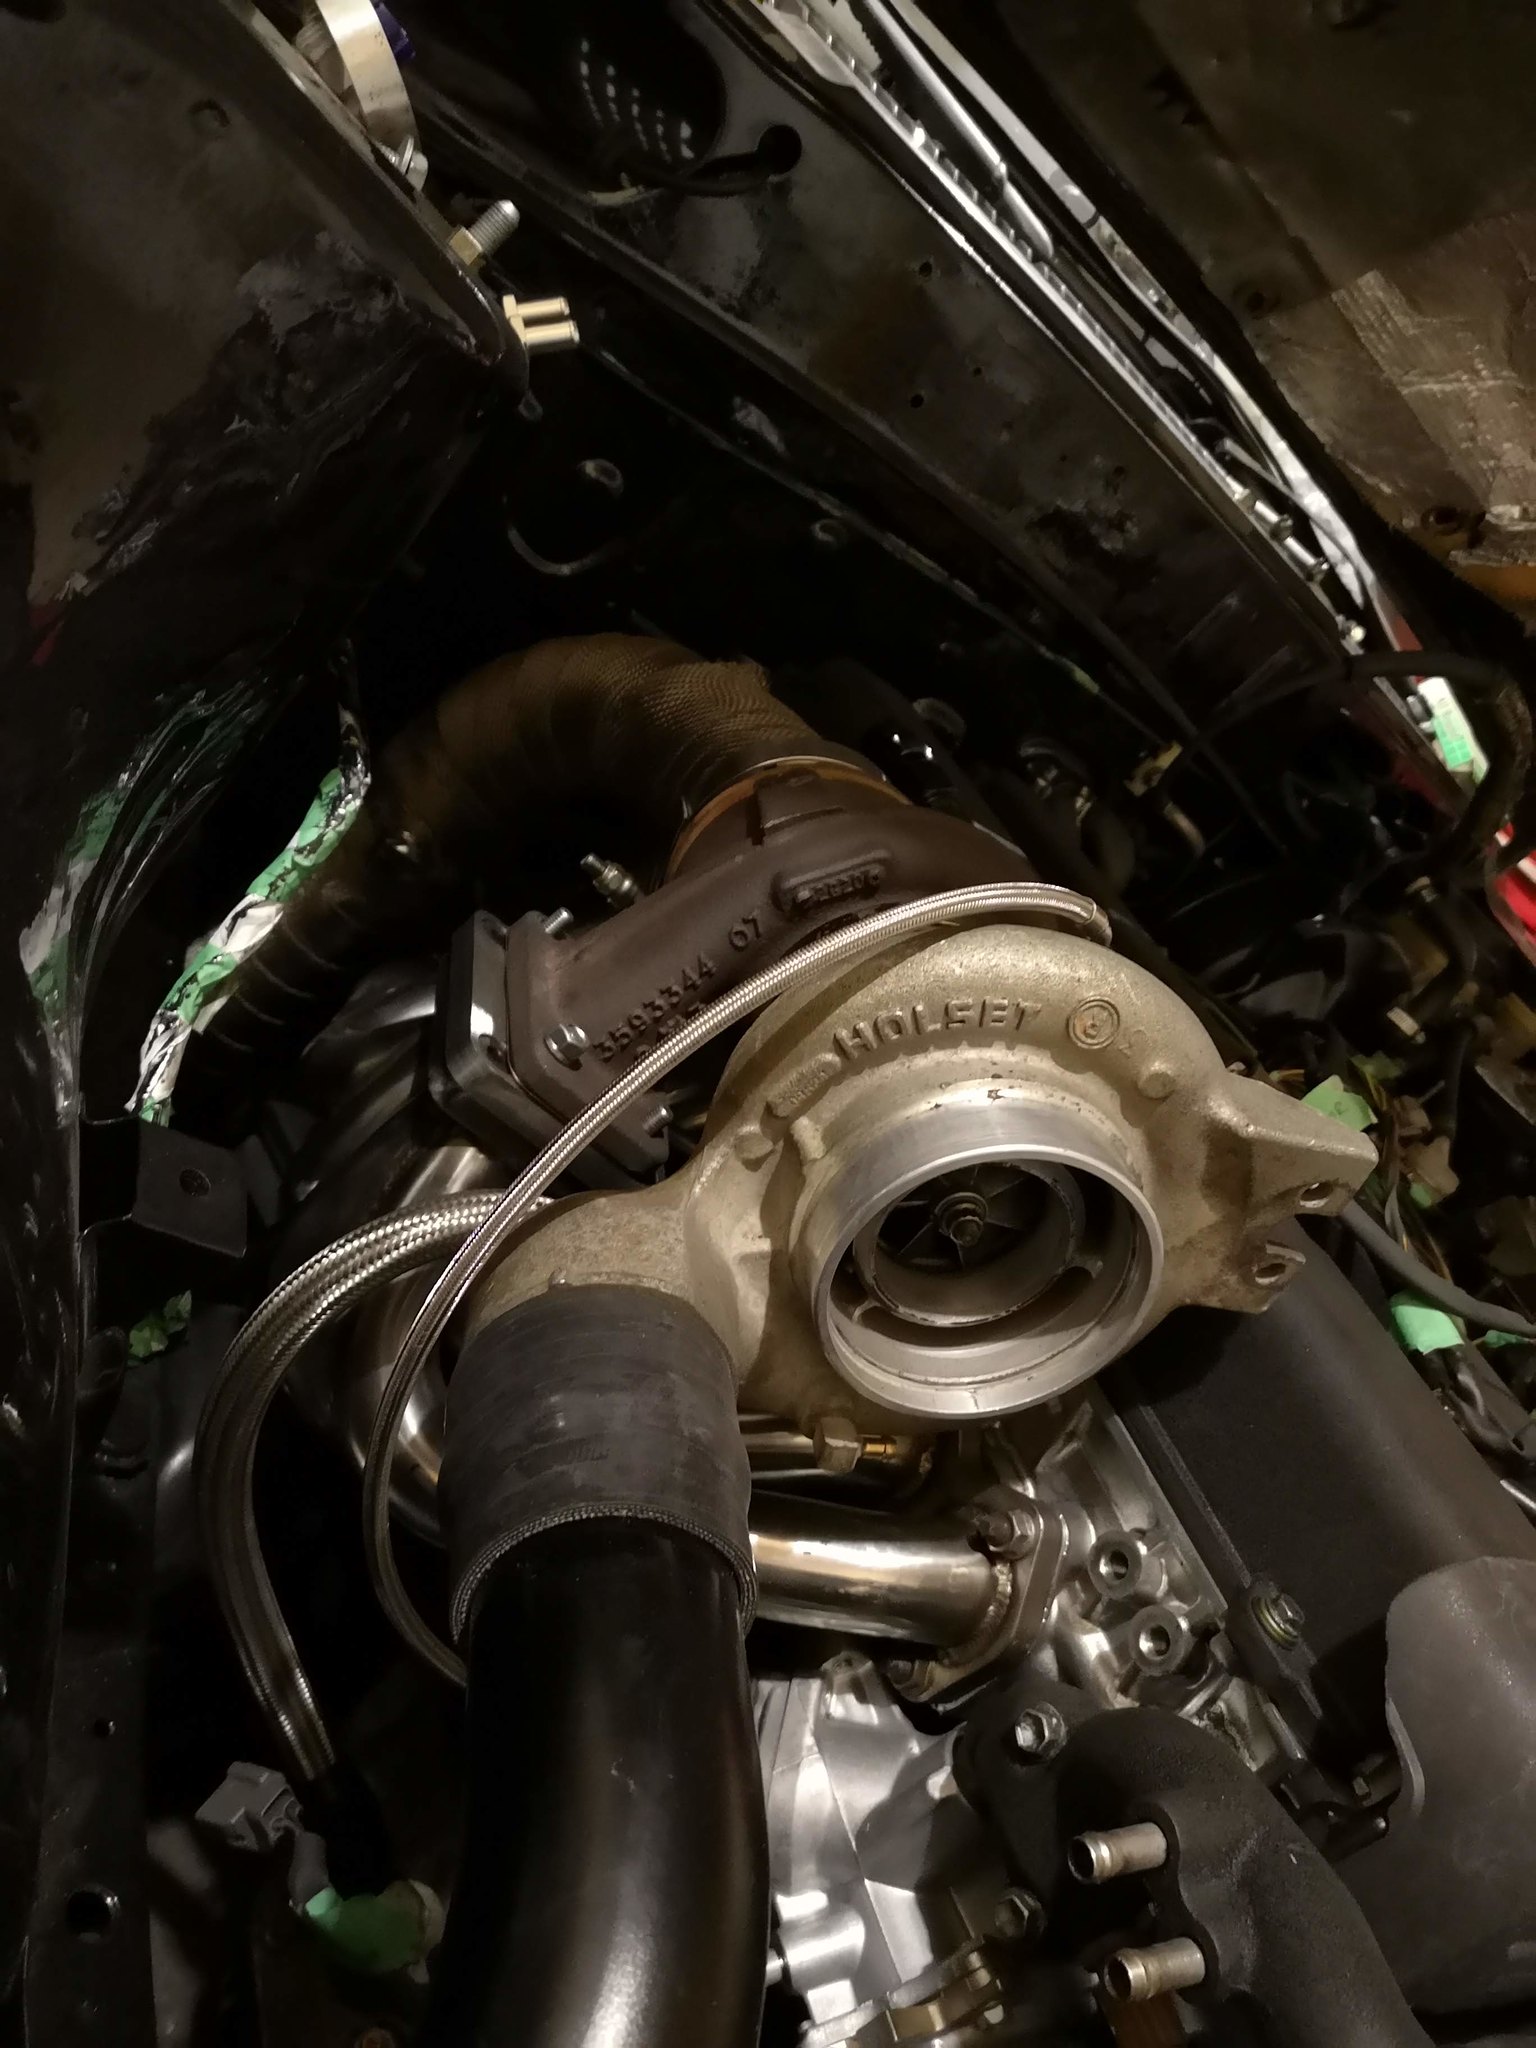
Then I looked at this thing and said Fuck that noise. (Plus I completely forgot where I put all the turbo piping.)
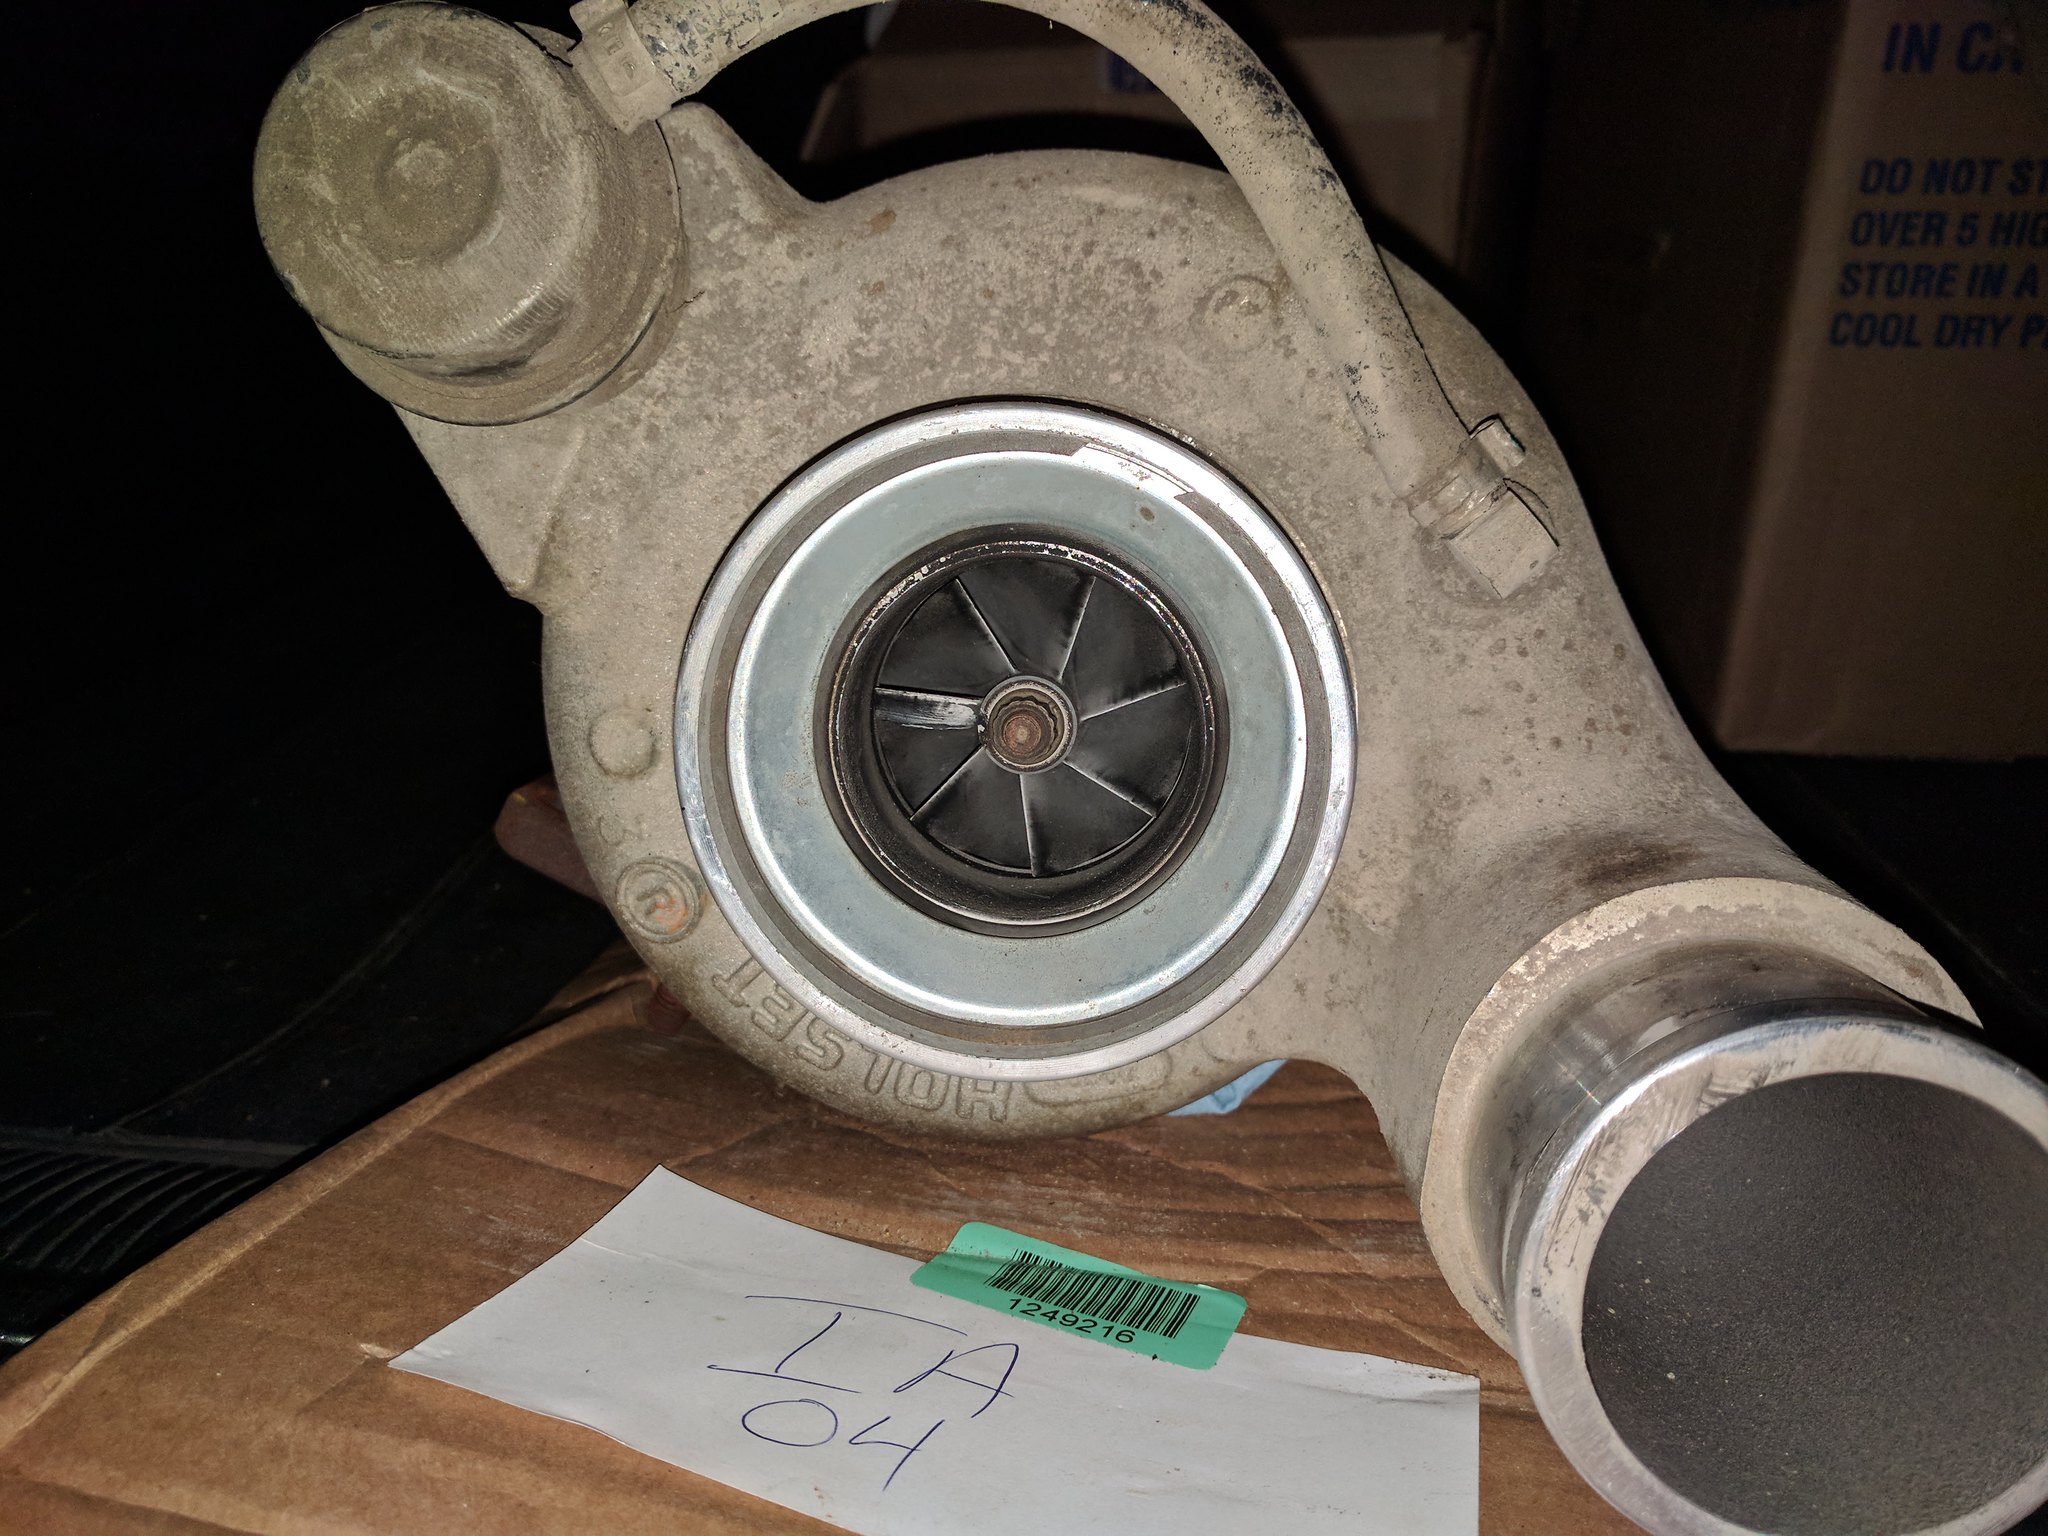
A few minutes on Kijiji, a quick drive to Olds and $160 later and I got this guy. Came off a 2003? Cummins. I believe it's a HY-35?
Honestly, I don't know how well it'll work with everything, but the internet said it's alright so yeah. I mean, everything on the internet is always right. Right?
So then I bought this:
Which came with this:
Along with a 3" DP, turbo oil kit and various other hooplah. Honestly, not a bad kit from Driftmotion.
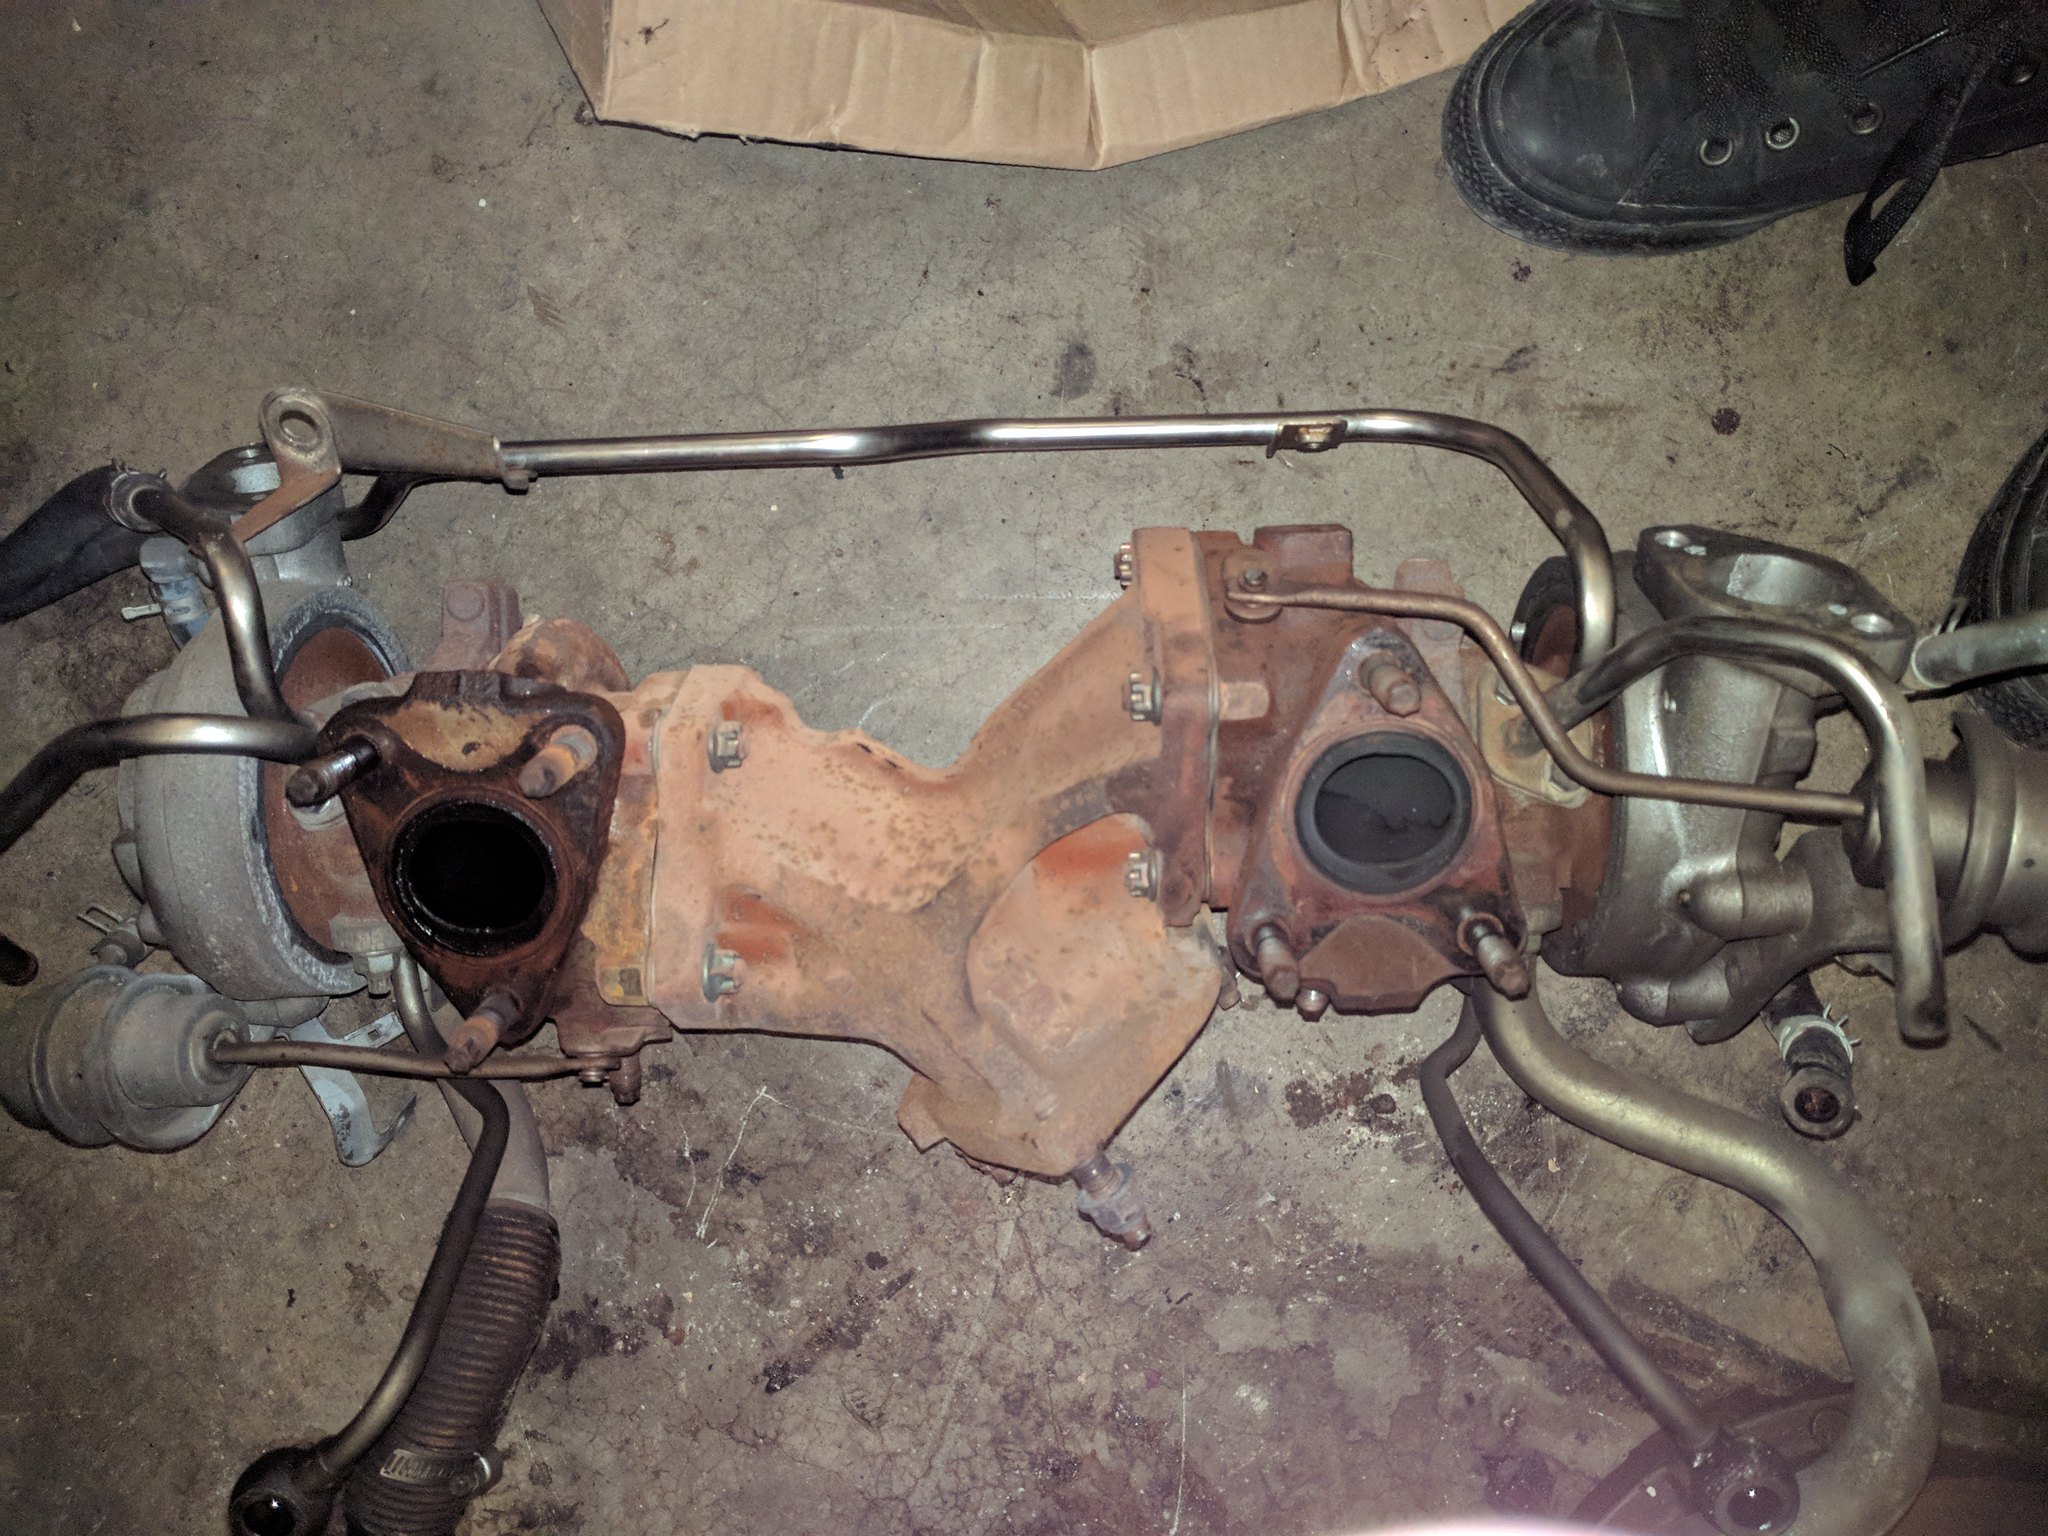
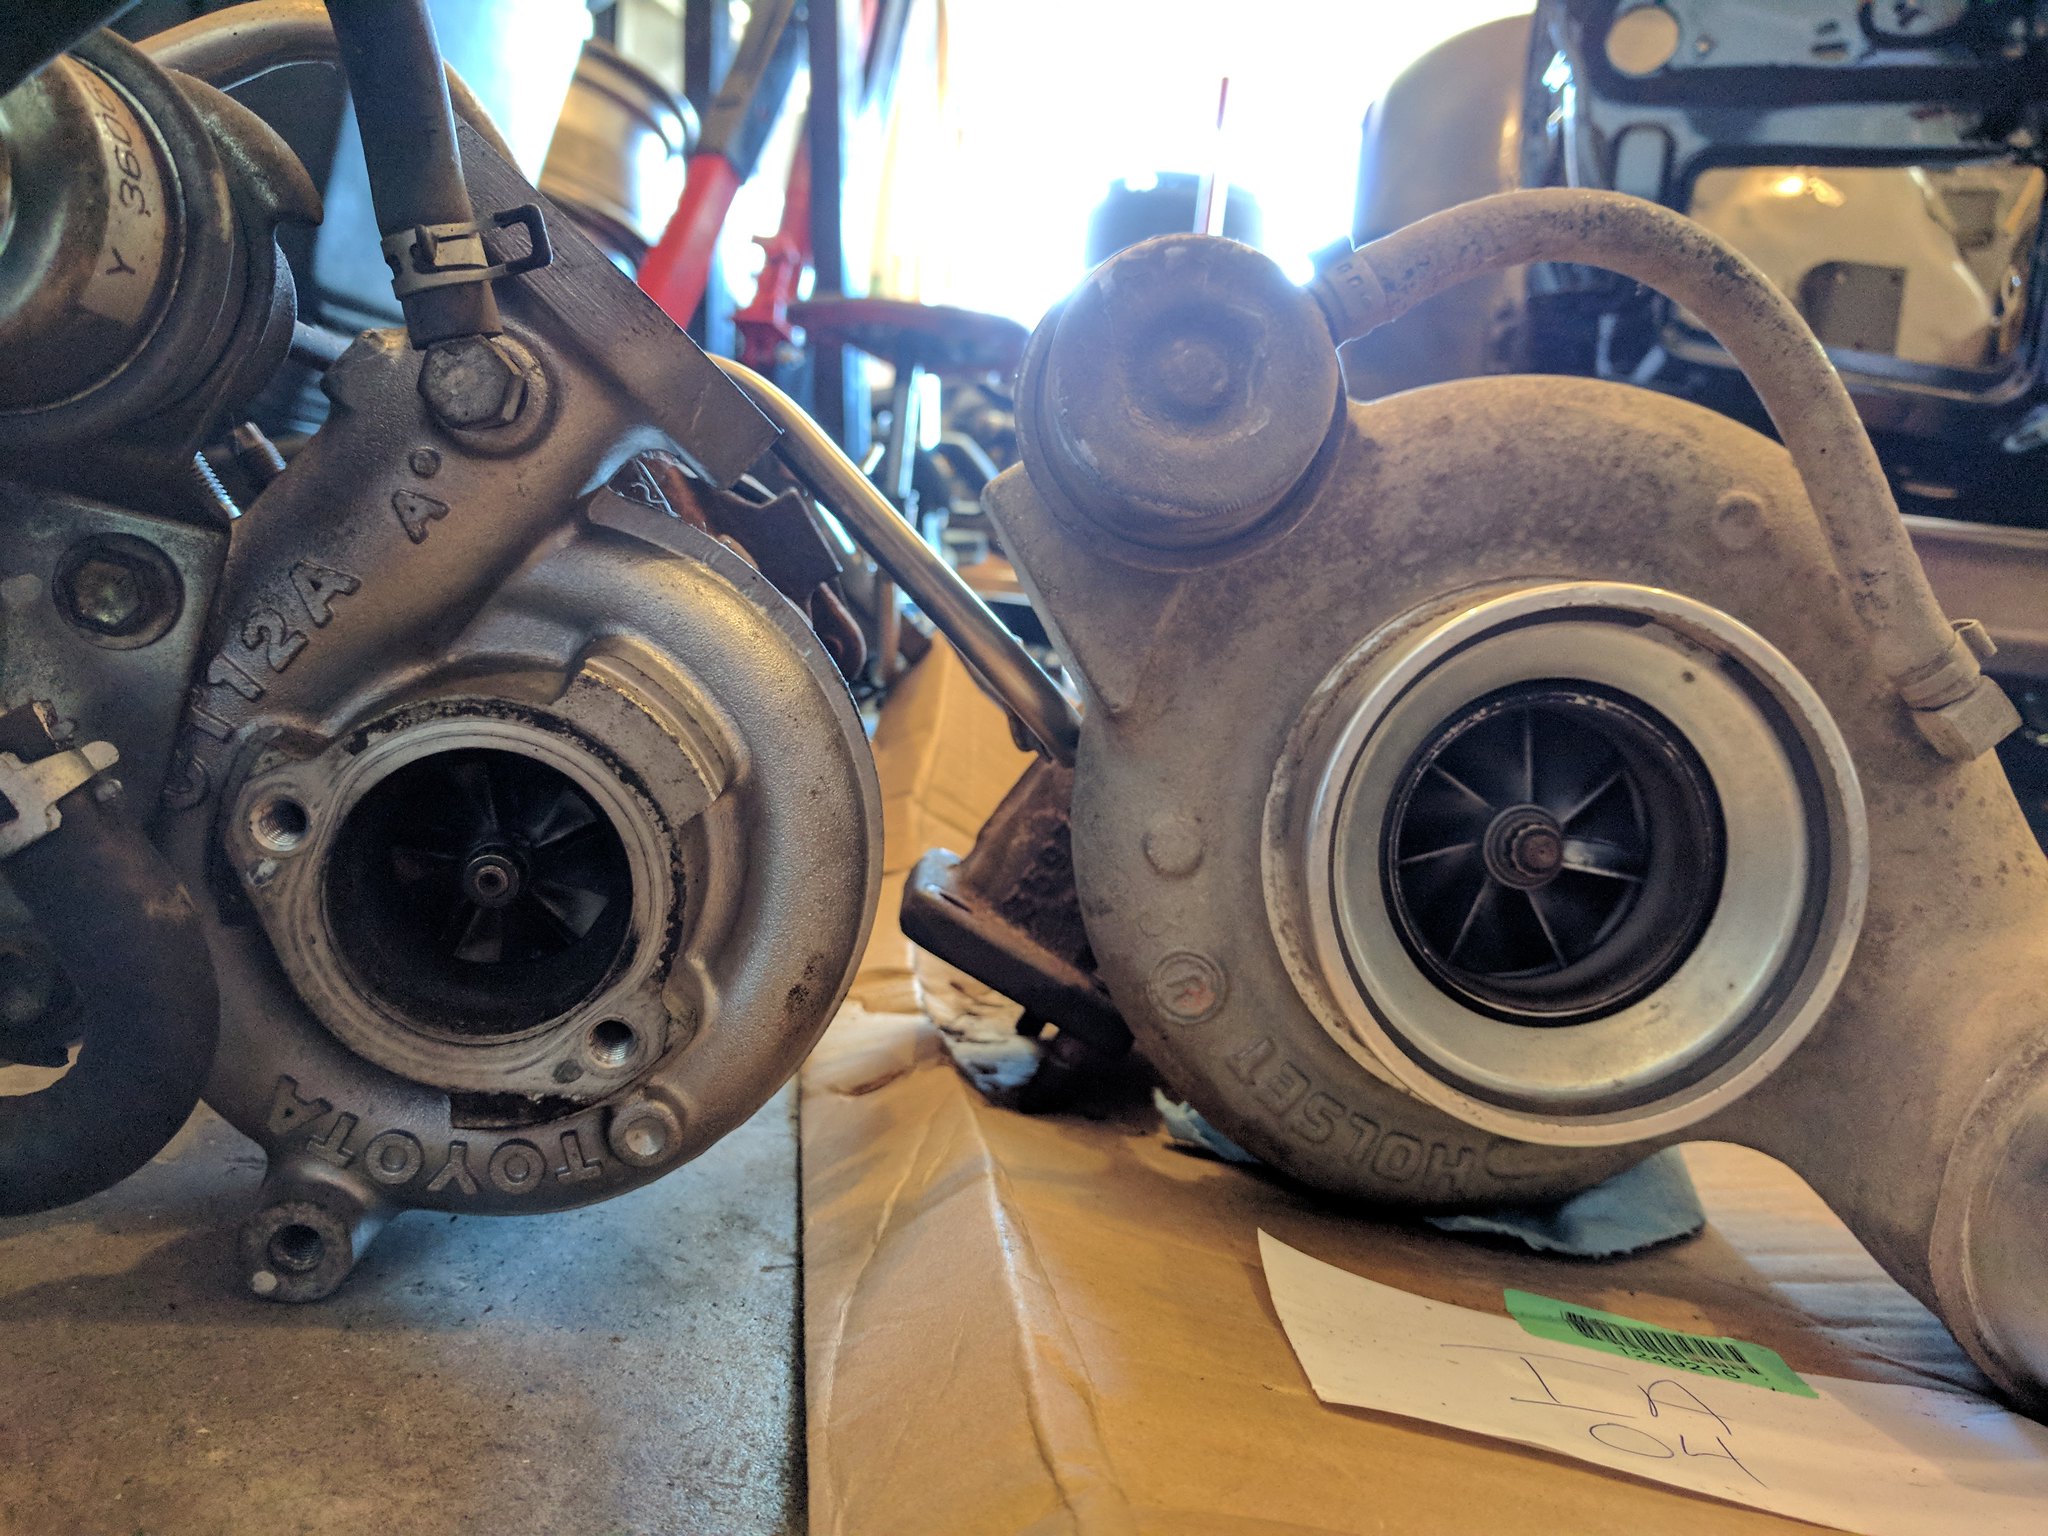
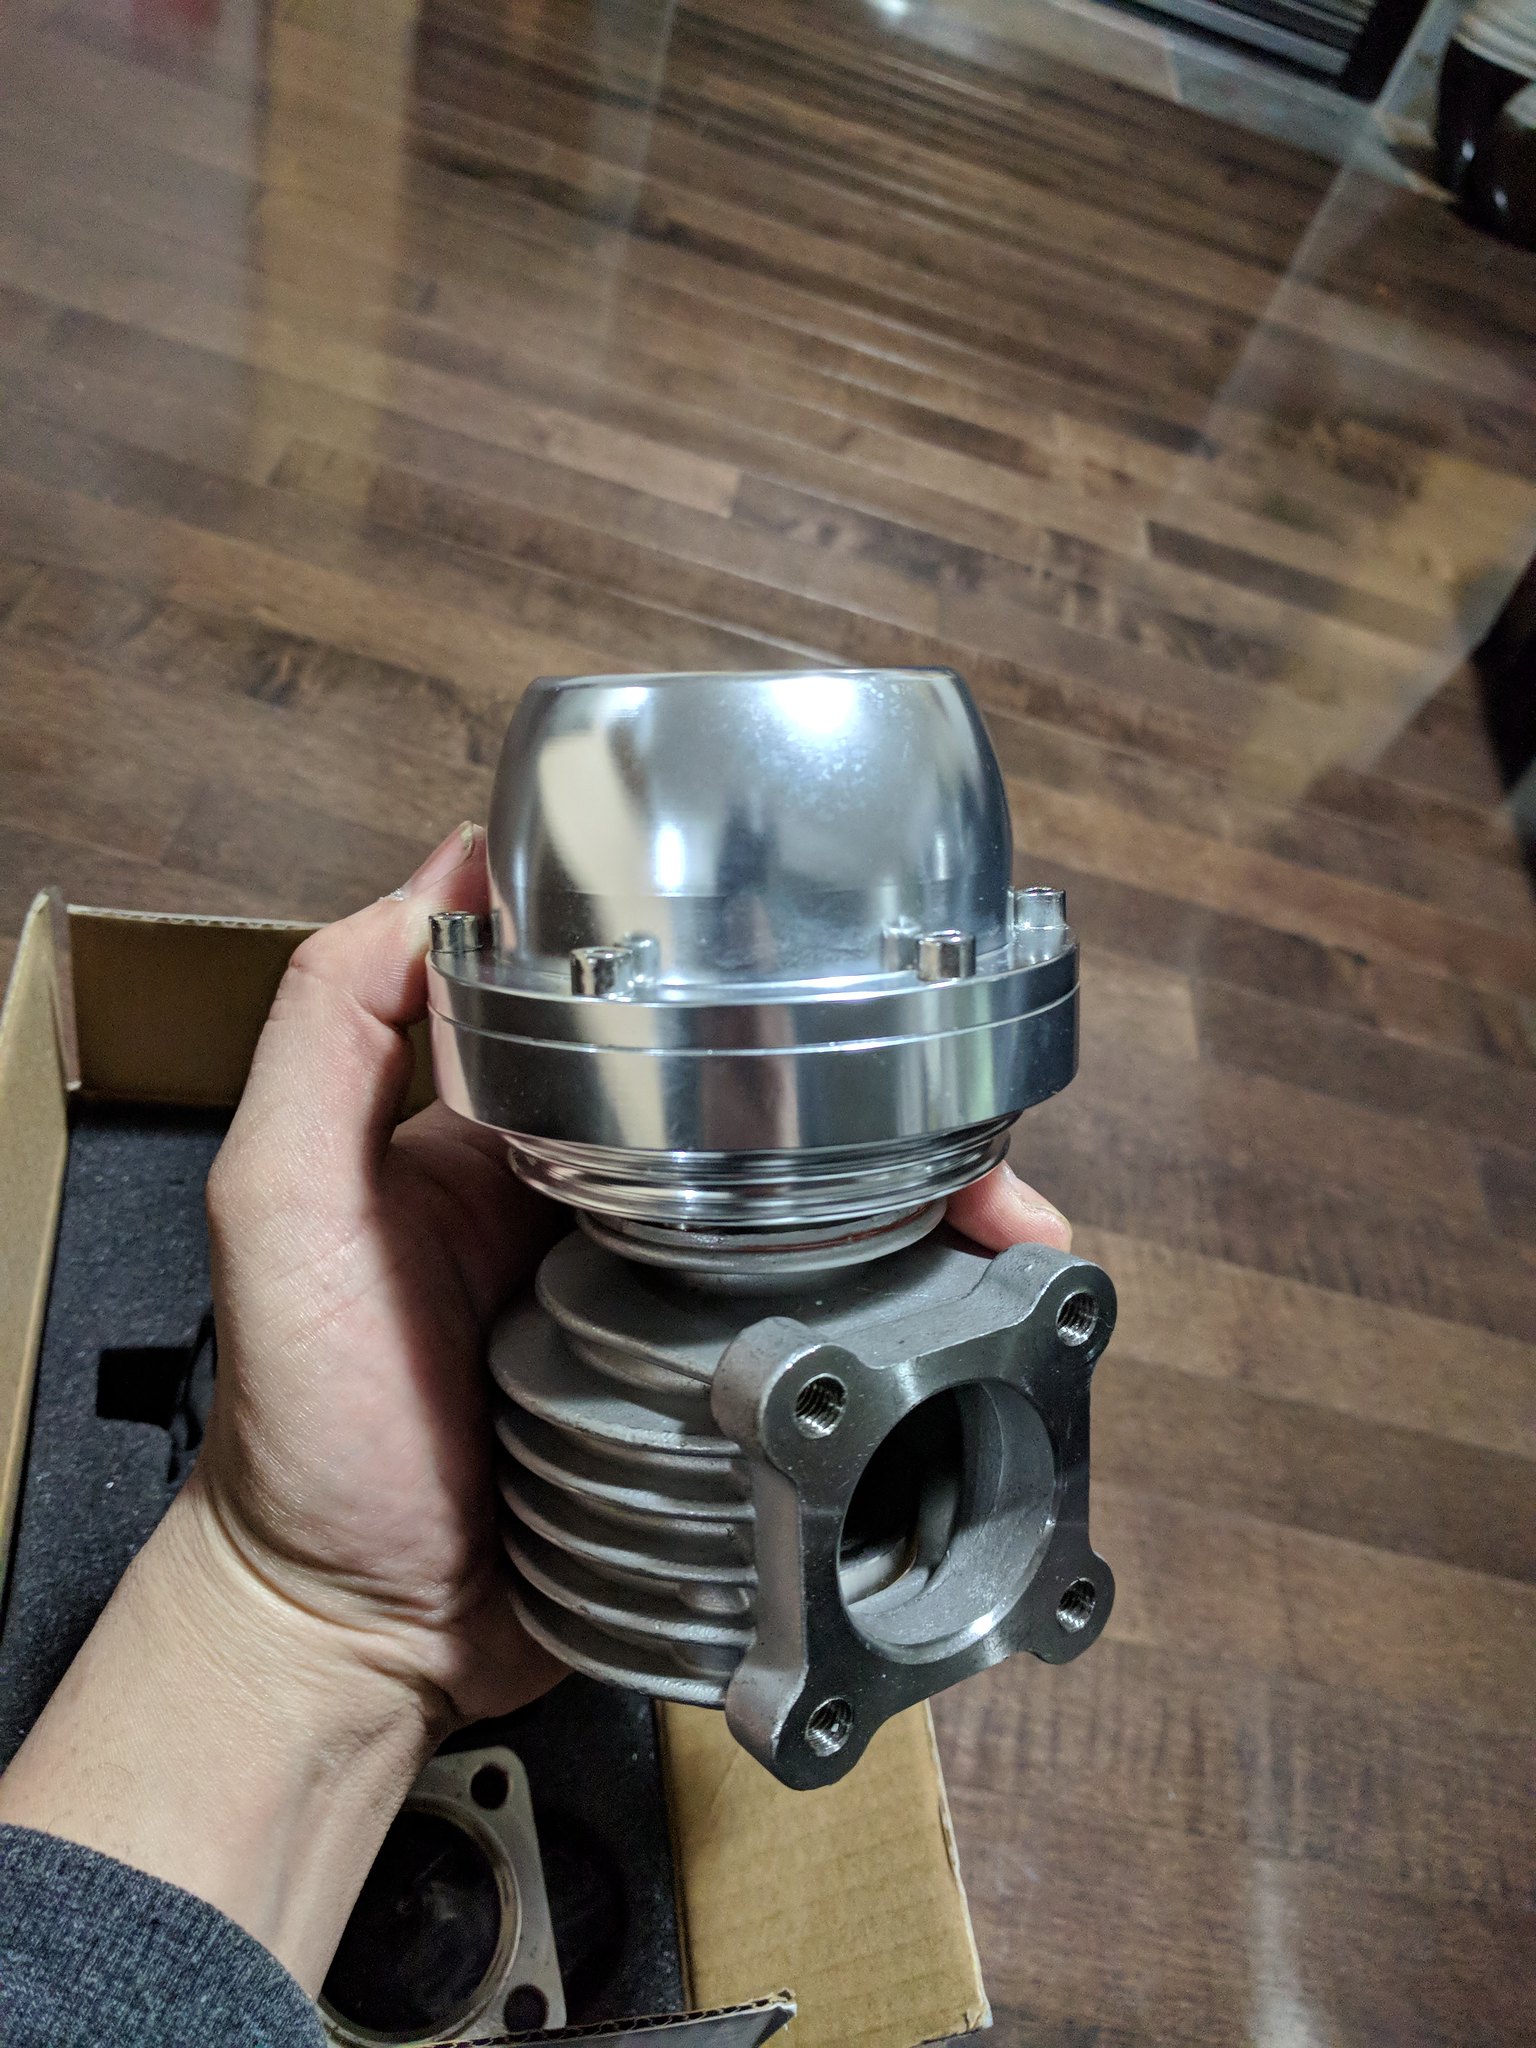
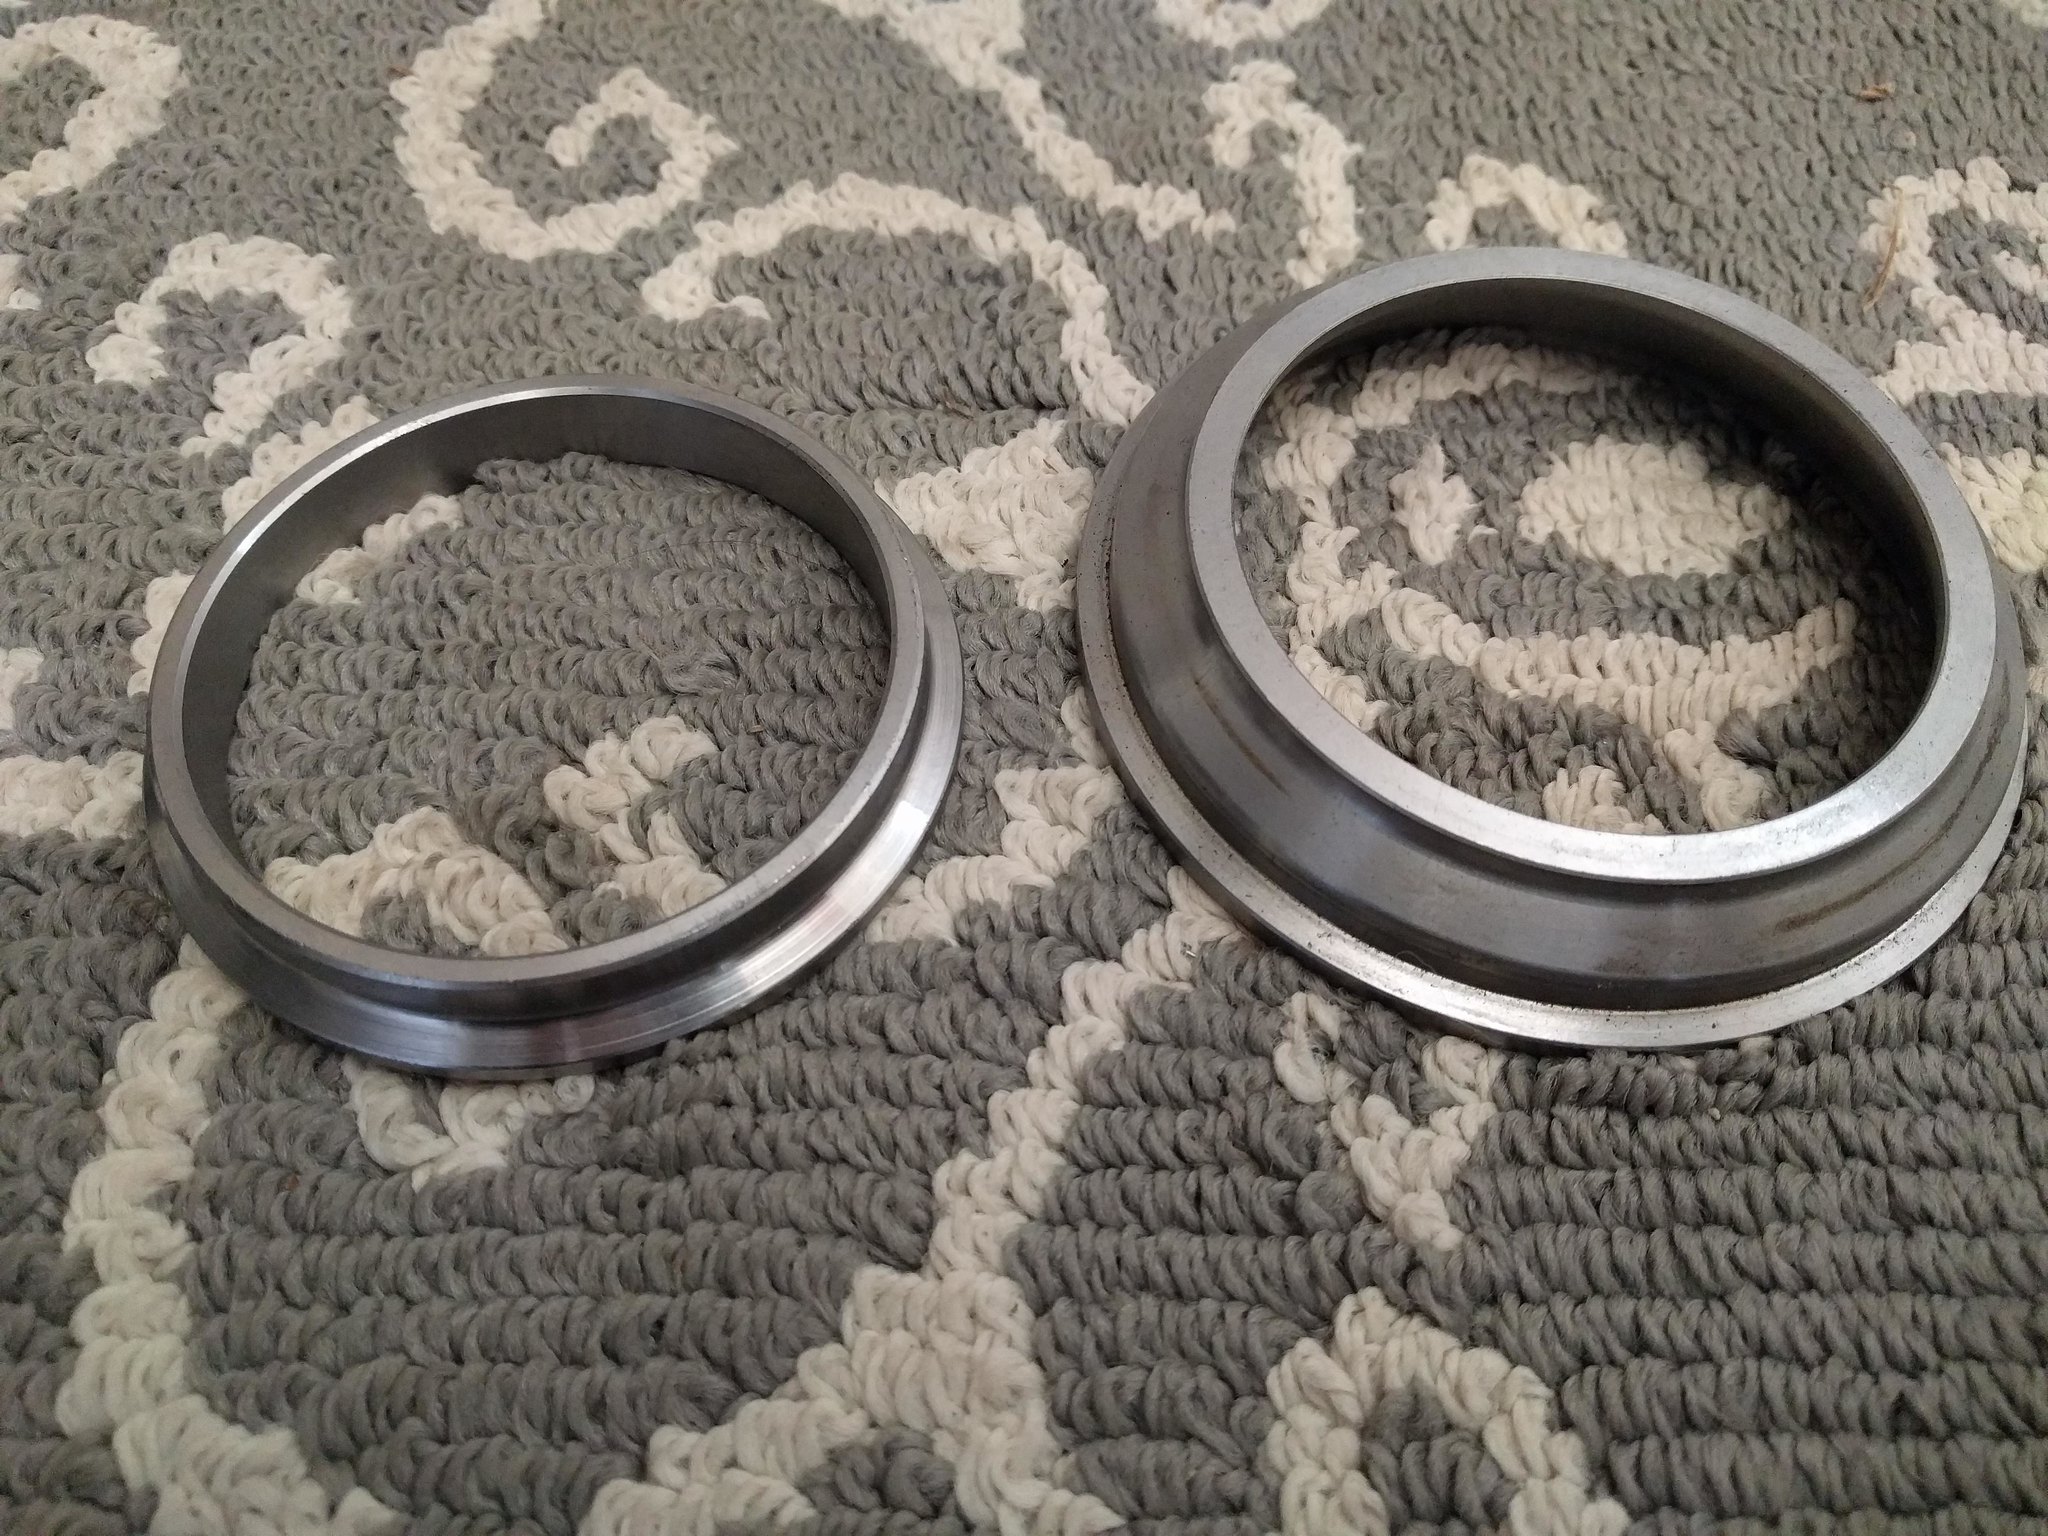
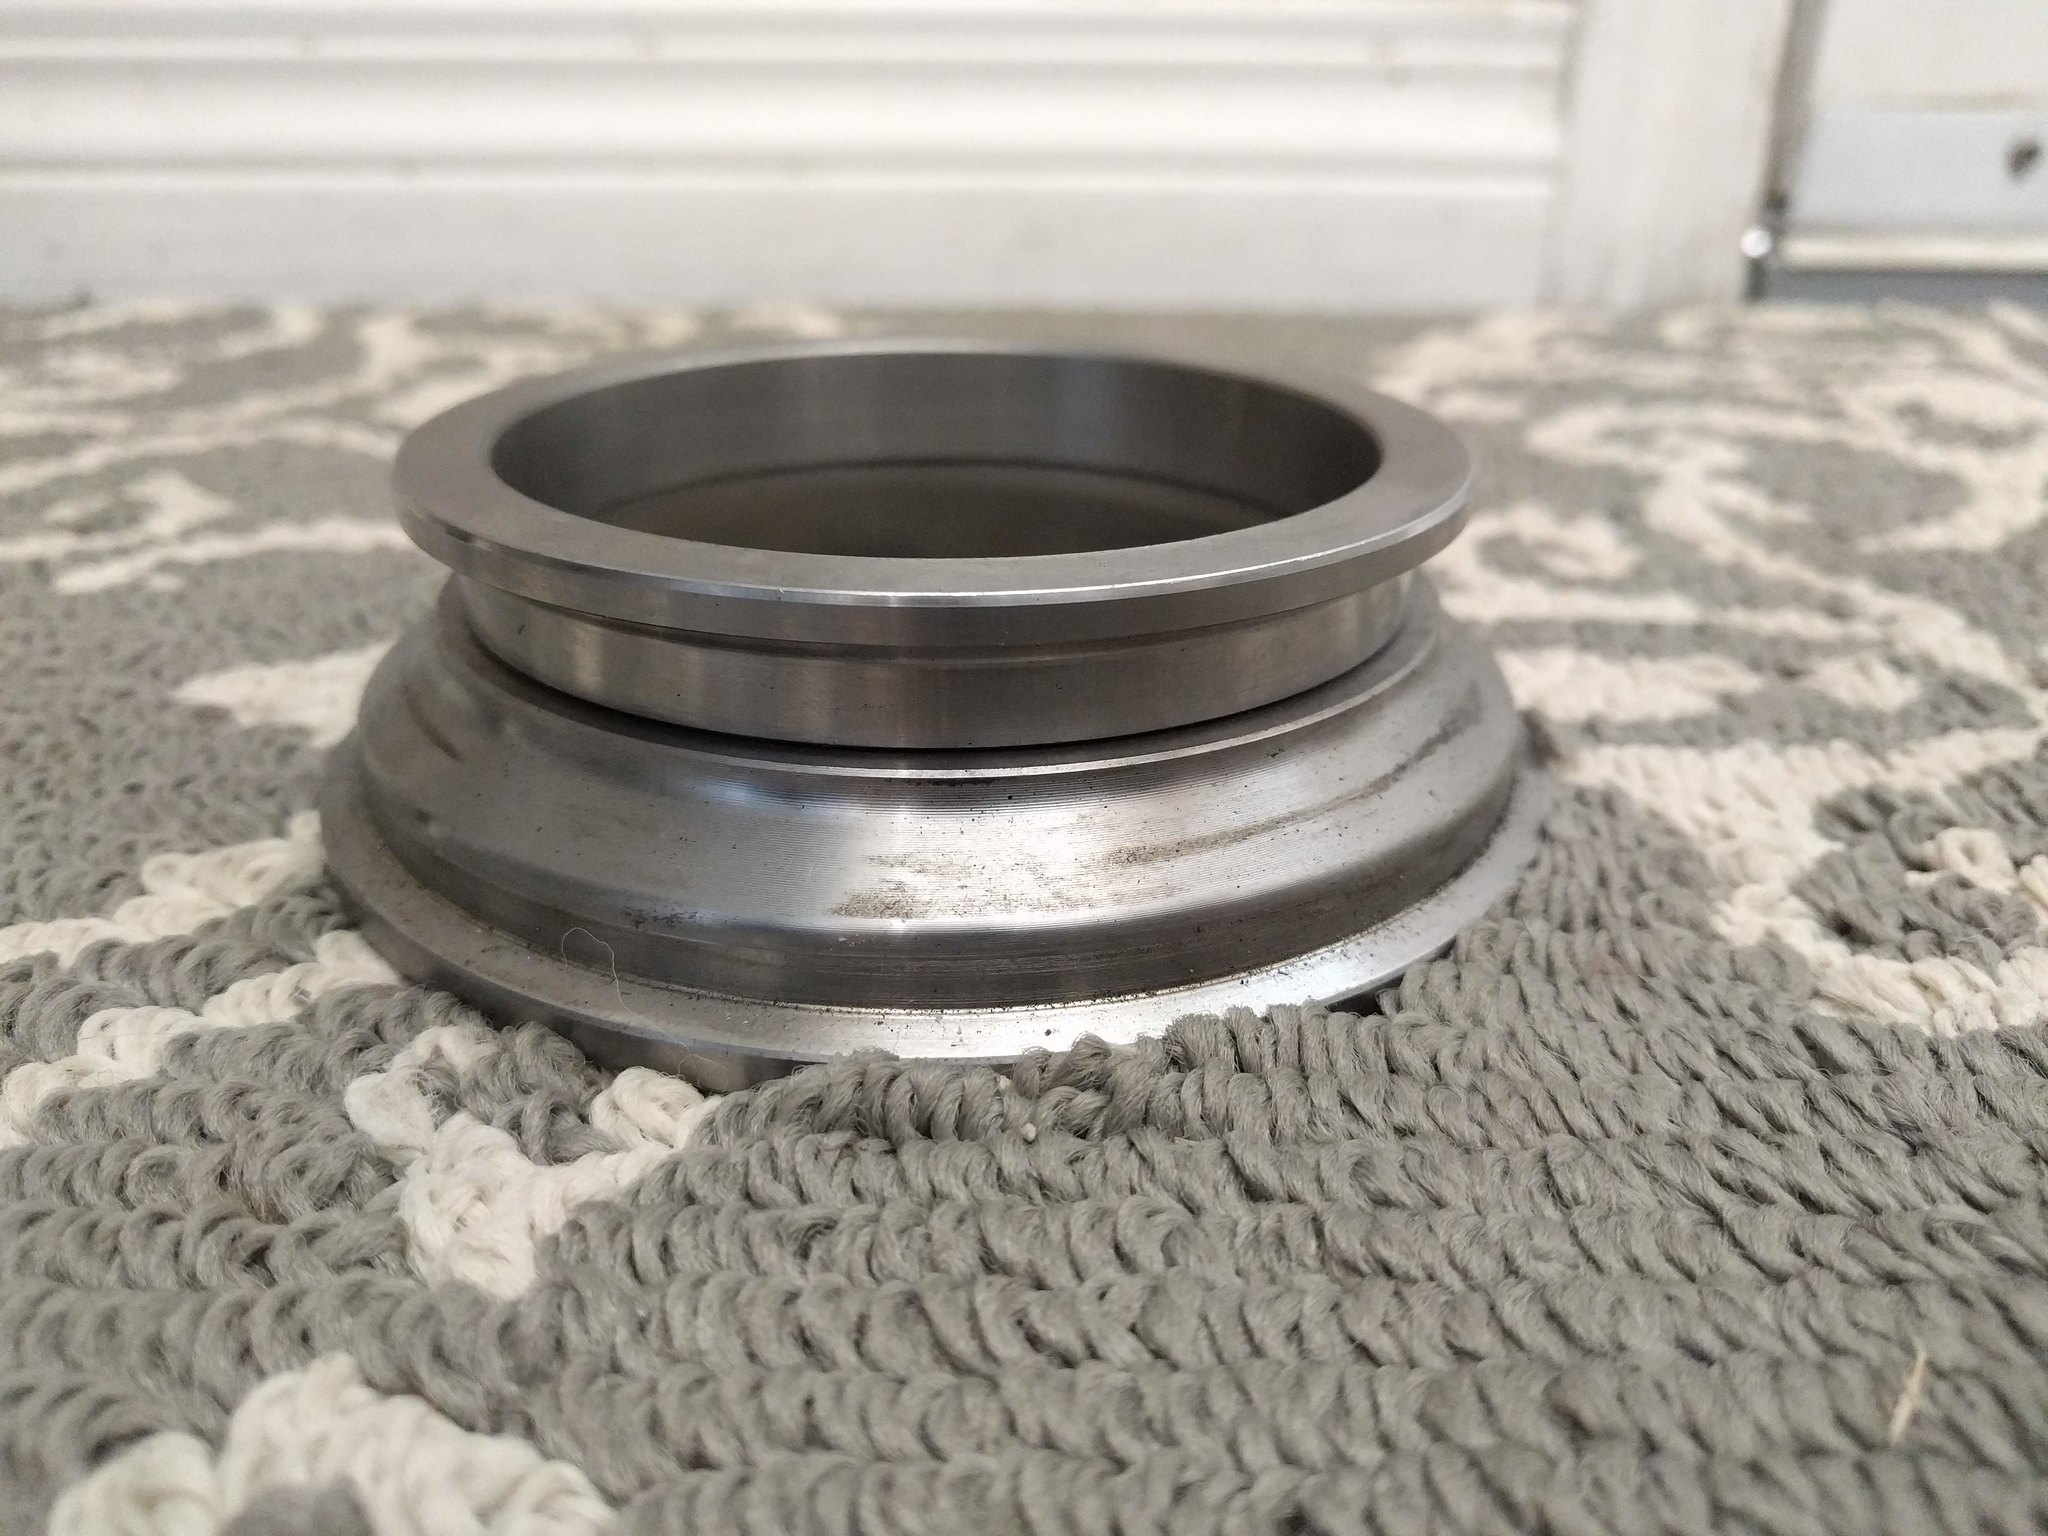
Now, the hardest part of going with a Holset: The v-band. Holset uses some weird ass 4.4" v-band and no one locally knew what I was talking.
A few days later of searching the interweb and I found a Diesel shop down in the States that made this: (regular 3" on the right, weird ass 4.4" on the left. )
4.4" to 3". Laterr, I had a dude I met on Kijiji TIG weld those together and as well as weld the wastegate flap shut on the Holset.
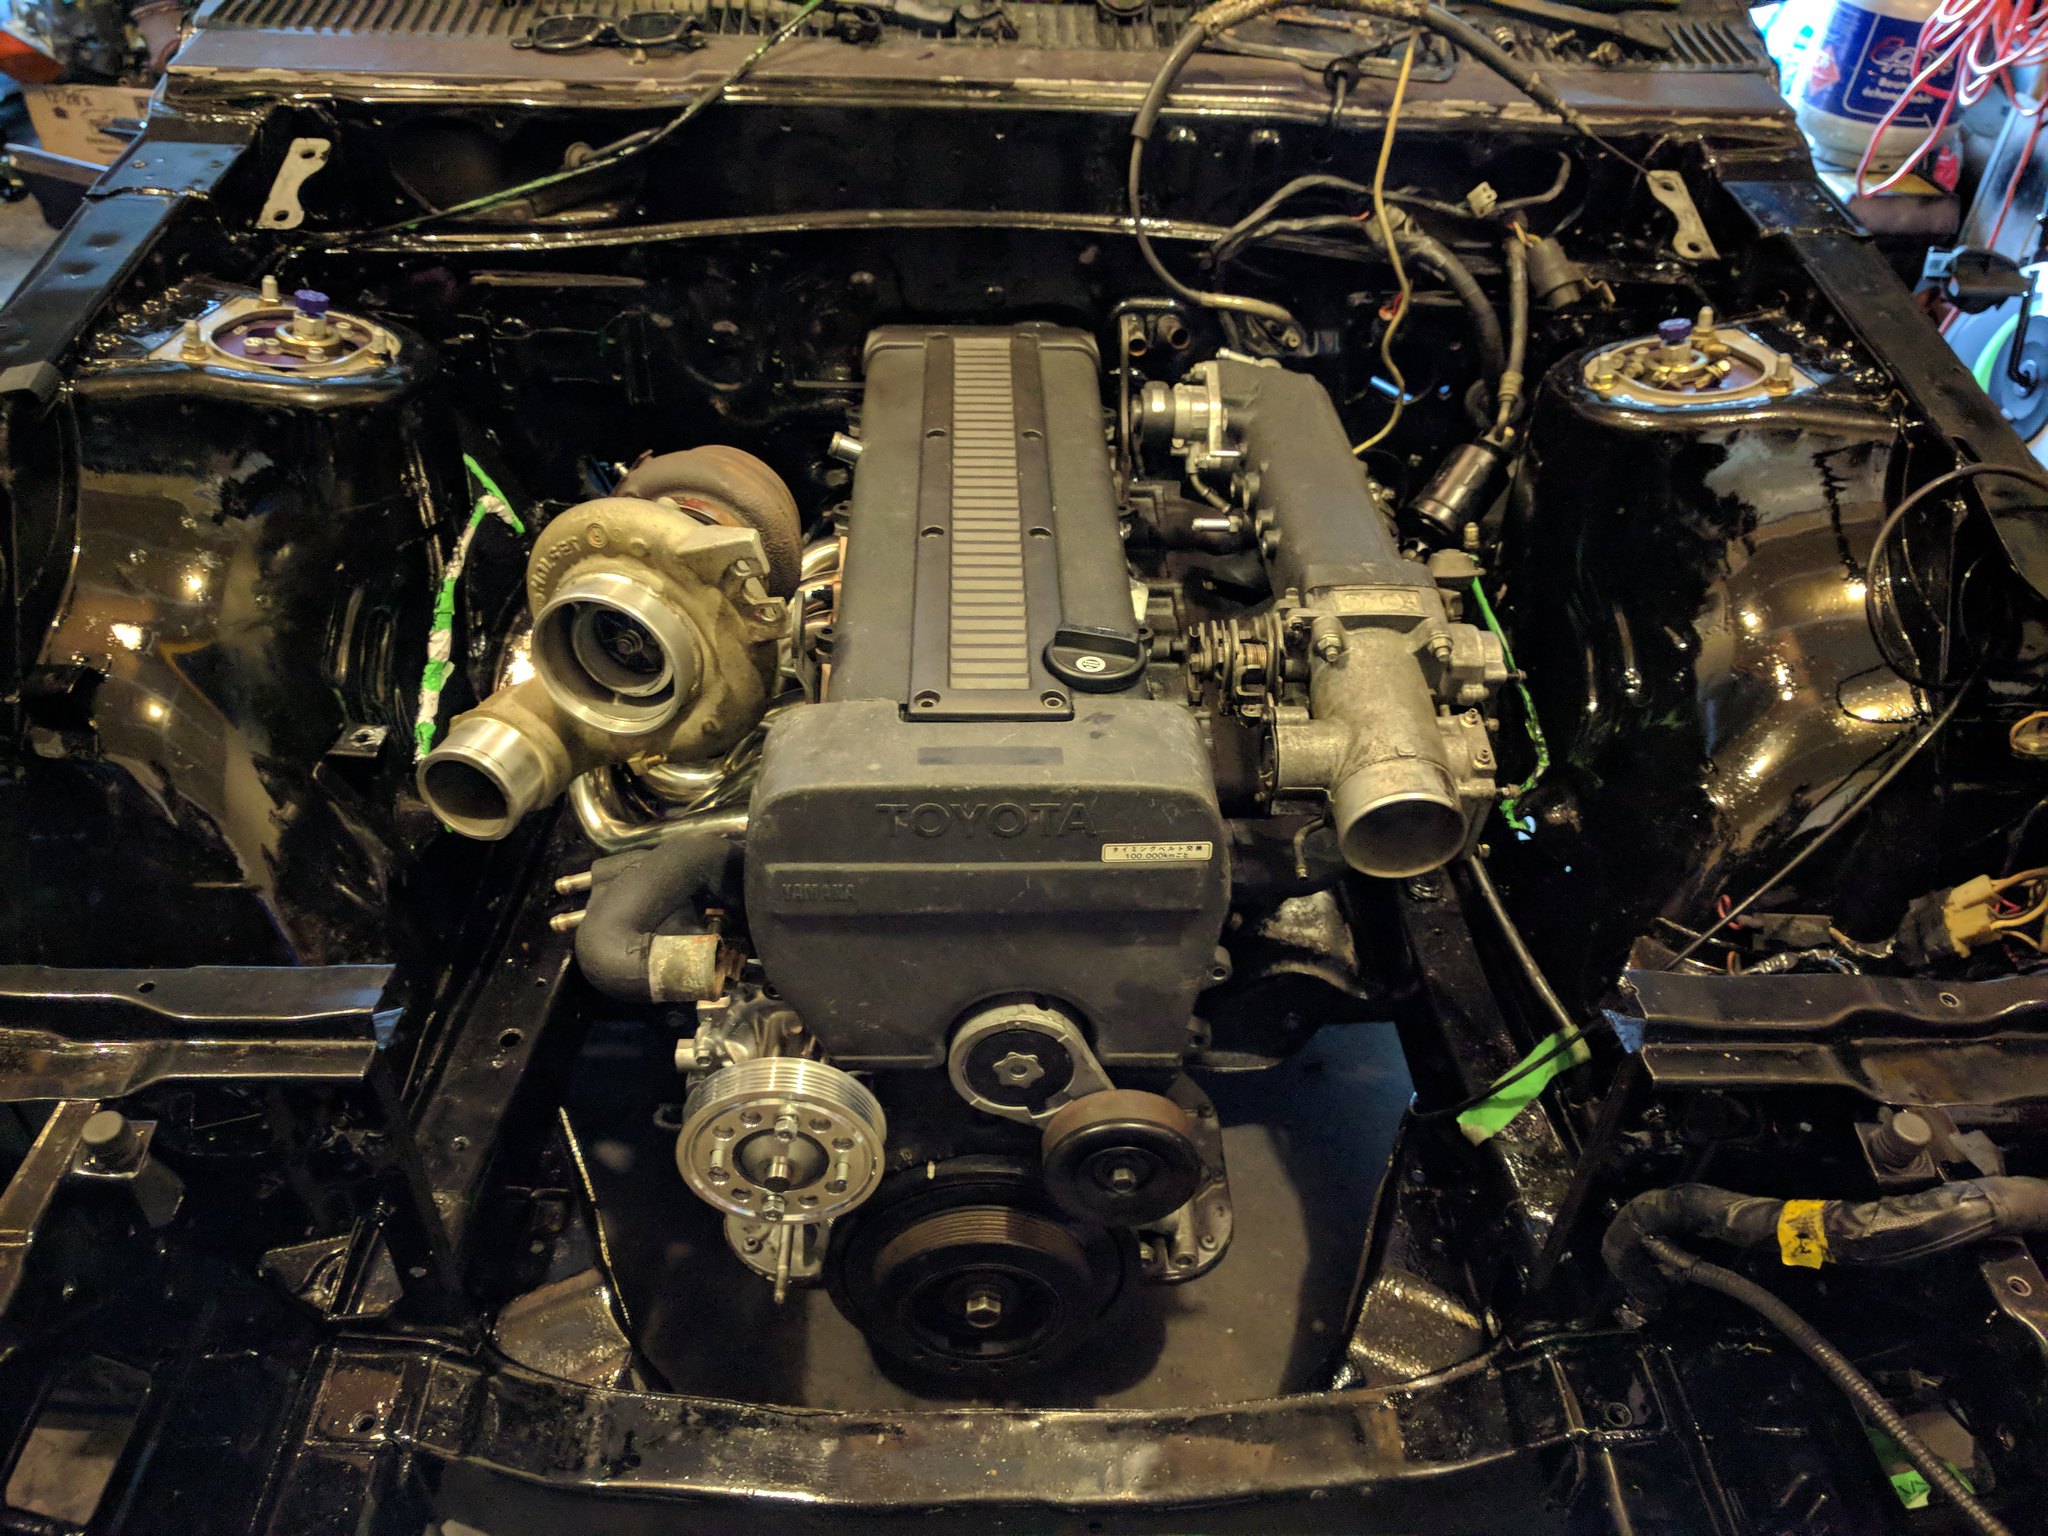
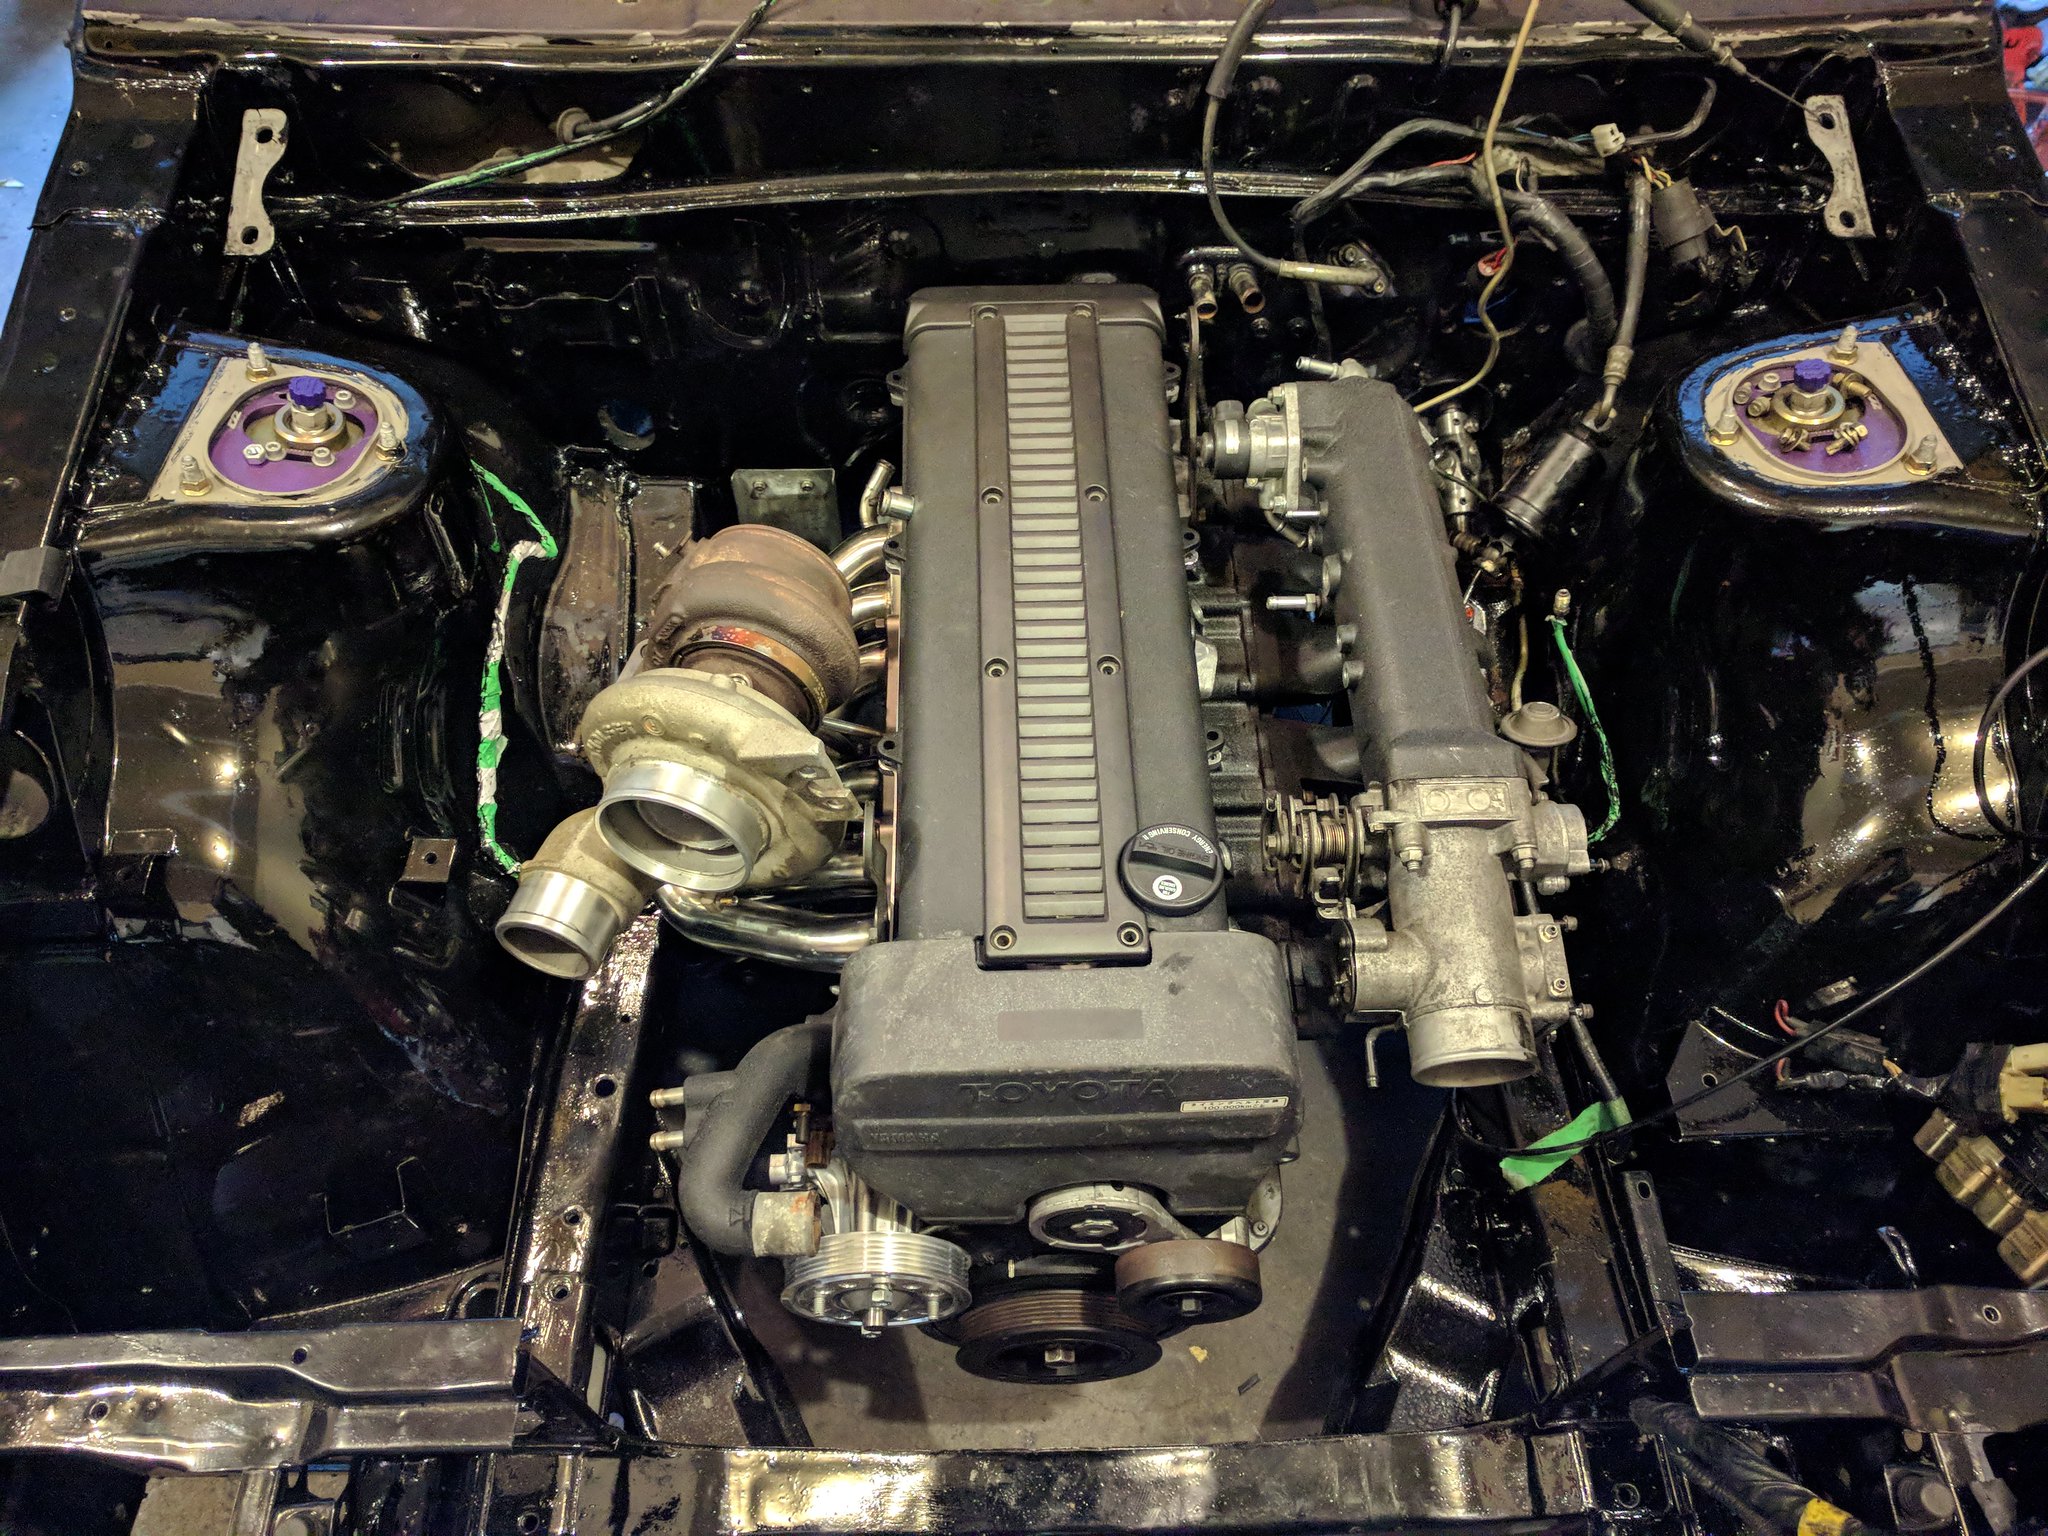
After more parts came, the engine was finally put back together. Replaced the usual timing belt, water pump, tensioner, pulleys as well as all the seals. Installed an OEM 2JZGTE head gasket and ARP head studs. I don't really plan on making that much power, but I figured might as well. Now for some beauty shots!
AND IT ONLY TOOK 4 YEARS!!
Registered User
I also got the clutch and transmission finally installed. (no photos sadly) For a while, I was debating on whether or not I should sell the R154 and go with CD009 just to future proof it now that R154 prices are going up and are getting rarer and rarer every day. Eventually, I decided against it after I saw my bank account. Maybe in the future?
Now, probably the most physically demanding task of the build: Hammering out the Transmission tunnel. At first, we used a bottle jack to try and expand the tunnel for the girthy part of the R154 but eventually, we just resorted back the the goold old mini sledge. Yo, I beat that tunnel harder than I beat my meat when I first discovered internet porn. Wait what?
SHE'S IN!
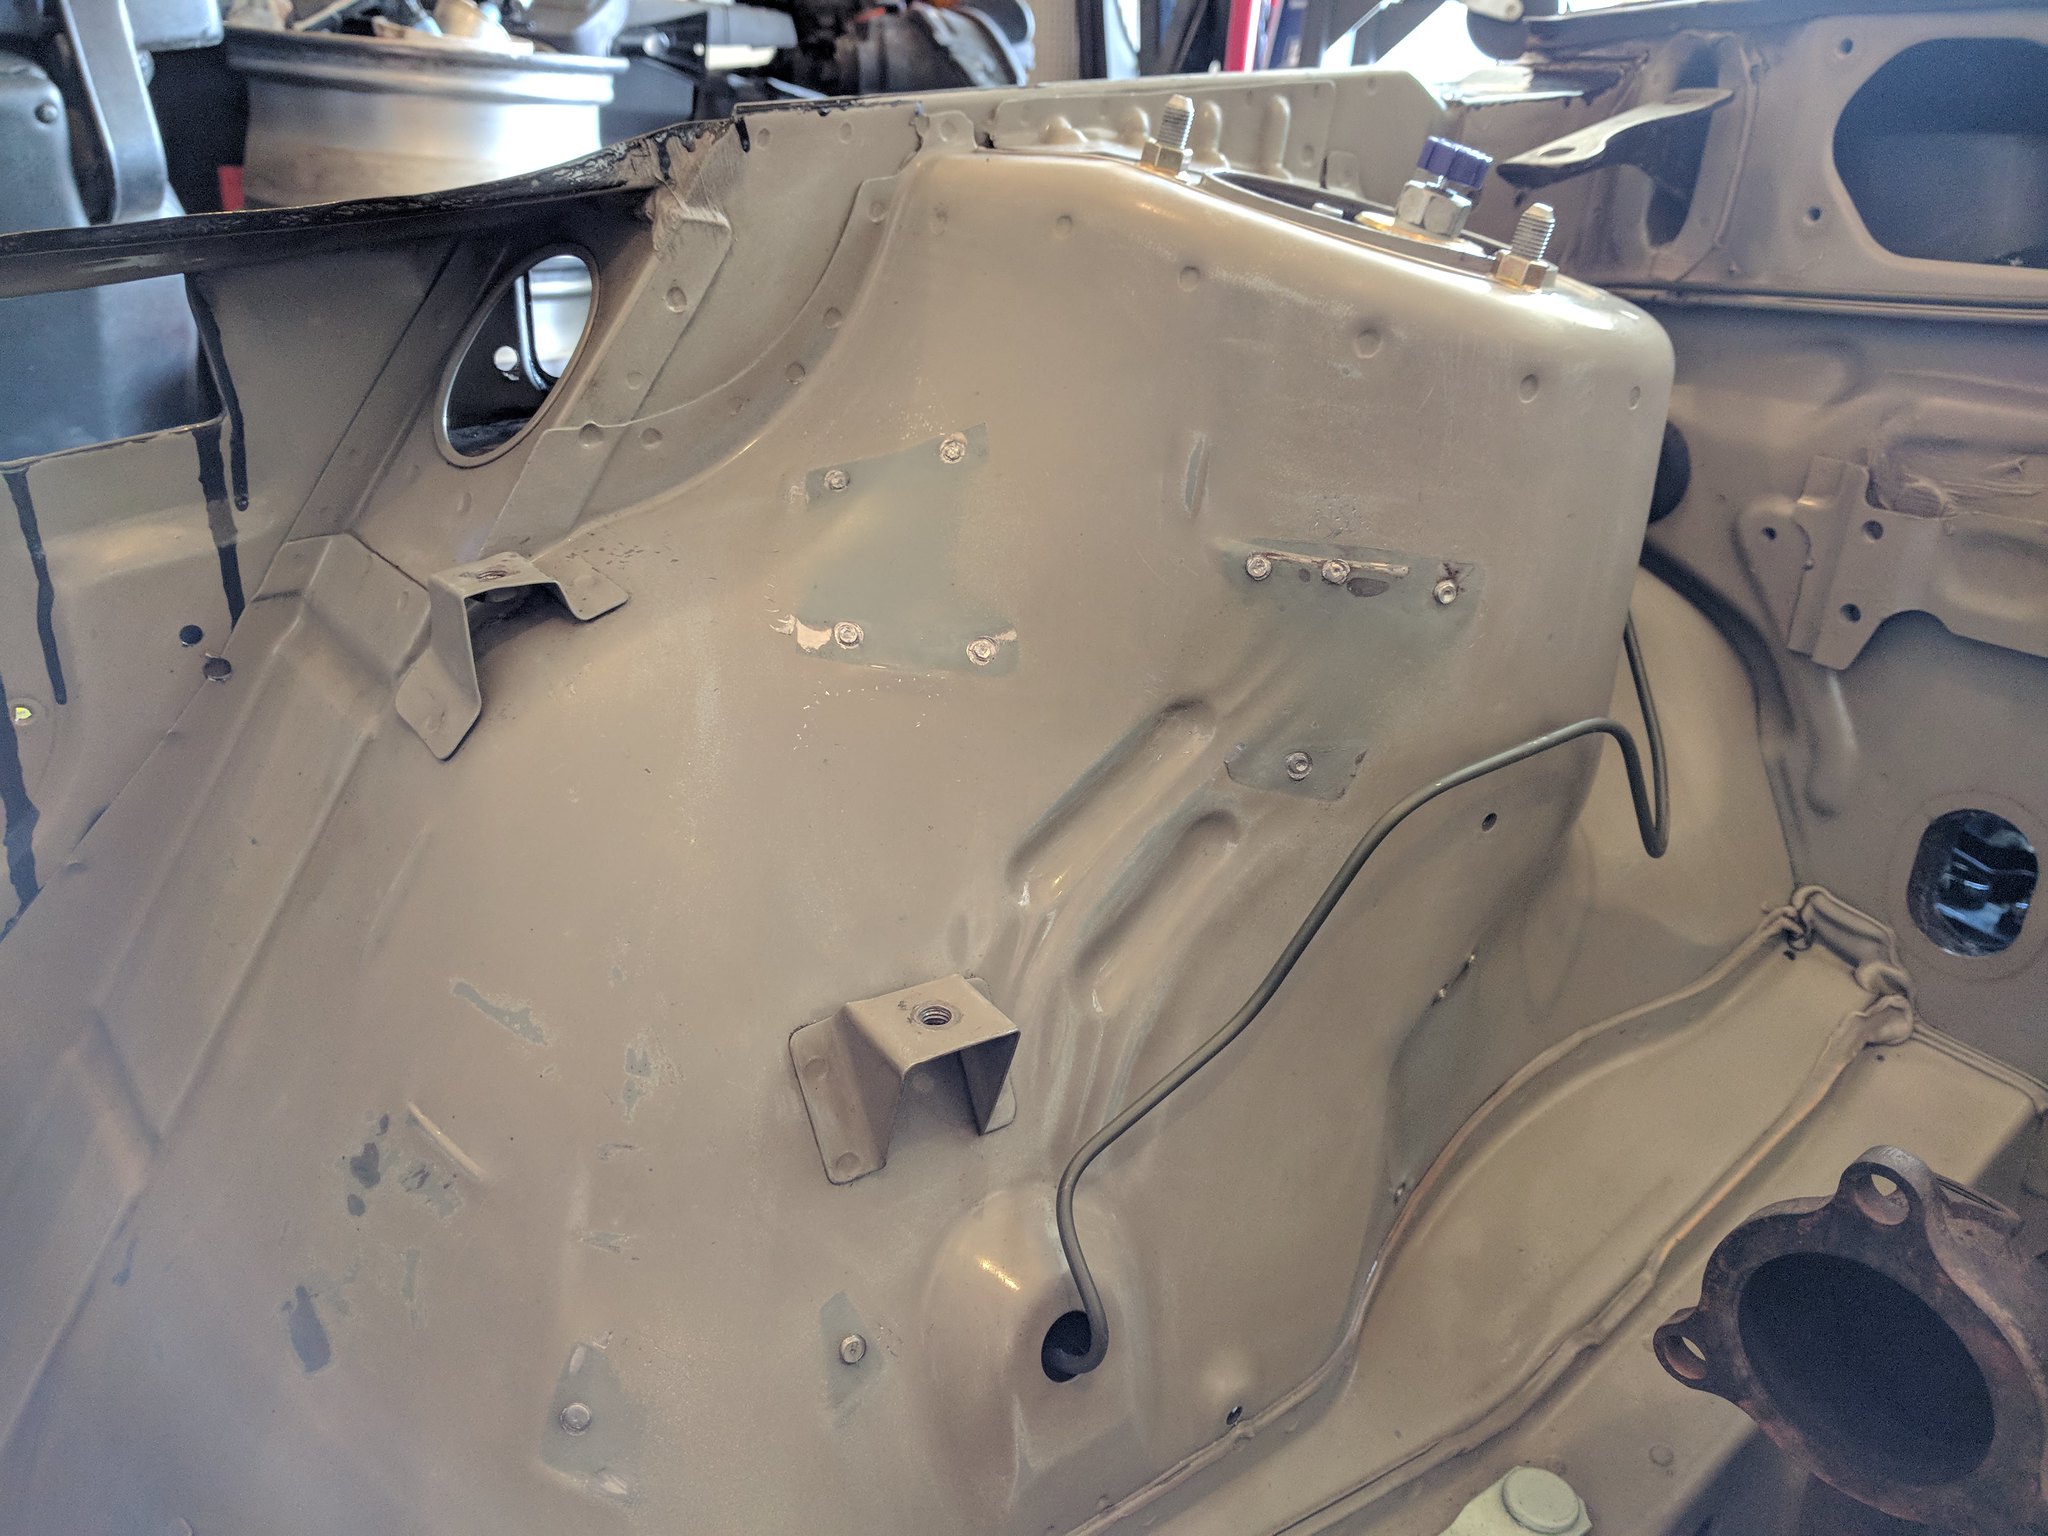
Also finally finished painting the engine bay with the help of my little brother. Had the garage door slightly open for ventilation and a big wind blew dust all over some areas. It turned out okay.
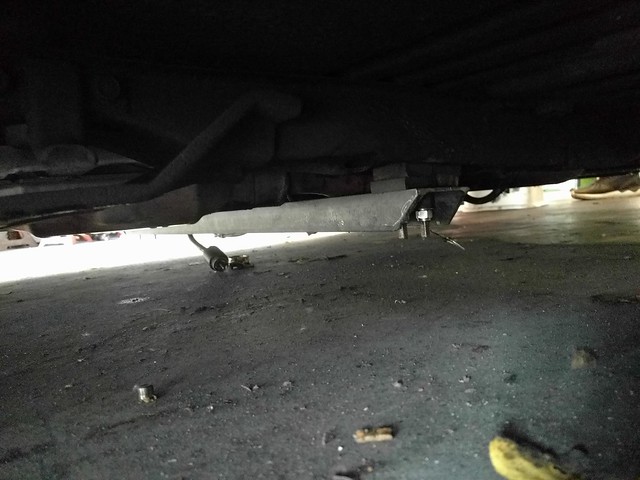
How we initially made the transmission mount.
Not only was it buttass ugly, It was also only 2.5" from the ground. So back to the drawing board. Eventually, we just reused the old MK3 transmission mount and attached it to the vehicle using some steel plates wheel had laying around. Still needs some final touches, but that's for future me to deal with later. (forgot to take pictures of the reworked mount)
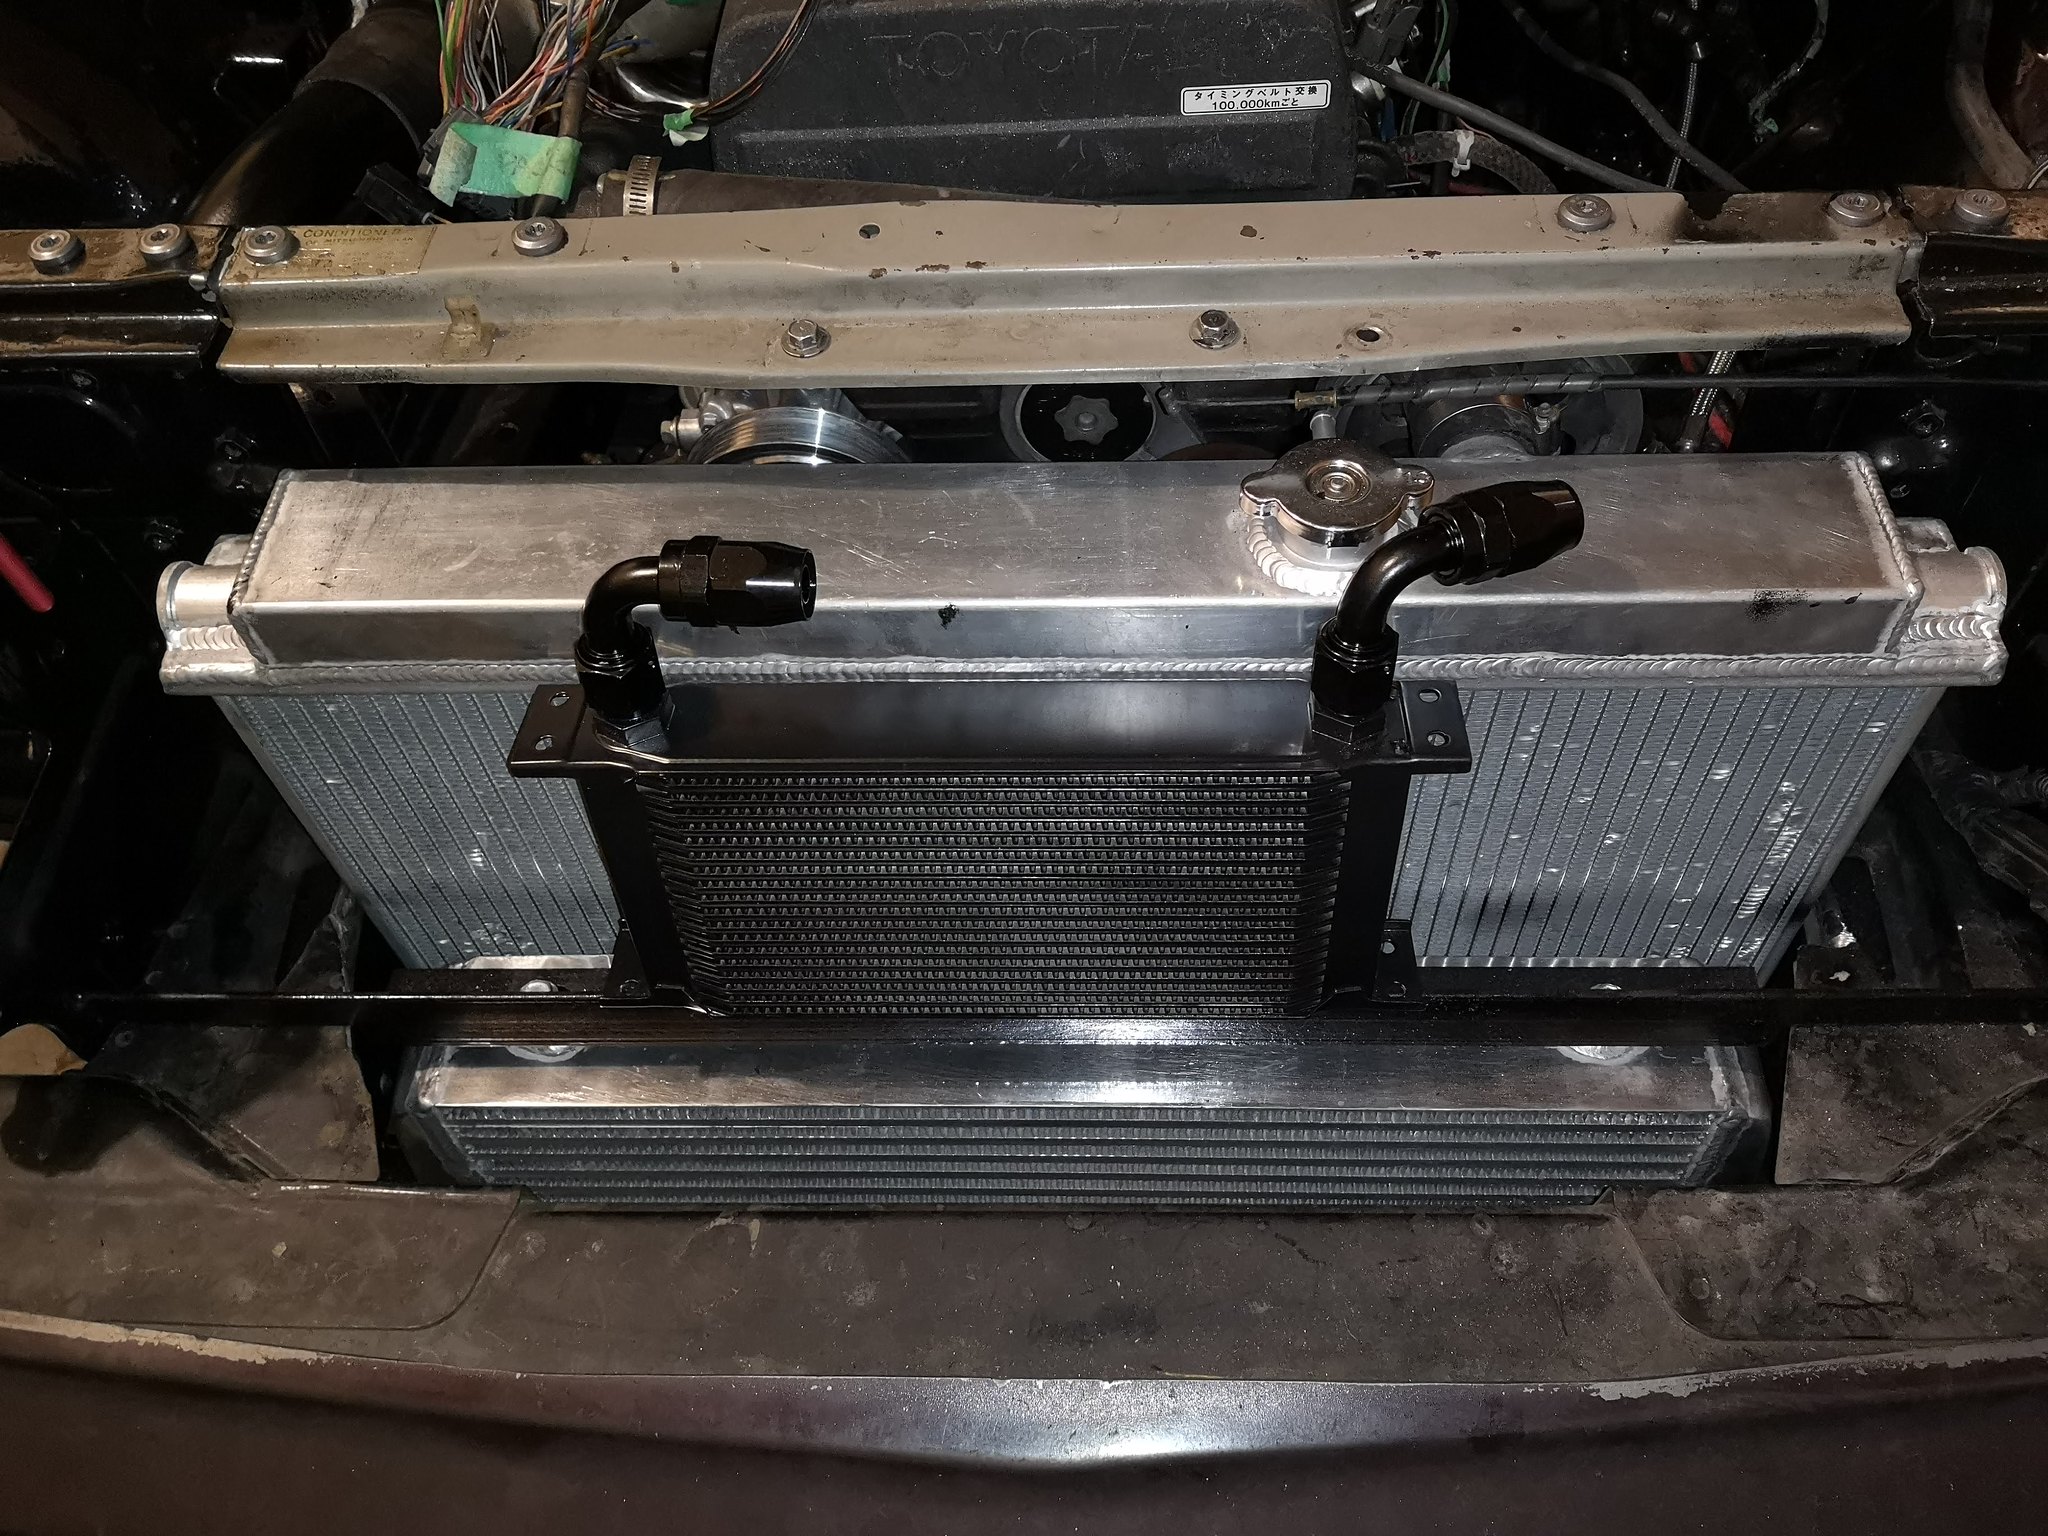
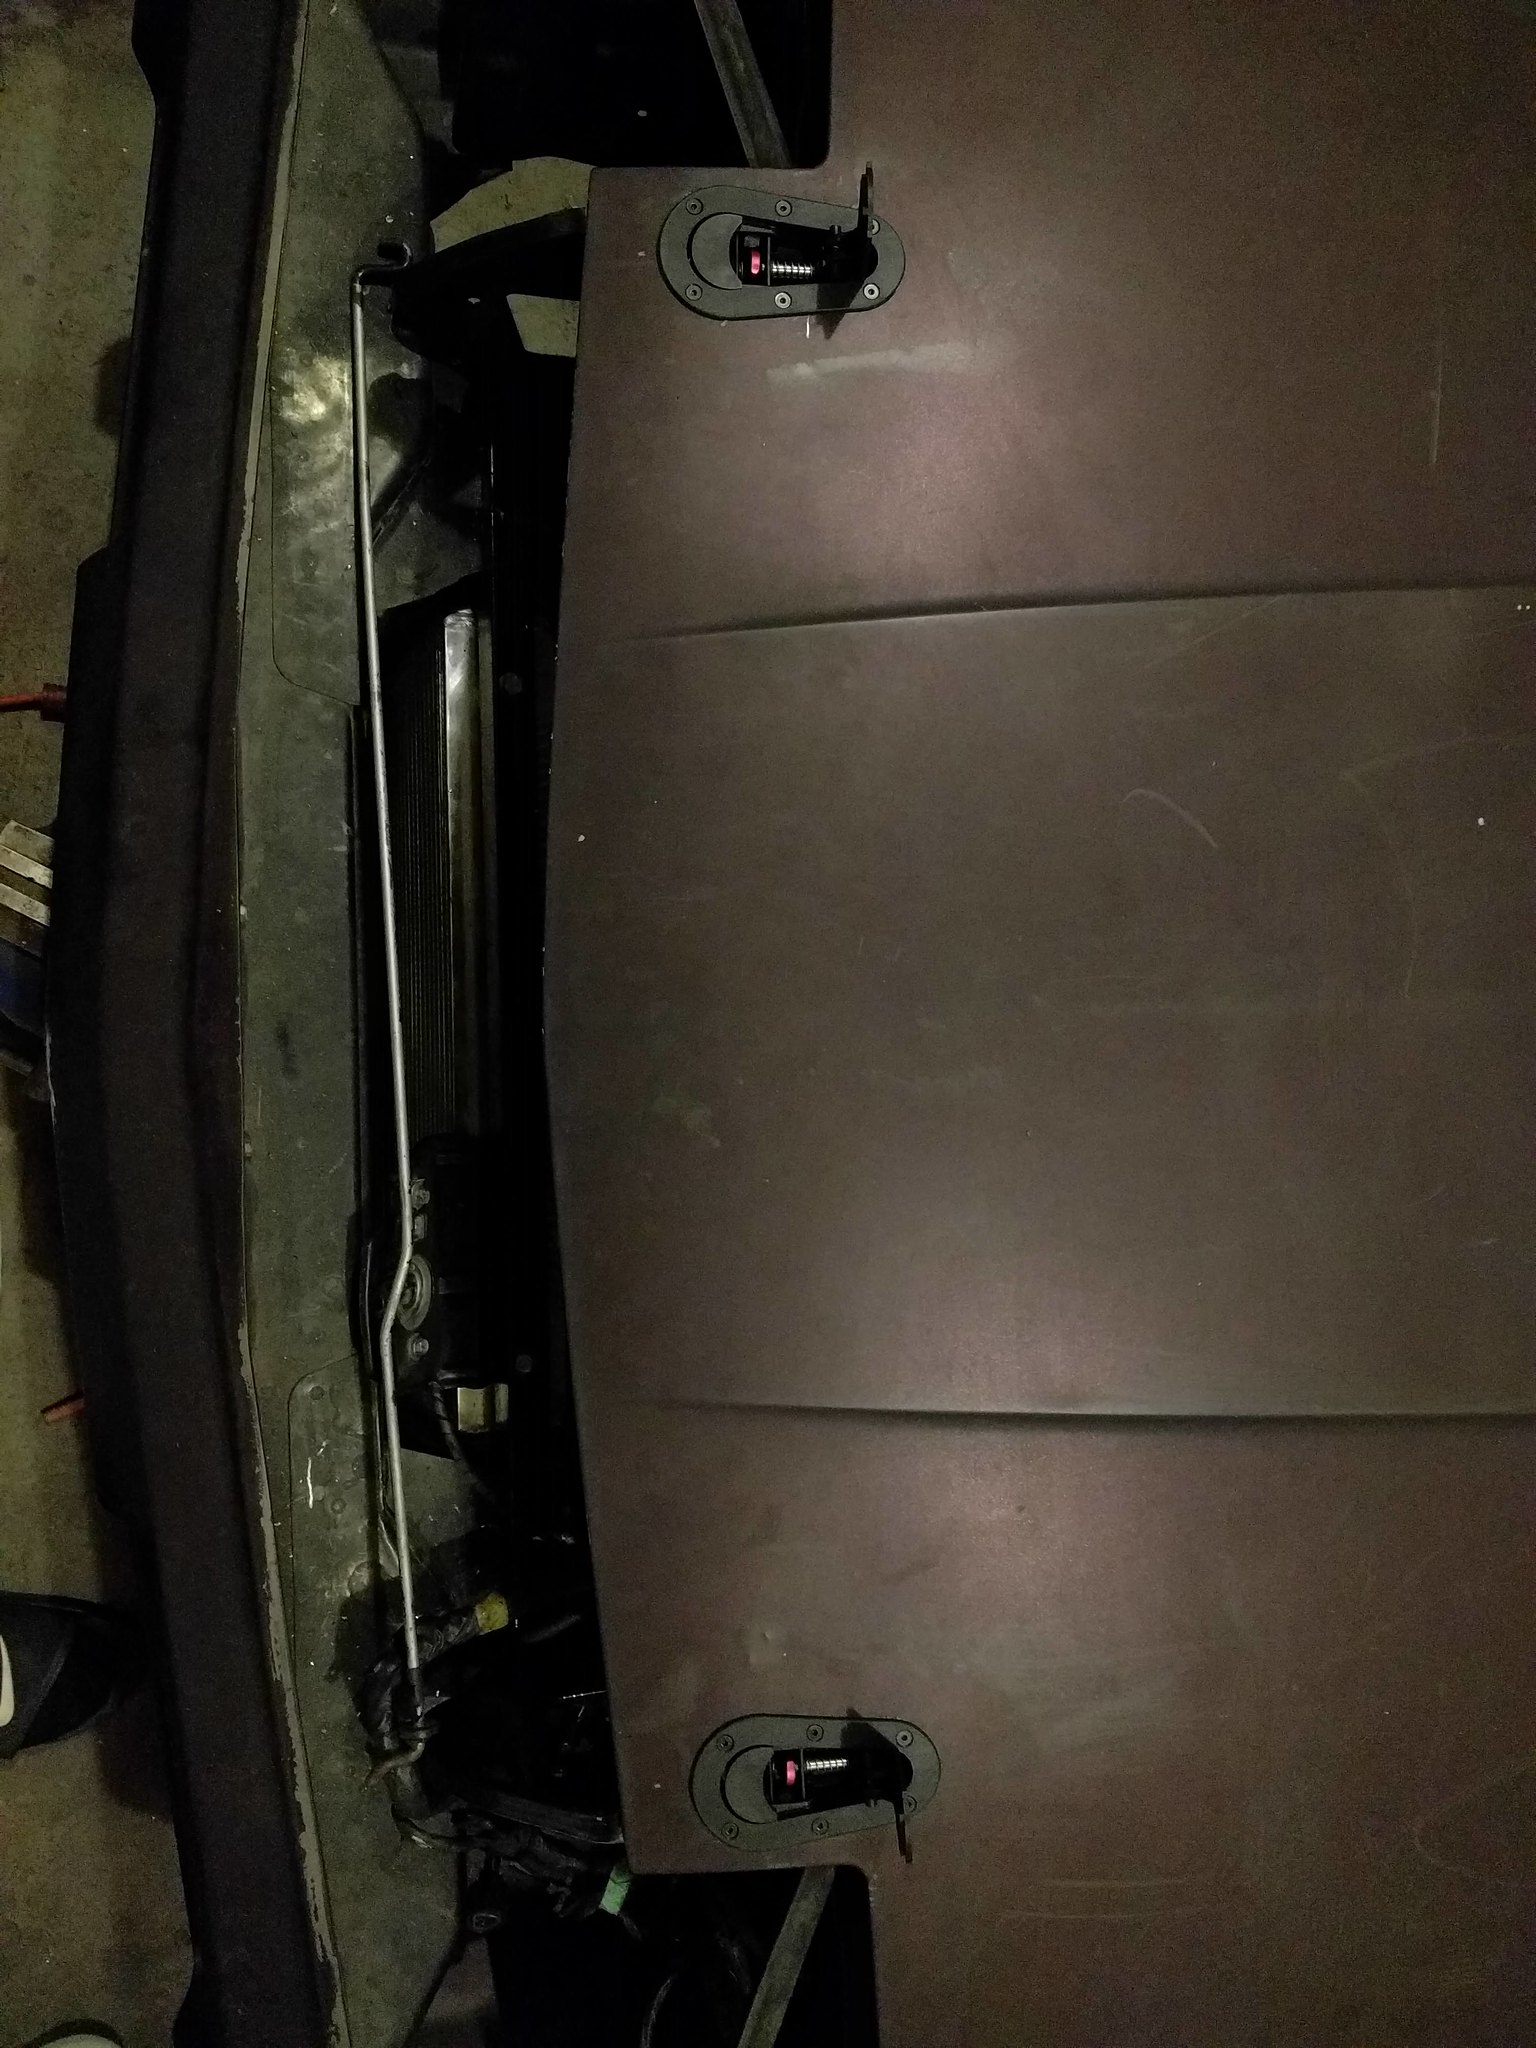
Got the radiator and intercooler mounted
Still trying to find a place the mount the oil cooler. Contemplating on whether or not I should mount externally ; Bozo style if I can't find a place to mount it within the bumper.
Because of where the radiator is mounted, I wasn't able to retain the factory hood release. As much as I hate hood pins, It was the only way to keep my hood from smacking my windshield while driving.
These were the only hood pin/latch system I found tolerable. I cried a little while cutting into my hood.
I also made hood struts! Probably the highlight of this build so far. Some dude wanted $100USD +shipping for a kit made specifically for this car and I'm WAAAY to cheap for that. Sooooooo....off to the junkyard I go!
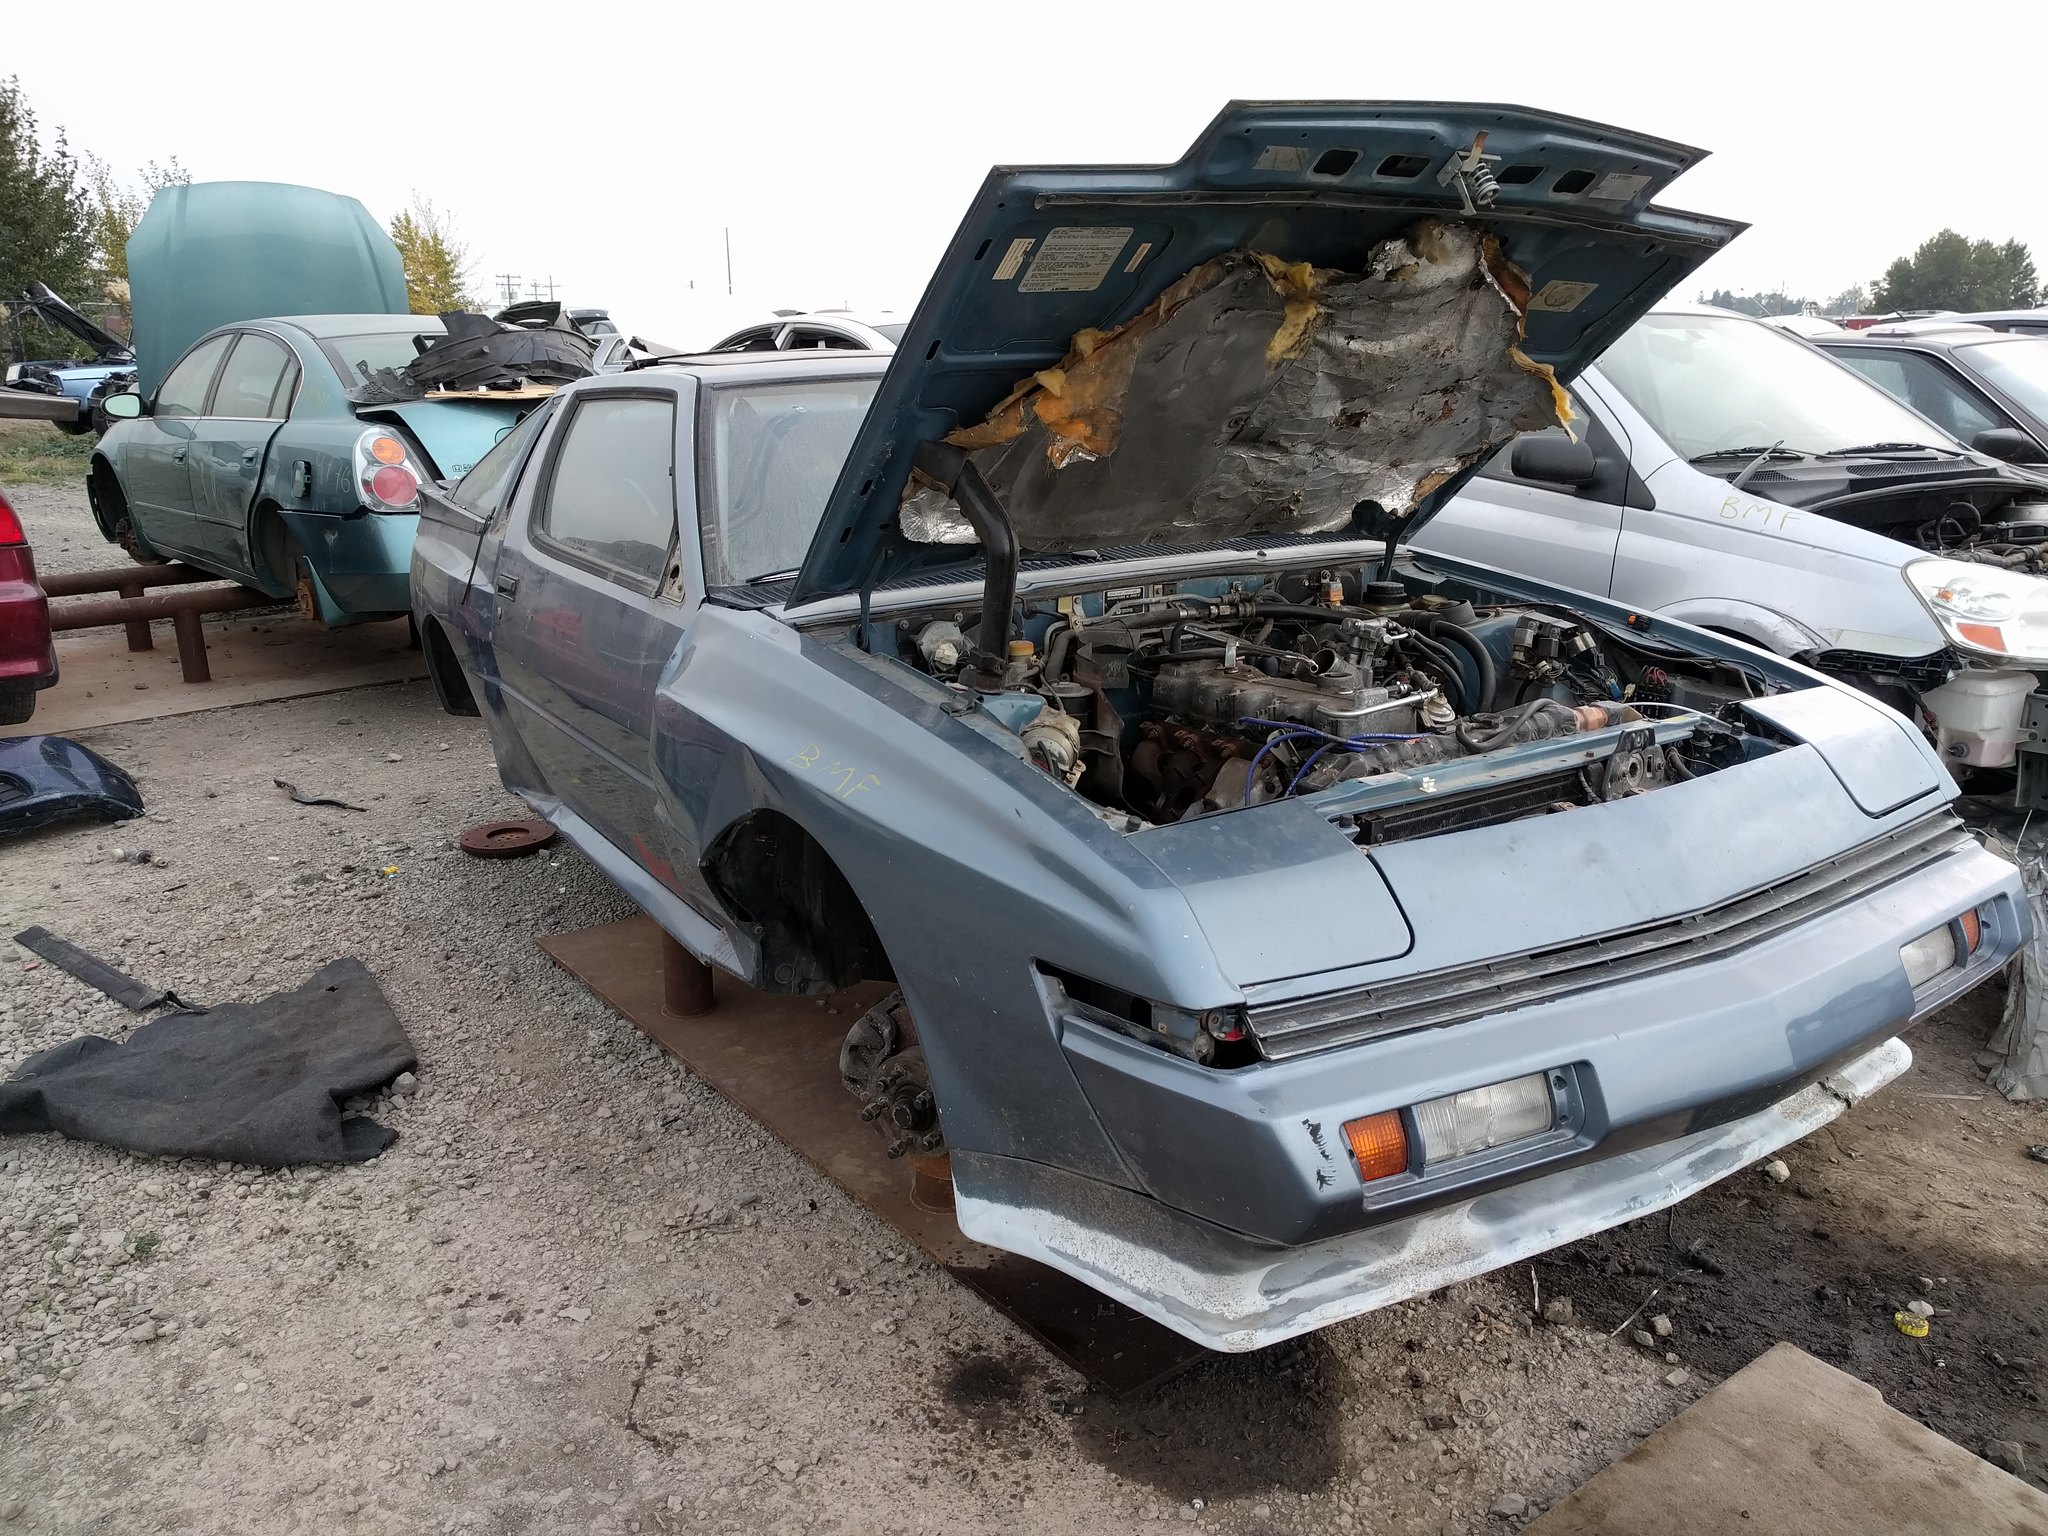
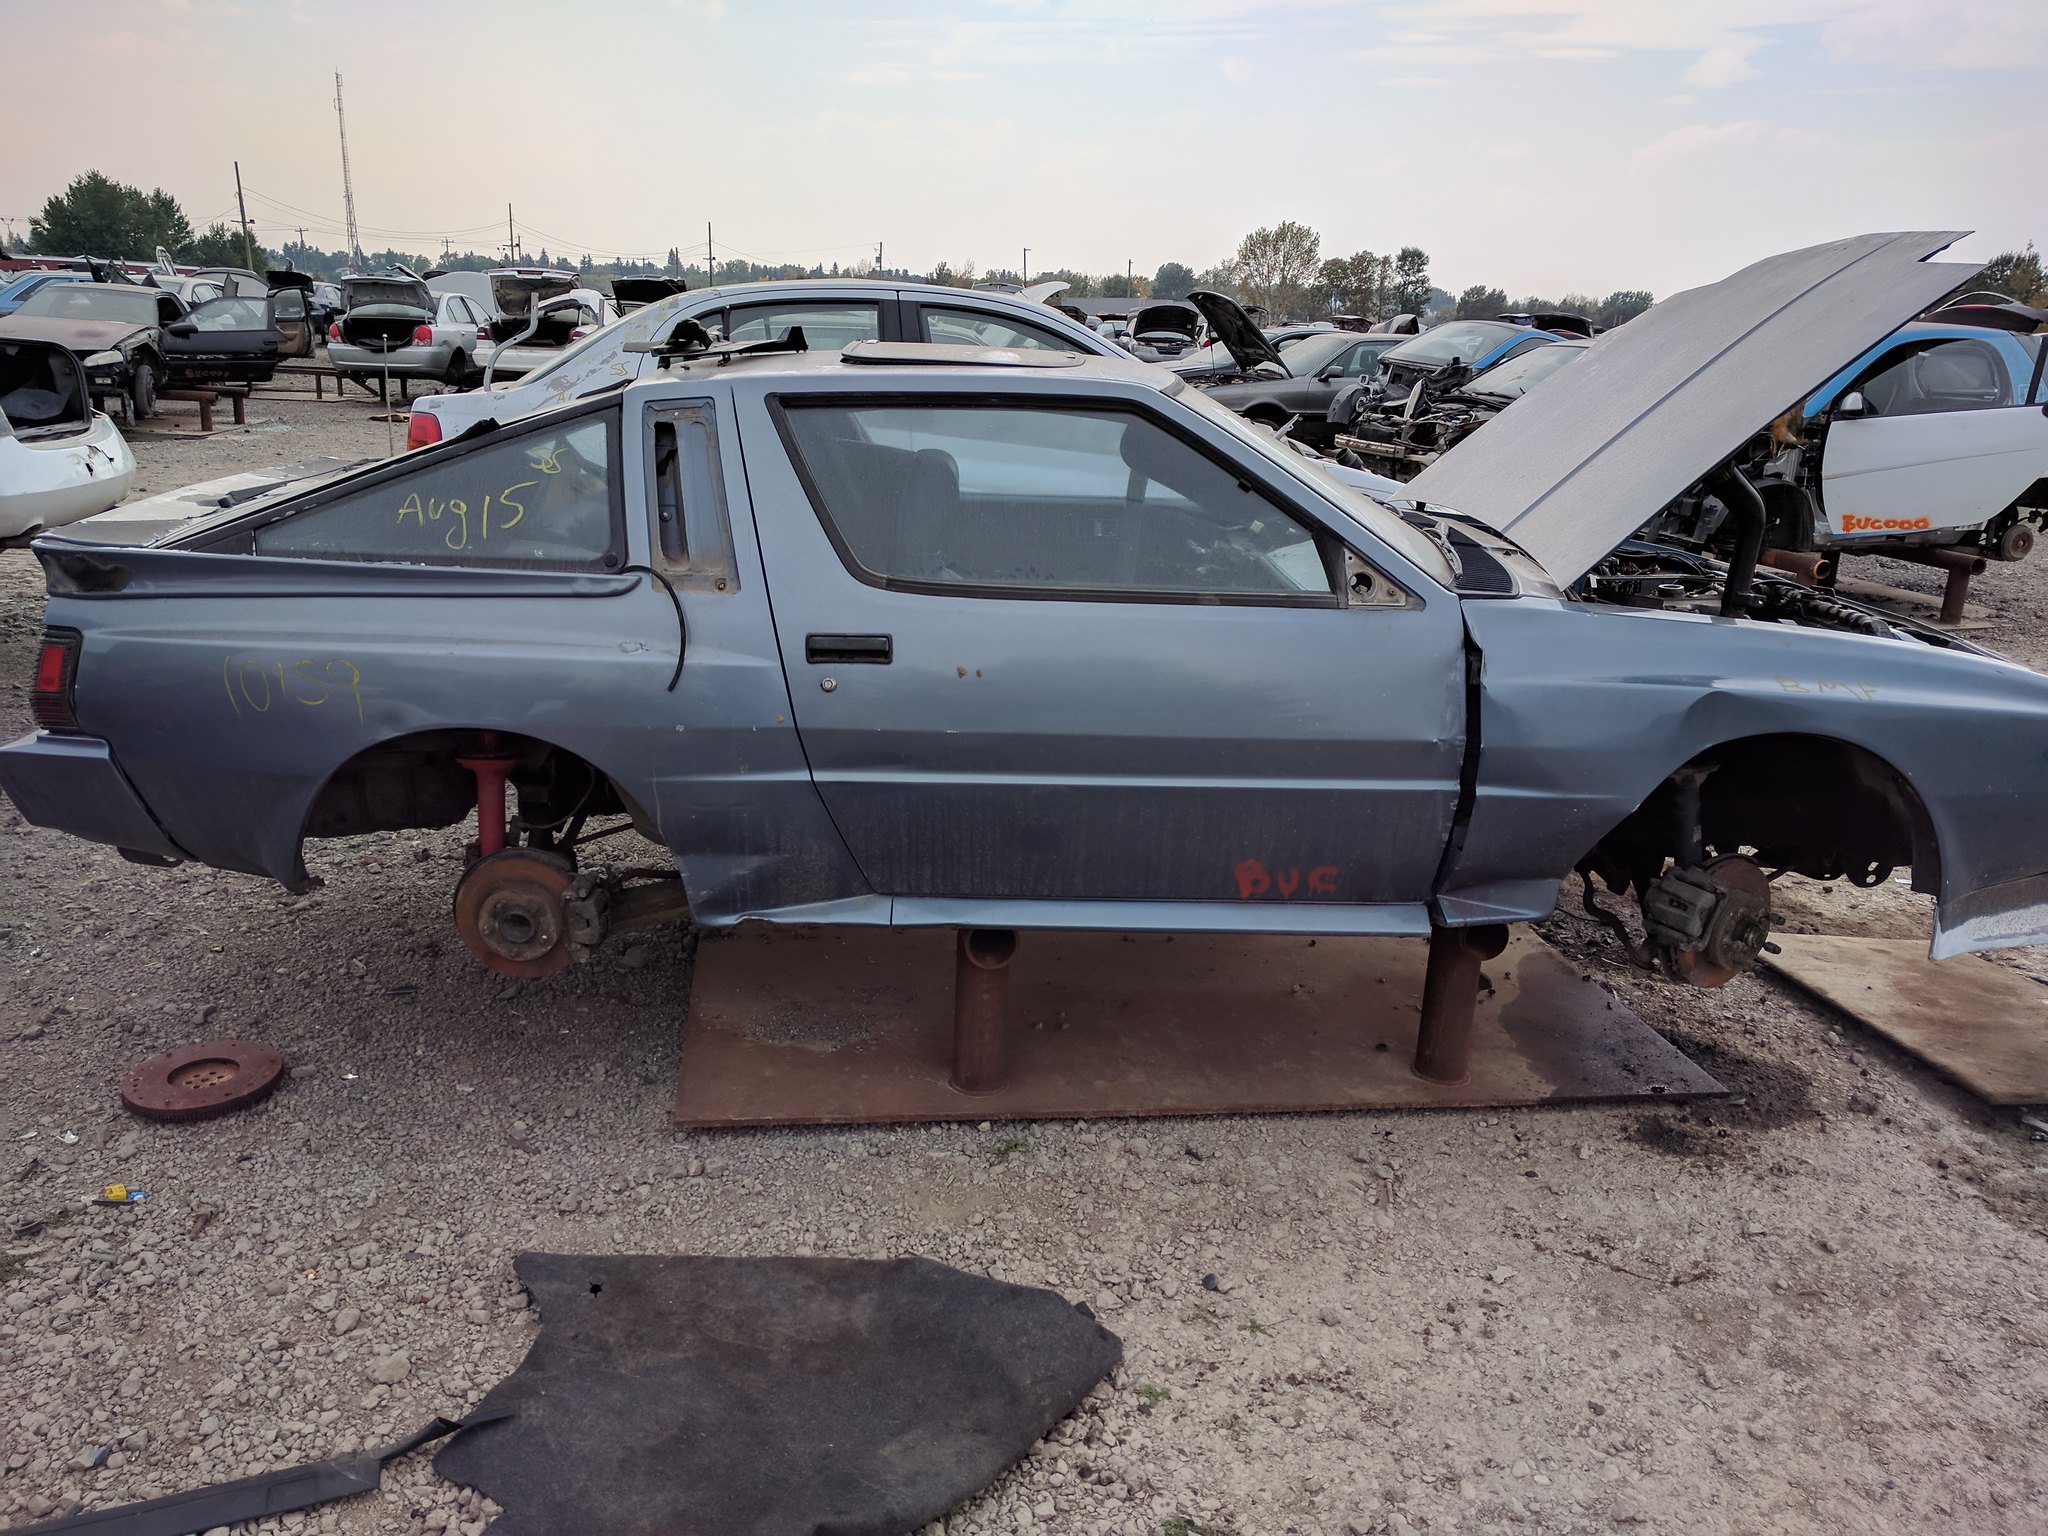
While walking around Buck's Auto, I saw the saddest thing....
It was an 87" Conquest. (3rd Starion/Conquest I've ever seen in my life) If I had the garage space, I would have bought the whole thing and kept it as a parts car. I was able to salvage some interior pieces from it, as well as a cluster, hatch struts and miscellaneous bits. I also used it to mock my own hood strut kit which only cost me $14! Seeing the hood of my car opening by itself changed me.
Registered User
ANYWAYS
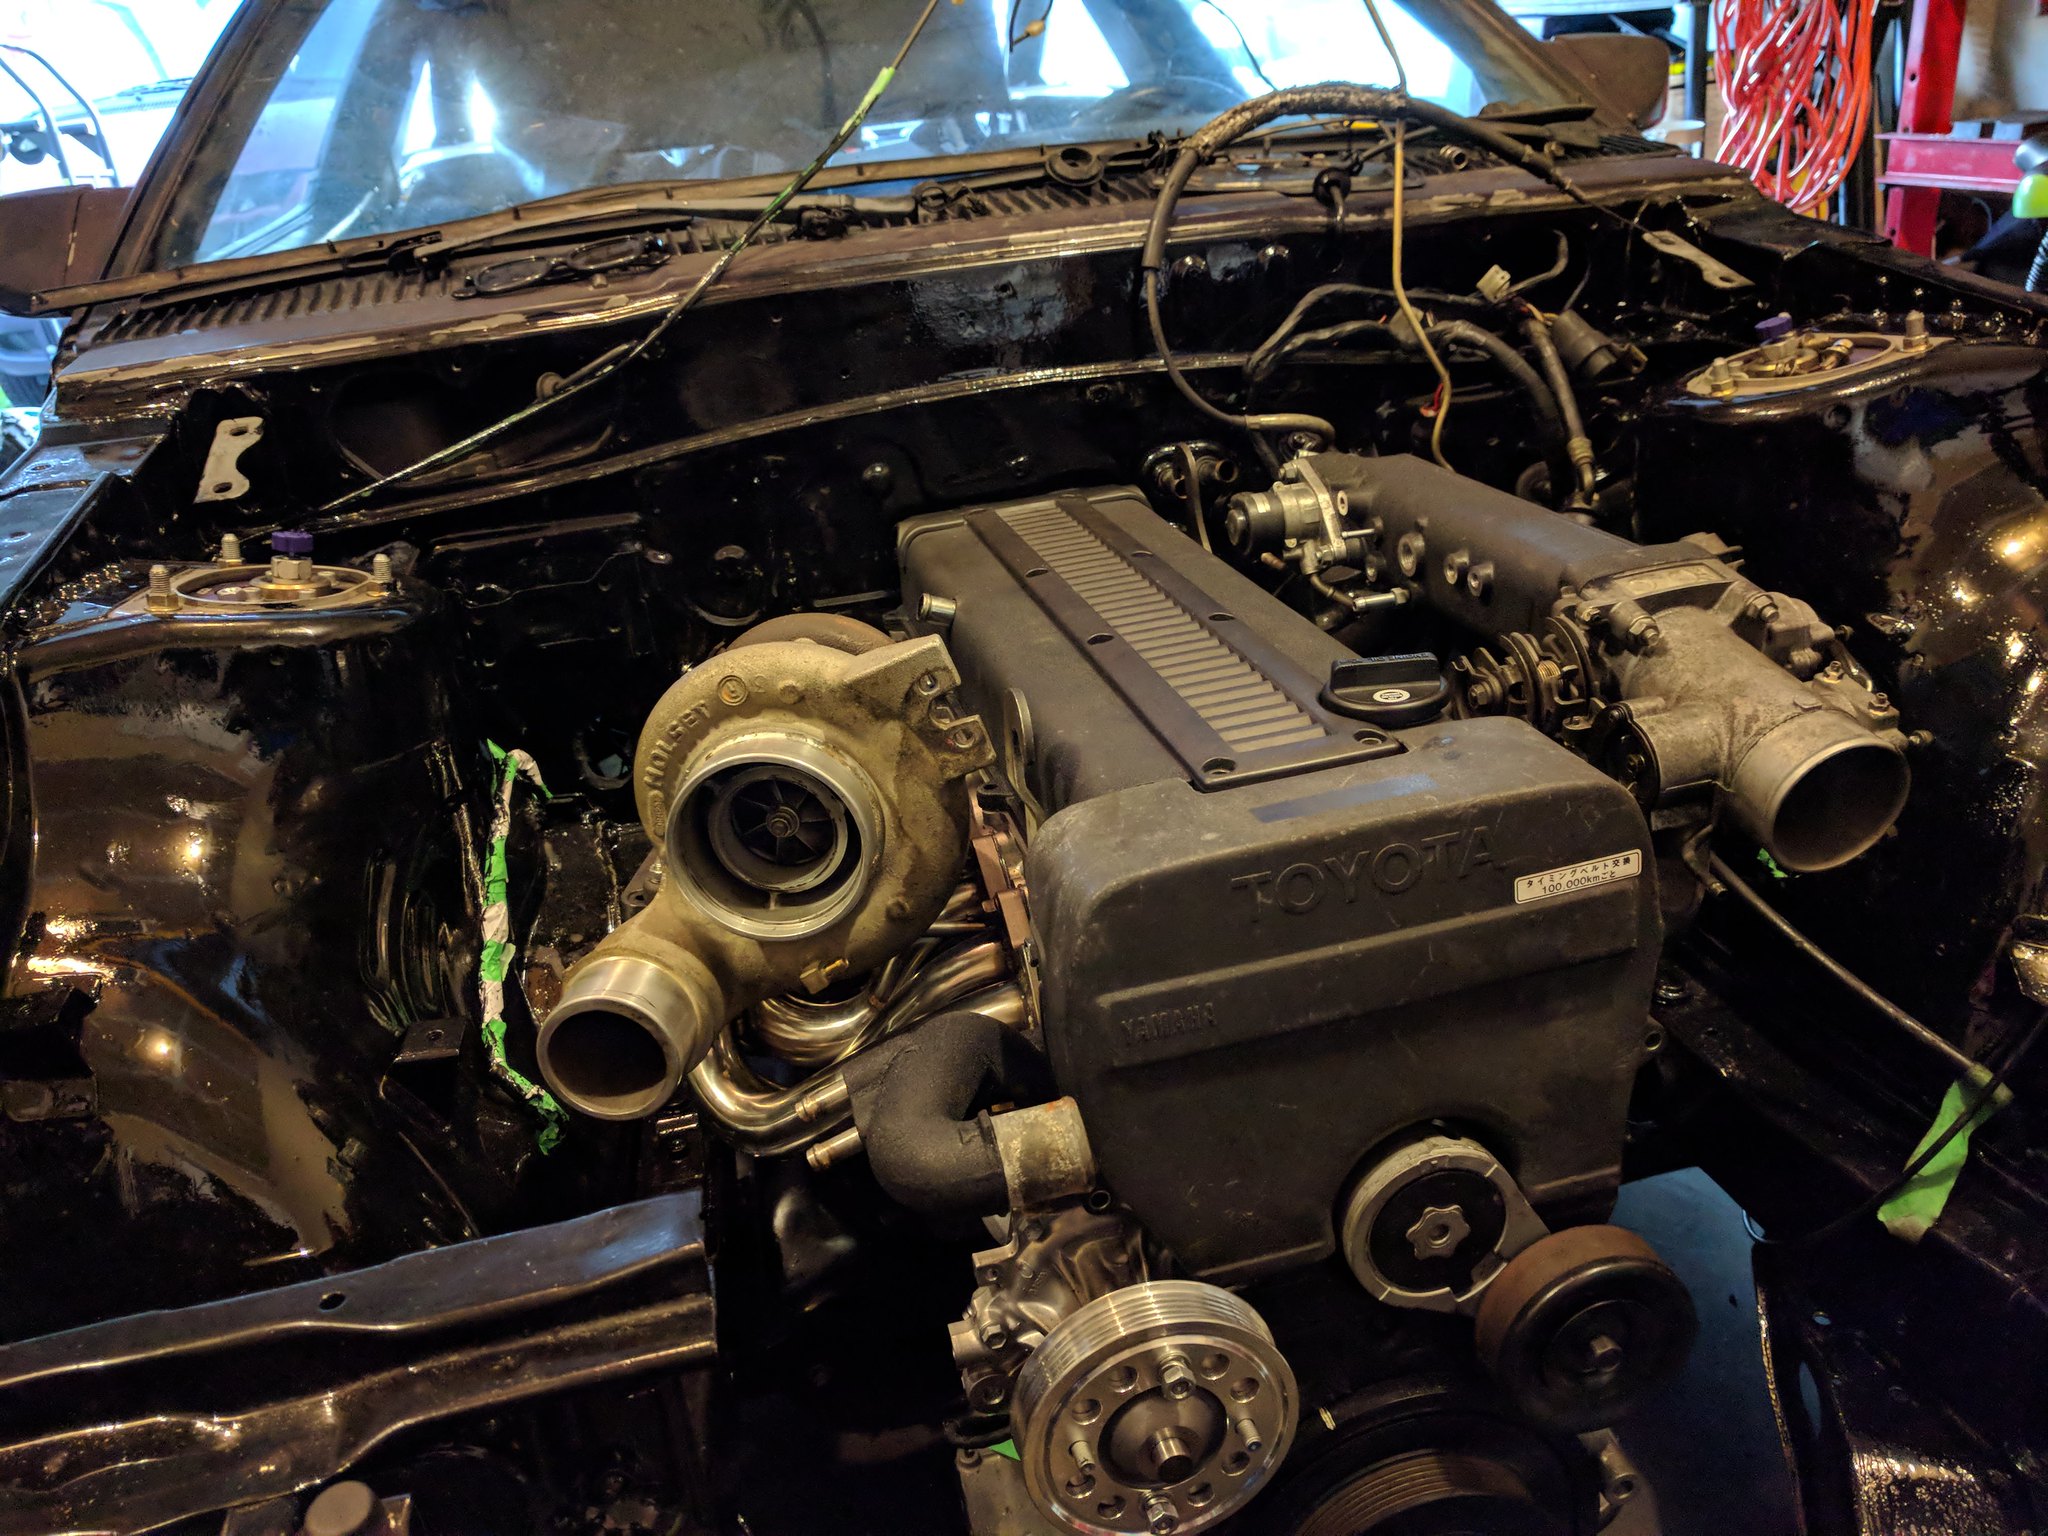
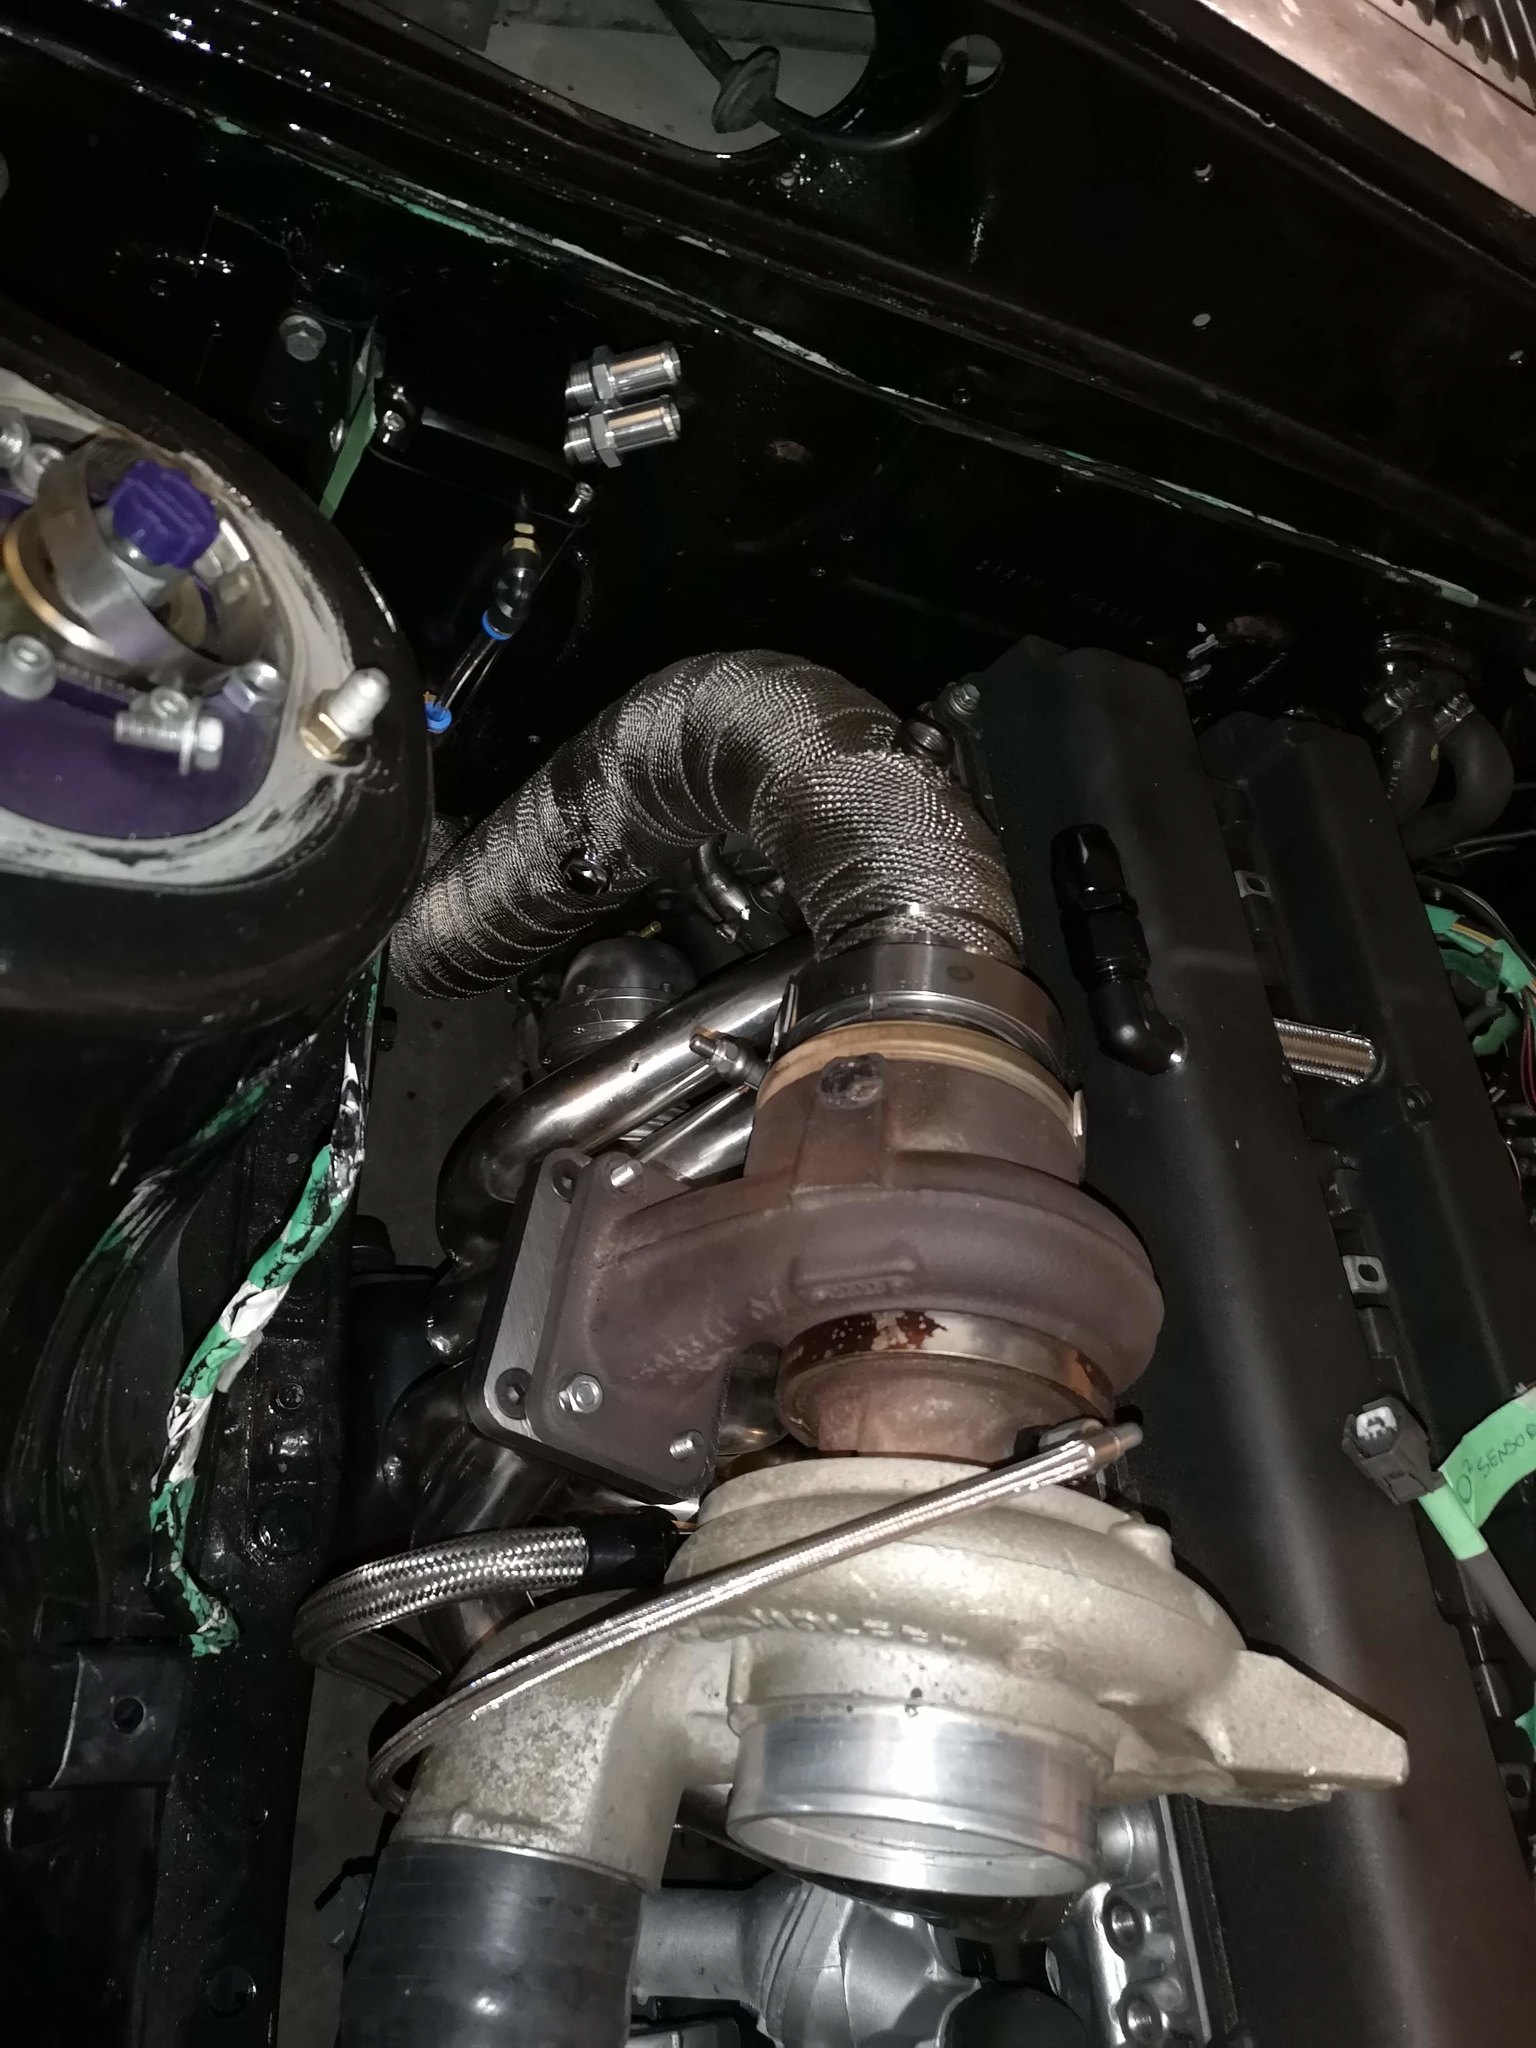
Turbo all mounted. Had to use a T4 to T3 flange to mount the turbo. Wrapped the MK3 Supra downpipe. It's amazing how well the Supra parts fits in this car. Still deciding where to put the catch can.
I'm a bit worried about the turbo return. From the turbo, it's a 90* AN10 fitting. Not sure if I should switch it with a 45* to lessen the restriction.
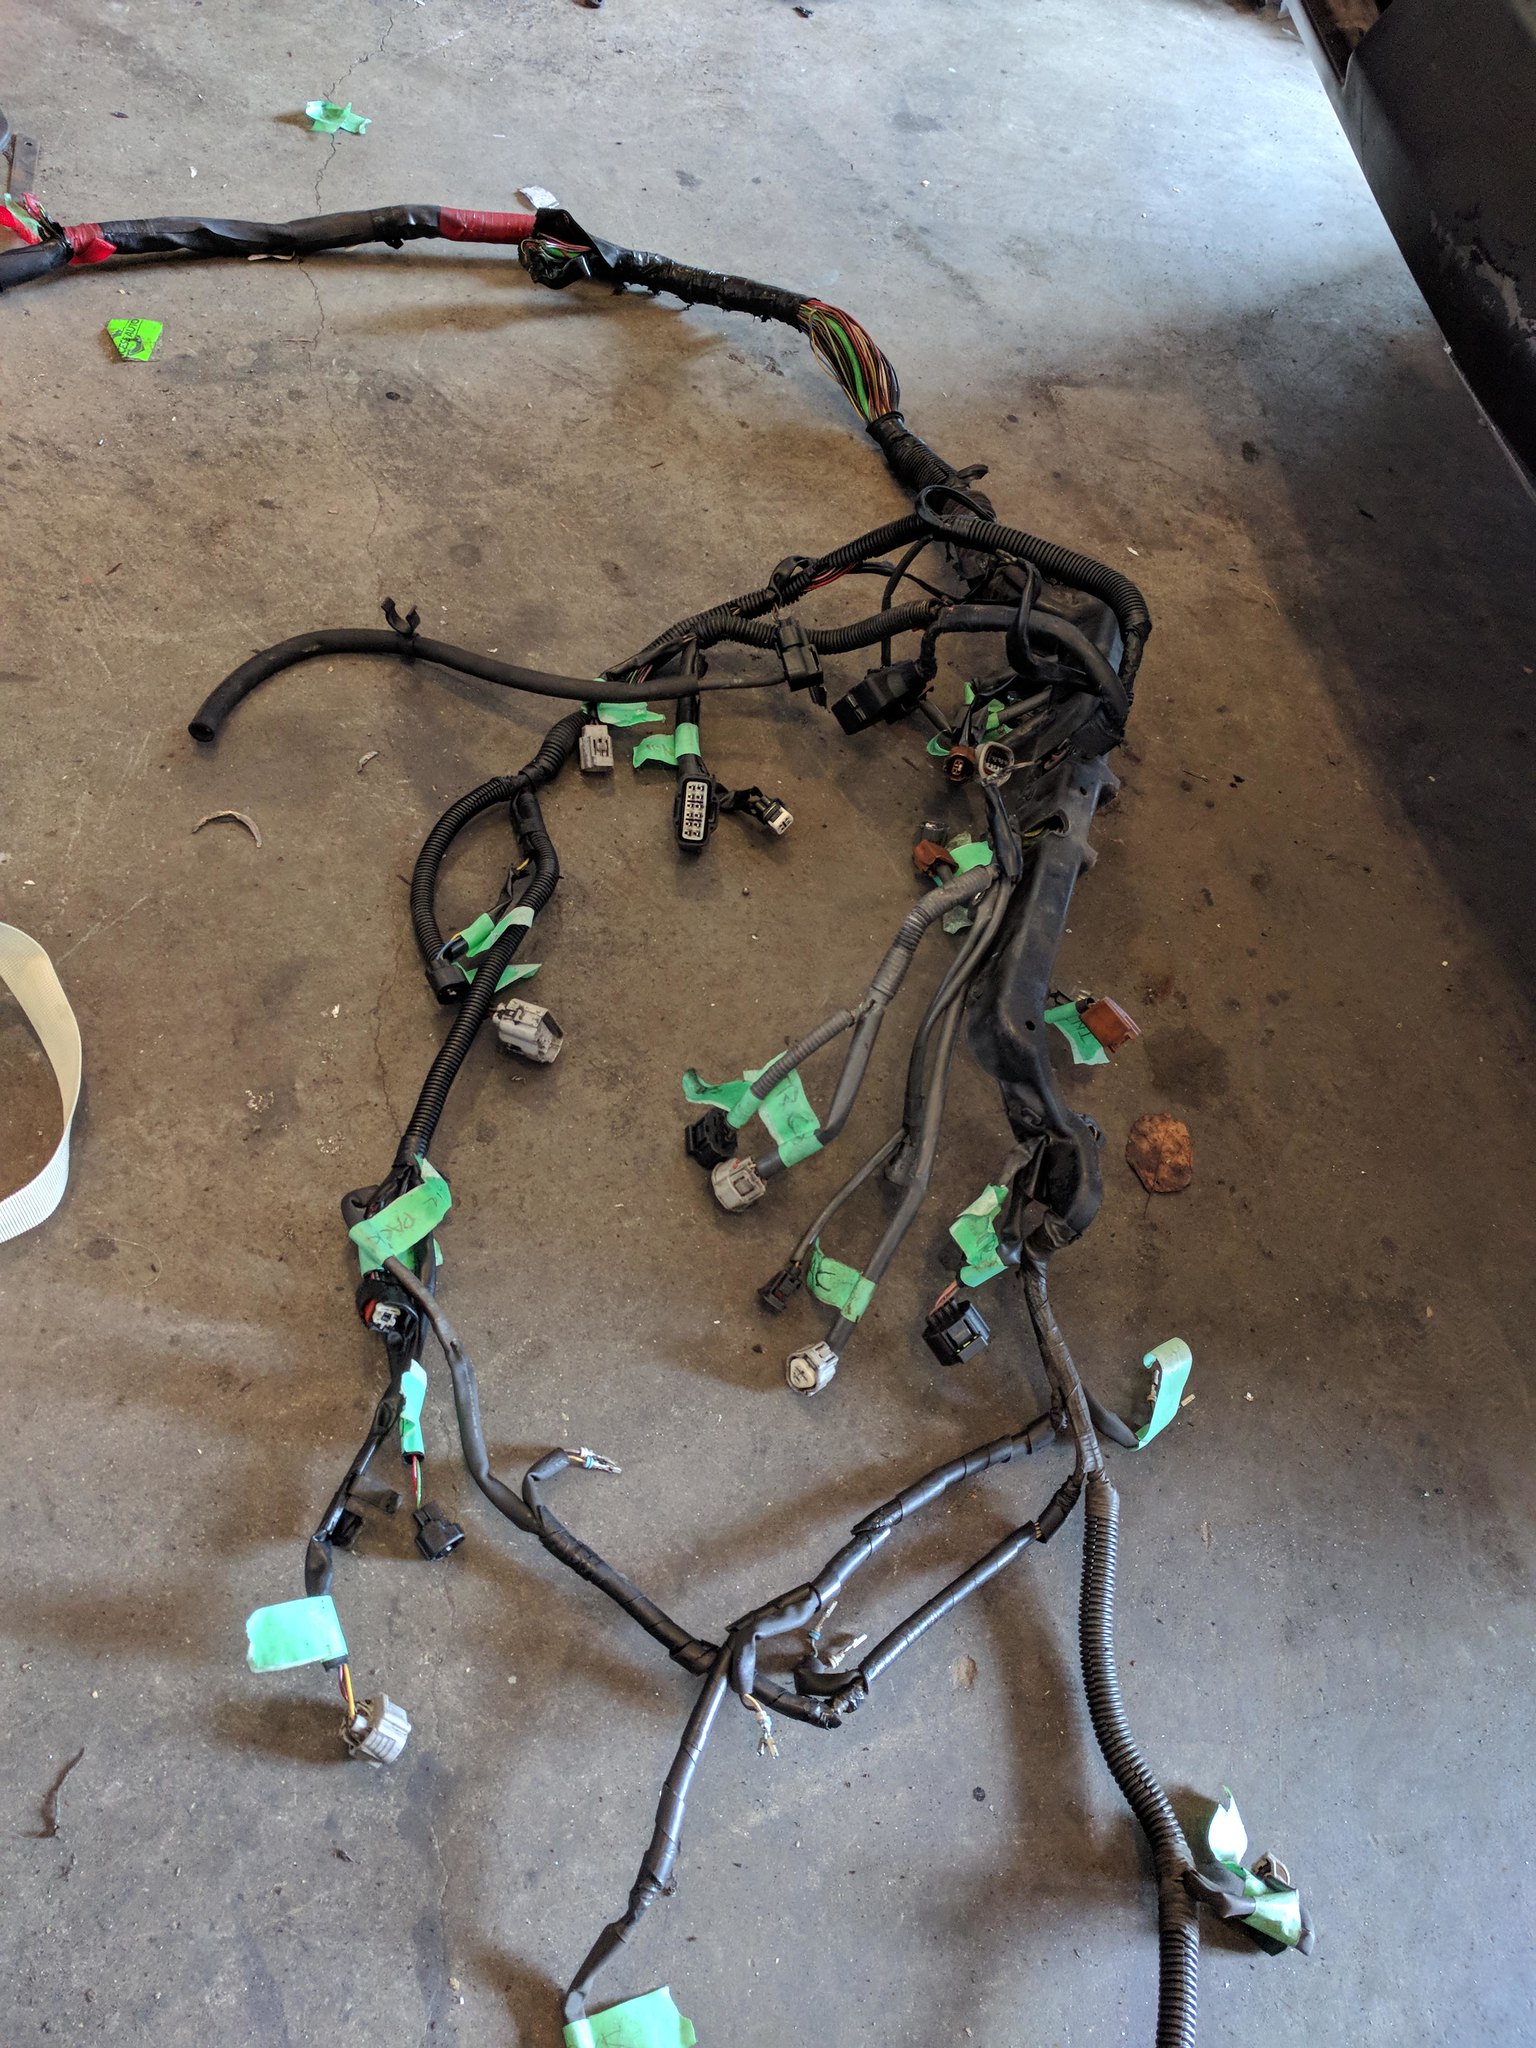
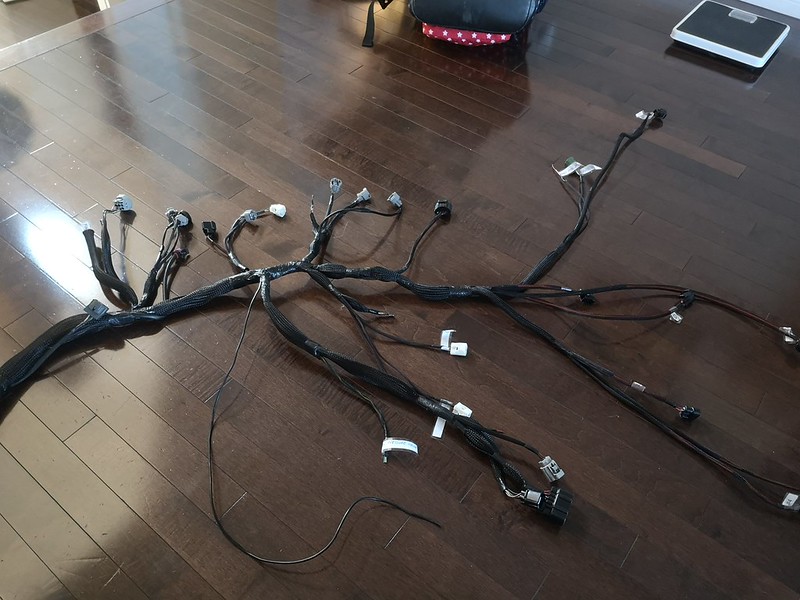
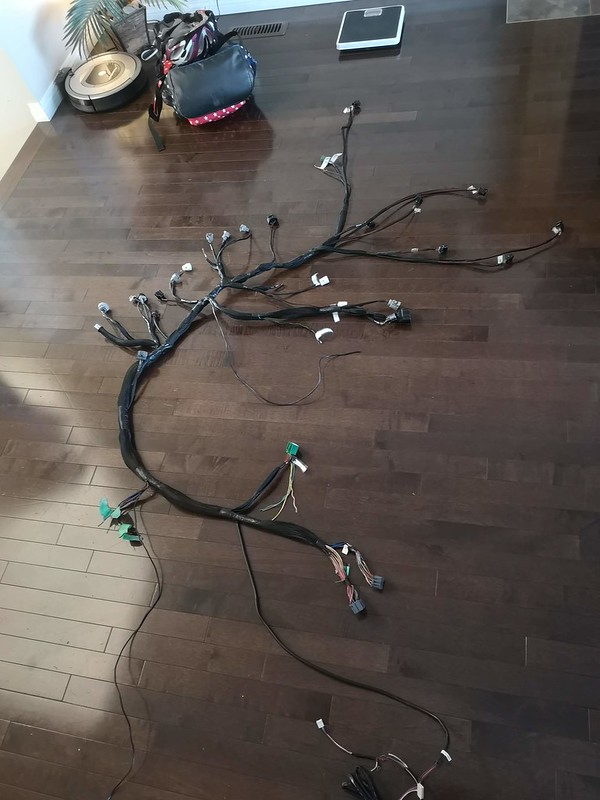
Decided to put the wiring harness on a diet.
Stripped the factory sheathing and removed all unneeded wires. Planning on adding some extra wires so I can retain the factory clusters' functionality as well as integrating some wiring a fuel pressure gauge.
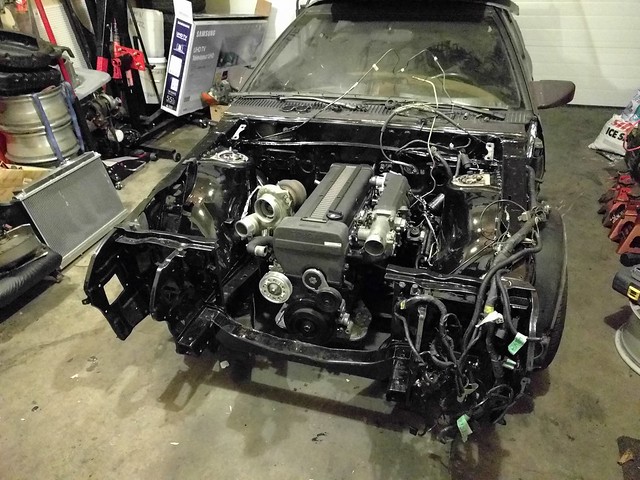
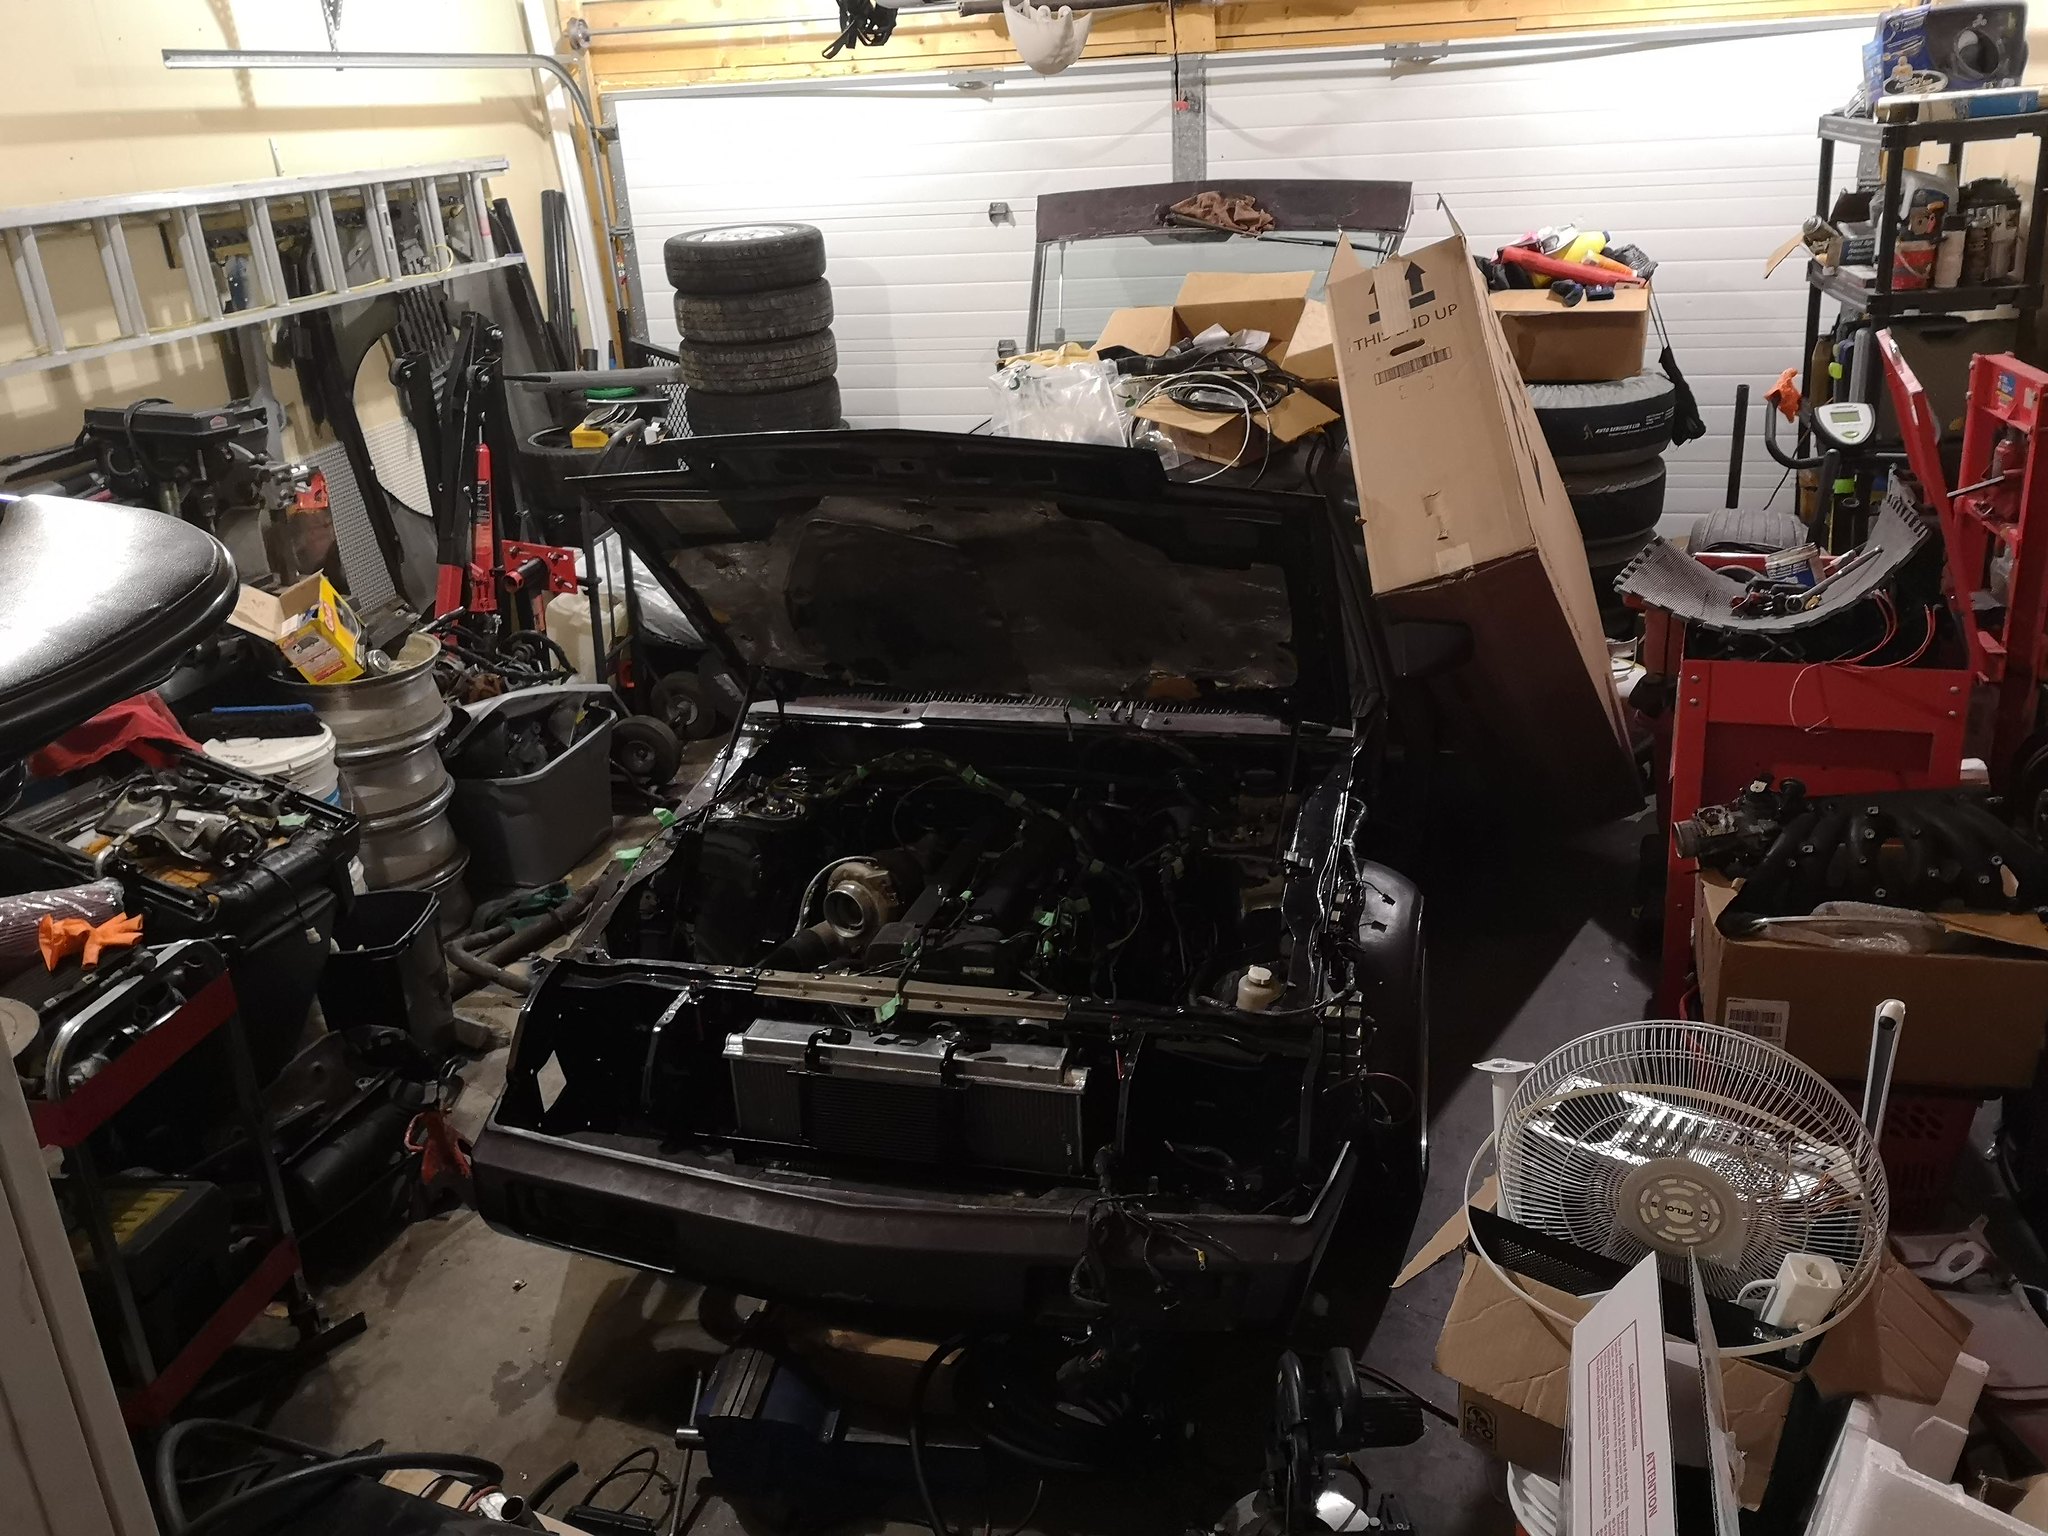
This is how the car sits as of now:
TO DO LIST:
-Engine wiring
-Fuel pump wiring
-Radiator fan wiring
-Cooling System plumbing
-P/S plumbing
-Bunch of other stuff i'm forgetting
-Find motivation
-Clean the garage (AGAIN)
I'll probably start working on it again in the spring and hopefully finish it by the end of the summer....or in 4 years again. I don't know. We'll see. Thanks for watching!
Registered User
Good work.
Registered User
I DID A THING!
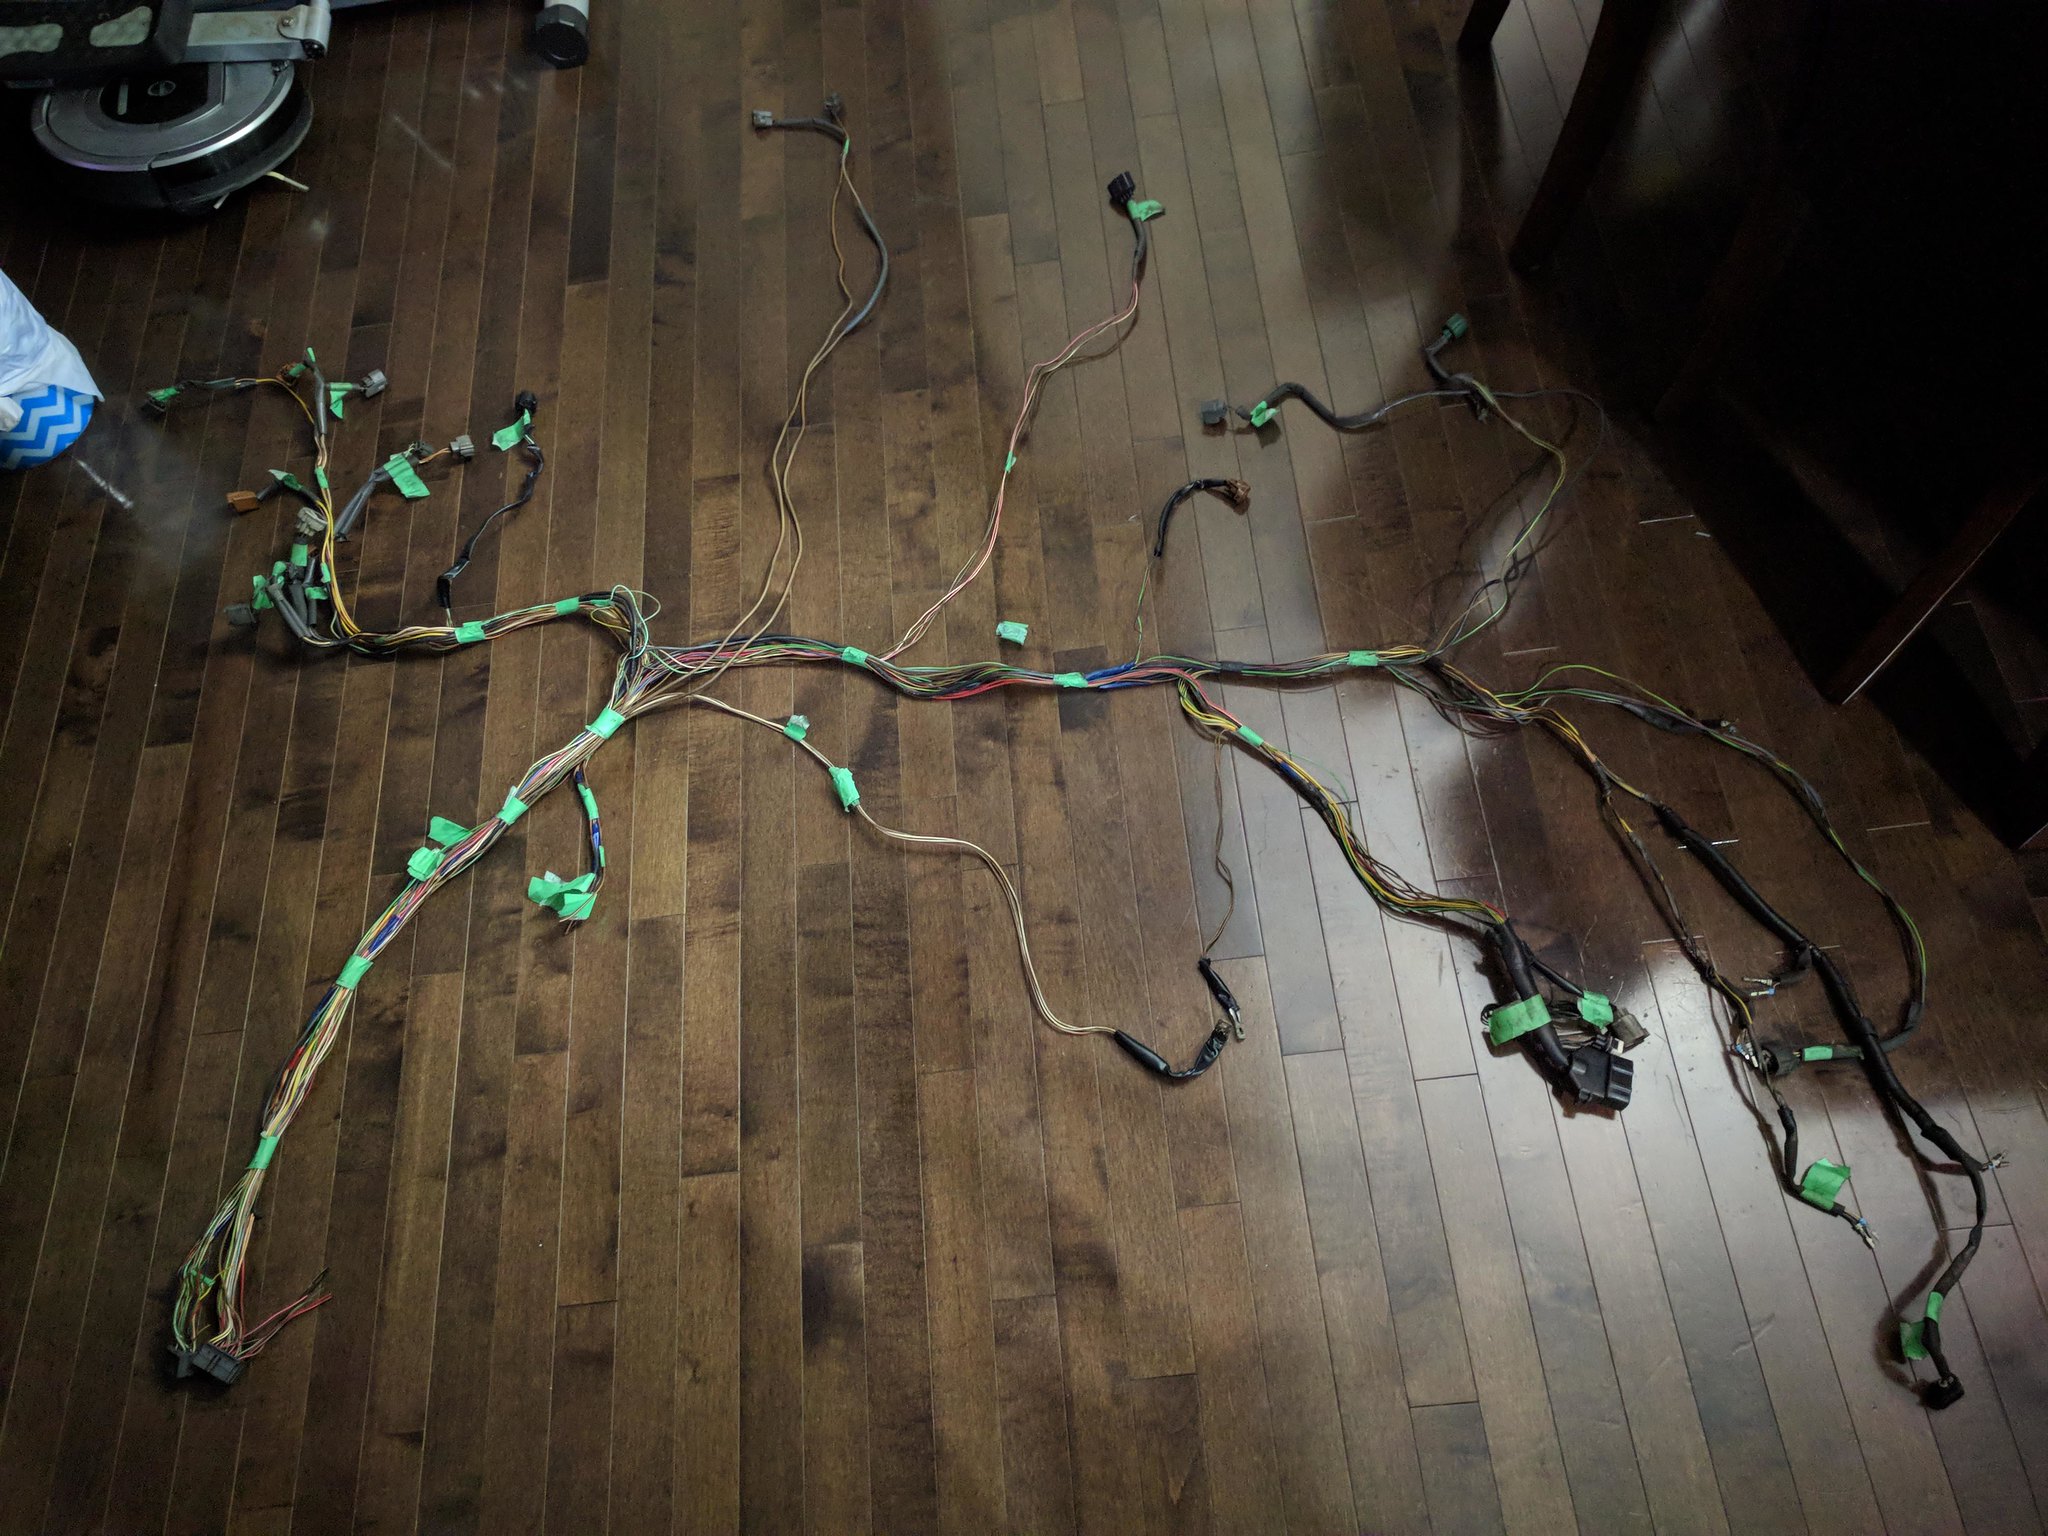
Finally finished the wiring harness! Replaced all connectors and repaired a bunch of old and brittle wires with wires salvaged from a Ram 1500 engine harness and a 3500 headliner harness. Even got it all wrapped up looking somewhat decent. Let's just hope it doesn't catch on fire.
Coil pack wiring harness. The connectors didn't come with terminals but luckily, the wiring repair kits that Chrysler uses is the same type of terminals. My years of hoarding parts at work has finally paid off!
The main artery of the harness
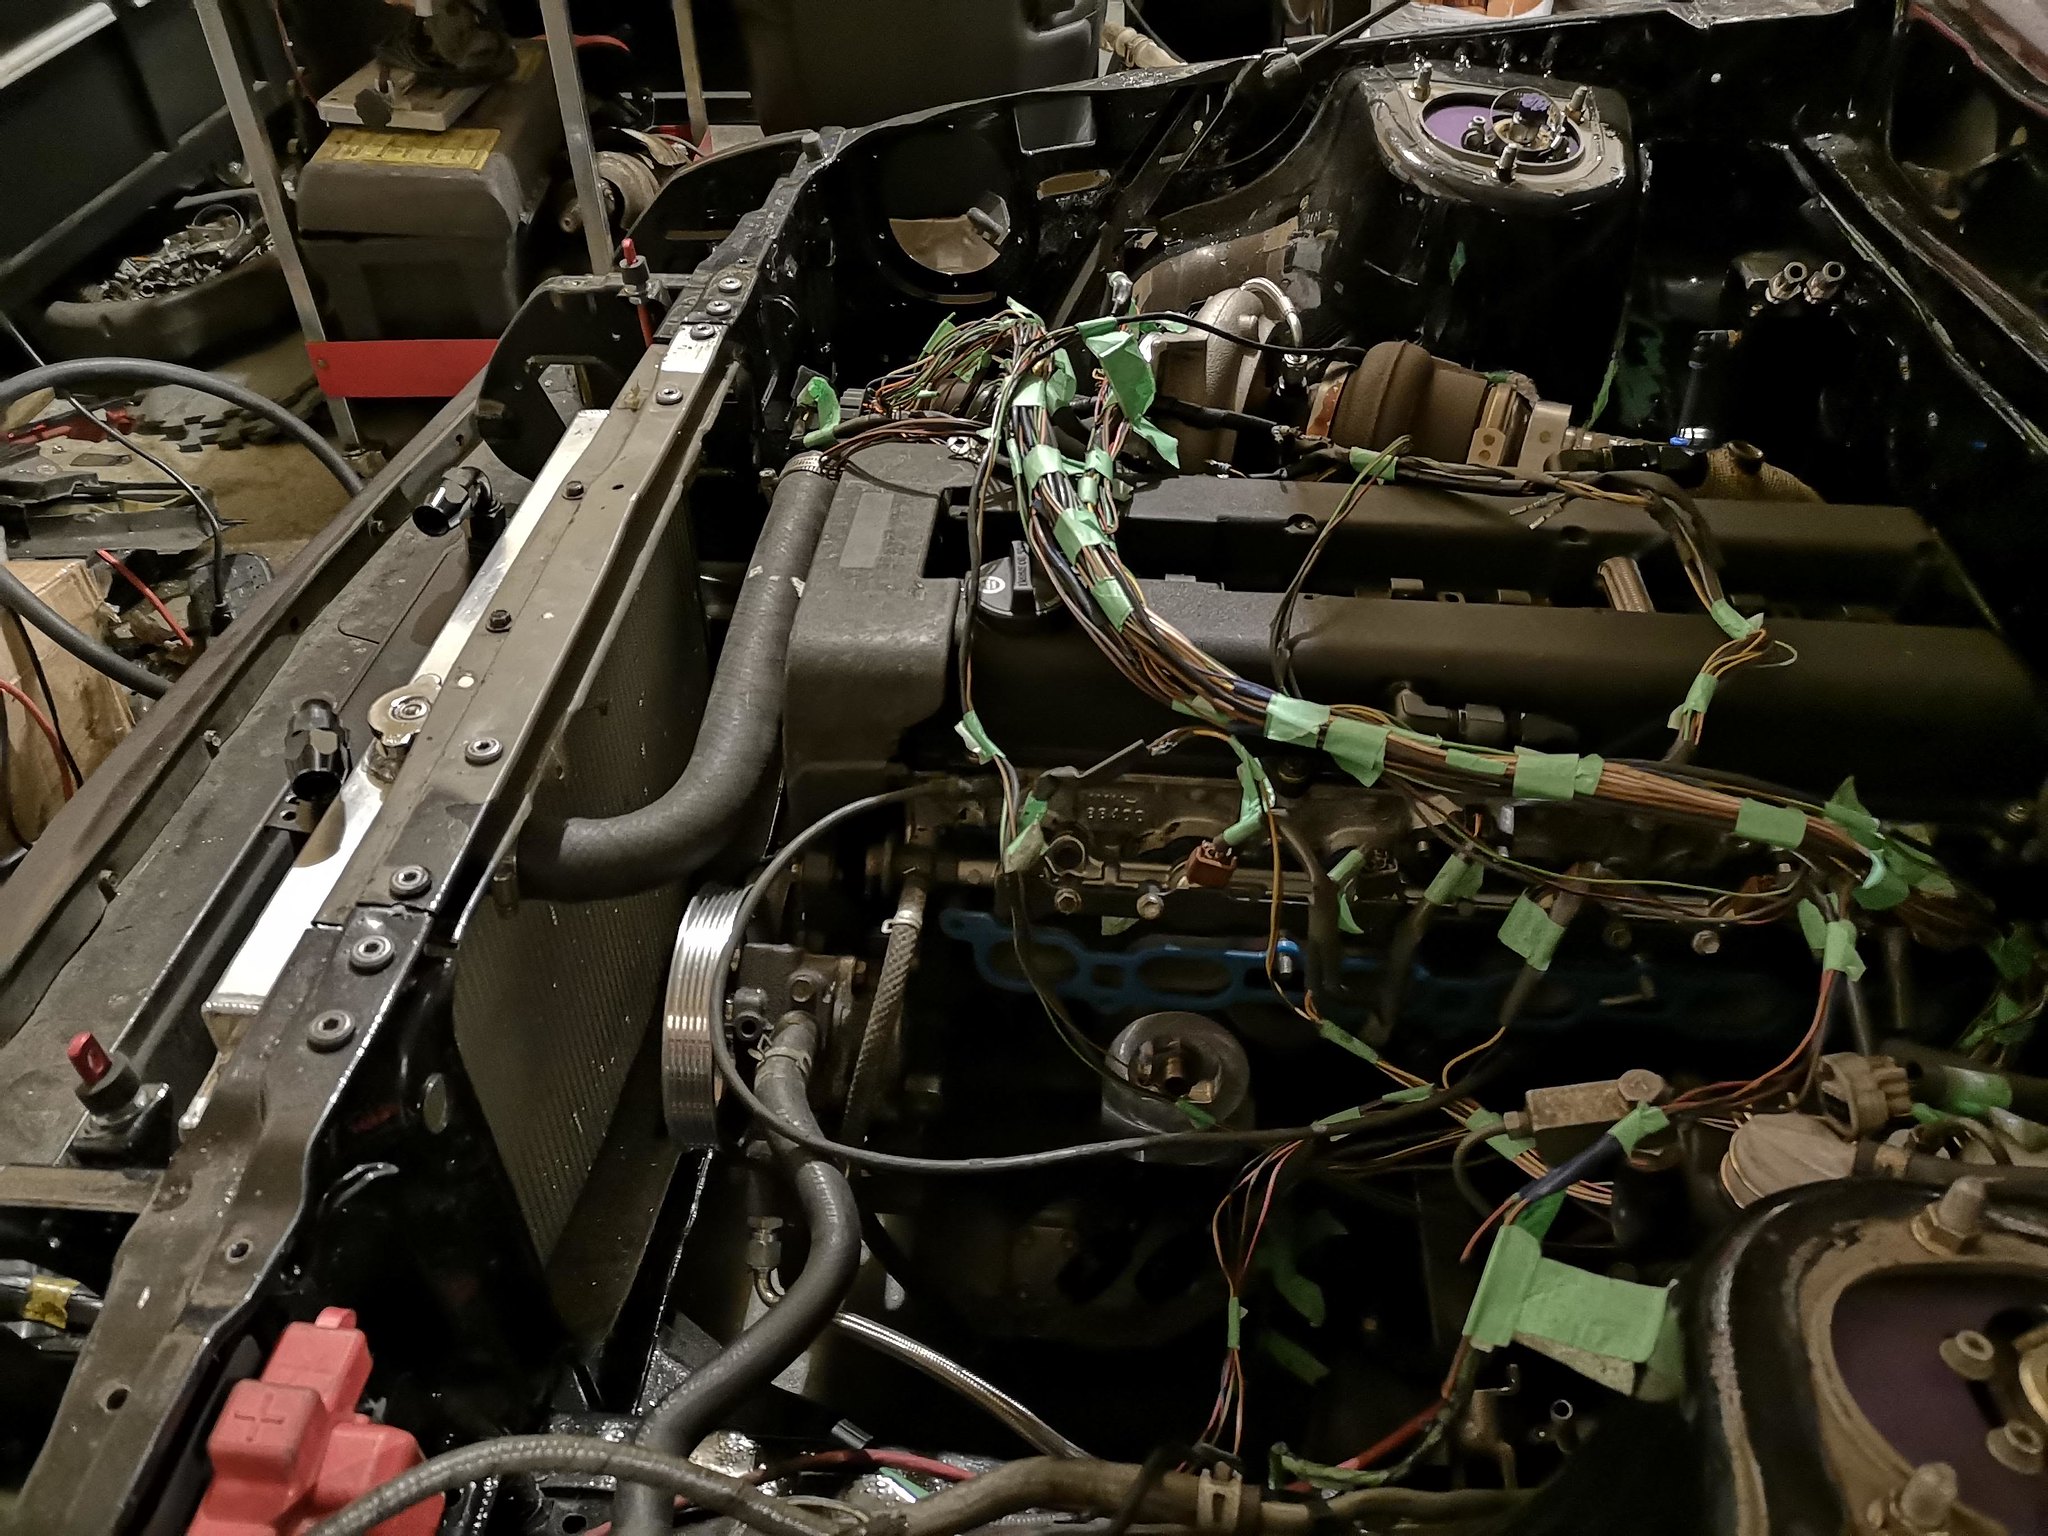
Engine harness all done up.
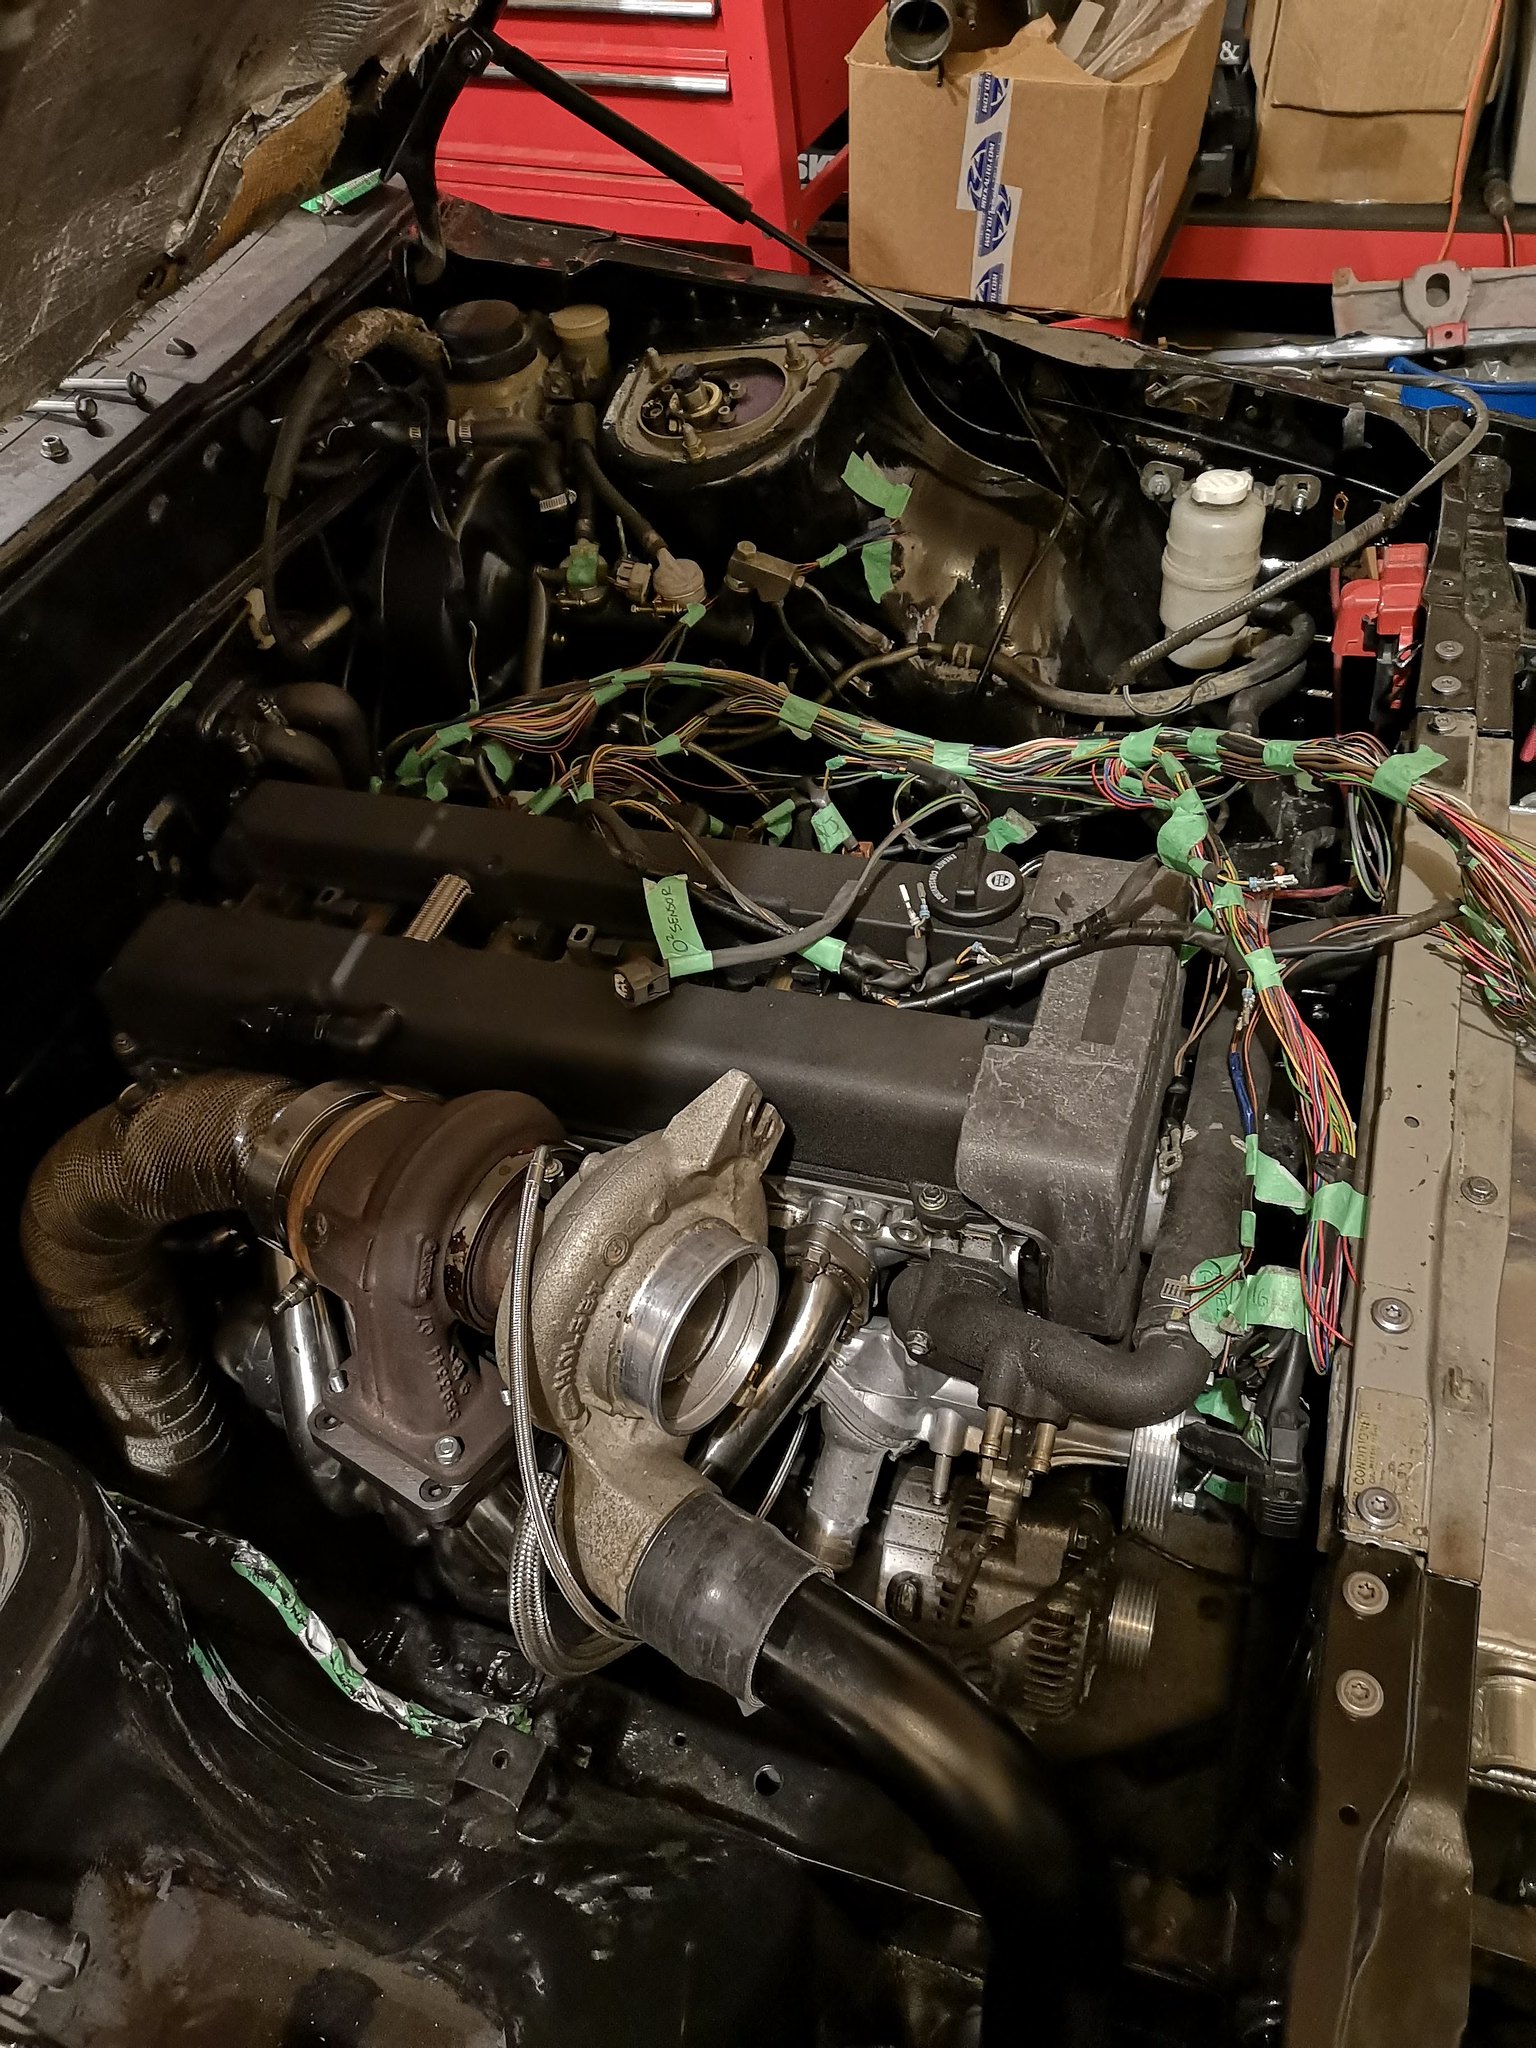
I ended up adding a fuse block and a few relays to the harness to keep the 1JZ ECU as close to it's factory set up. I also re-used some of the Starion's old connectors so everything is powered by the factory main relay and all the OEM gauges work. Excuse the spaghetti of wires. I still need to find a place to mount everything to.
Since my 1JZ came from a Soarer, the ECU controlled the fuel pump via fuel pump module, unlike the 1JZ from a Supra where it just sends 12V to the fuel pump. I could have easily ran a switch on the dash that controlled the fuel pump but thats too much hassle flipping it on and off. I'm lazy, so I bought one of these to control it instead.
It provides a 3 second prime when the ignition is on and only remains on if it detects an RPM signal from the engine. In the event of a collision, your boy will at least have a lower chance of burning to death.
Got the igniter mounted and the radiator fan controller and wiring harness tucked behind the fender.
Brownie points if you can guess which cars the jumpstart post and P/S reservoir came from.
Wiring harness in place. Found a place to mount the catch can and the coolant overflow bottle. Still need to figure out where to mount washer fluid reservoir. This photo shows how badly the engine bay paint turned out.
With all that said and done, I was finally able to do this.
There's still a bagillion little things I have to do like hook up the wide band and AFC NEO to tune it, put the front all back together, re-check everything for leaks and make sure everything is tight and finish up wiring the cluster to make the tach work. Baby steps I guess hahaha.
Saw these for sale on Facebook while I was pooping and ended getting them. For motivational purposes of course.
Oh, if any of ya'll have a NON-TRC 1JZ throttle body laying around, let me know!
*Hopefully* she'll back on the road this summer. *not guaranteed
Thanks for tuning in! That's all folks!
Registered User
BMW PS reservoir, they are cheap and awesome. Compact and easy to mount in most engine bays. Used them on bunches of customer cars.
Moderator
Holy fuck good on you for not giving up. mad props.
Registered User
Wow, this is still awesome. Building my own wiring harness is pretty much what satan will have me doing in hell. It's got layers of things that frustrate, confuse, and annoy me.
This quote is hidden because you are ignoring this member. Show Quote
Registered User
Whoa, it's running! Nice.
Registered User
YAASSS! I forgot where I put the factory reservoir but luckily I had this laying around from my Brother's mini. Definitely see why you use these. Shits awesome!This quote is hidden because you are ignoring this member. Show Quote
Thanks man! Definitely has been a struggle.This quote is hidden because you are ignoring this member. Show Quote
You know what's weird? I enjoyed building the harness. I'm sure I've shorten my life by a few days after inhaling all that smoke from the heat shrink tubing, but it was somewhat therapeutic.This quote is hidden because you are ignoring this member. Show Quote
I know right?! I can't believe it myself!This quote is hidden because you are ignoring this member. Show Quote
 Posting Permissions


 Quote
Quote