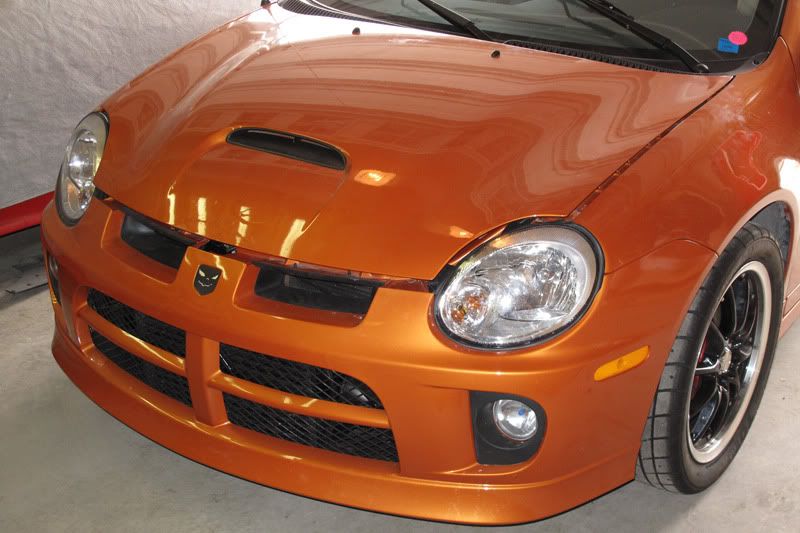
Just bought this in late March of 2012.
Orange Blast w/Pearl Coat
1 of 210 Orange ACR's ever produced
Has just 13,477km on the odometer
Should be interesting...pics to follow, eventually.
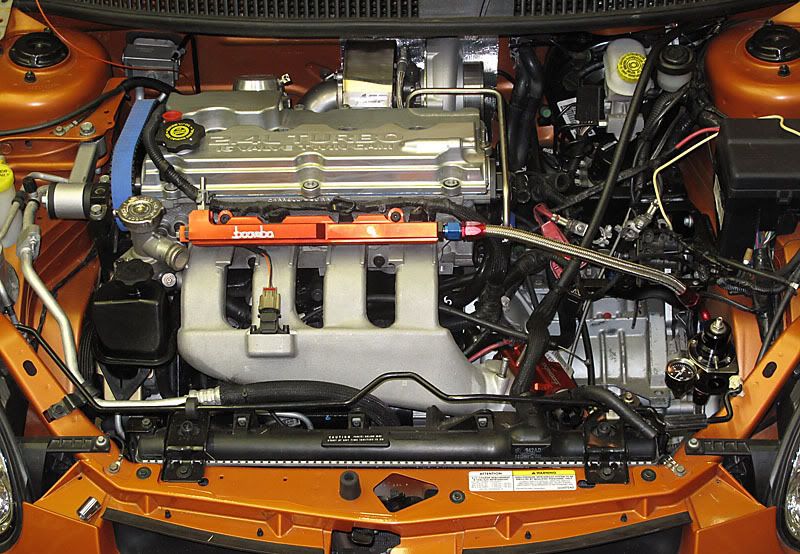
Edit: I've been meaning to compile a list of the vehicles modifications. I'm not sure it is totally complete here, but this is a pretty good list of what is in the vehicle:
Modifications:
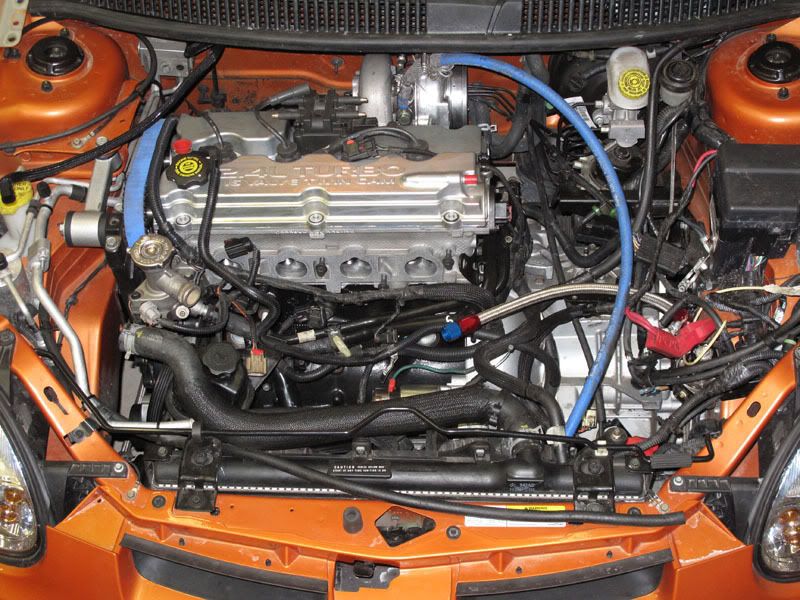
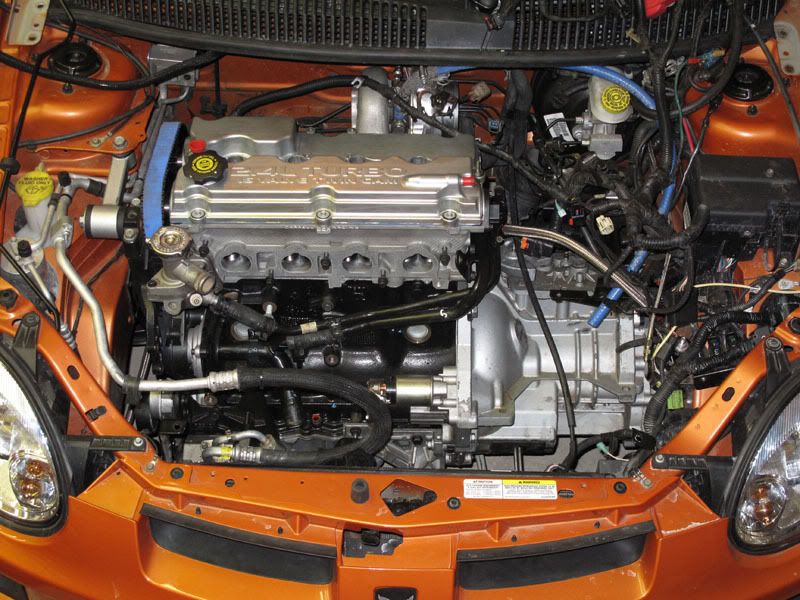
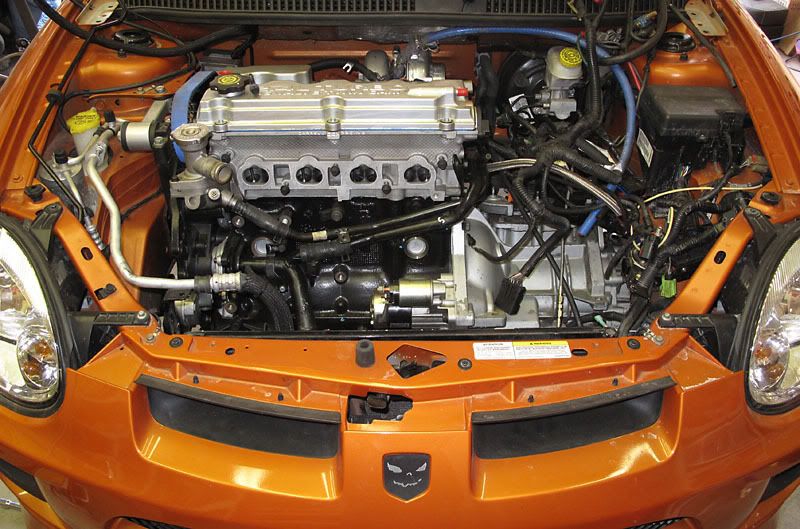
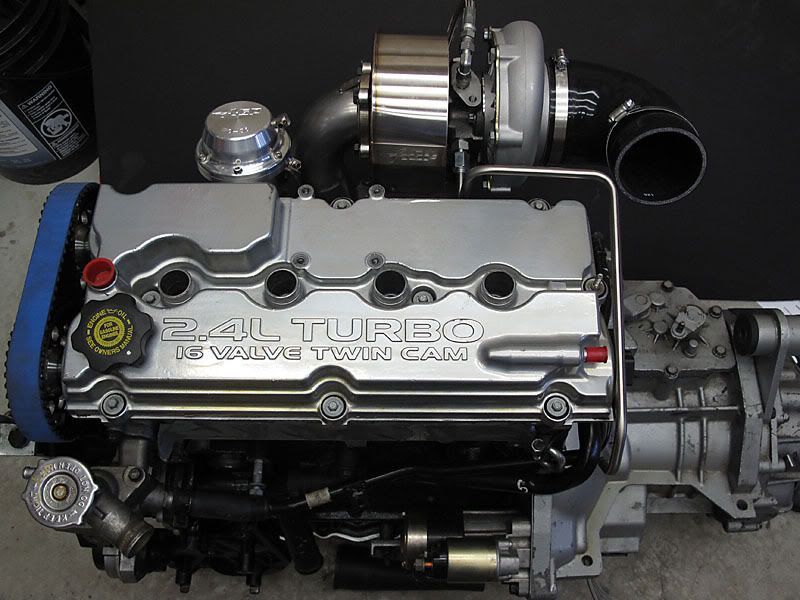
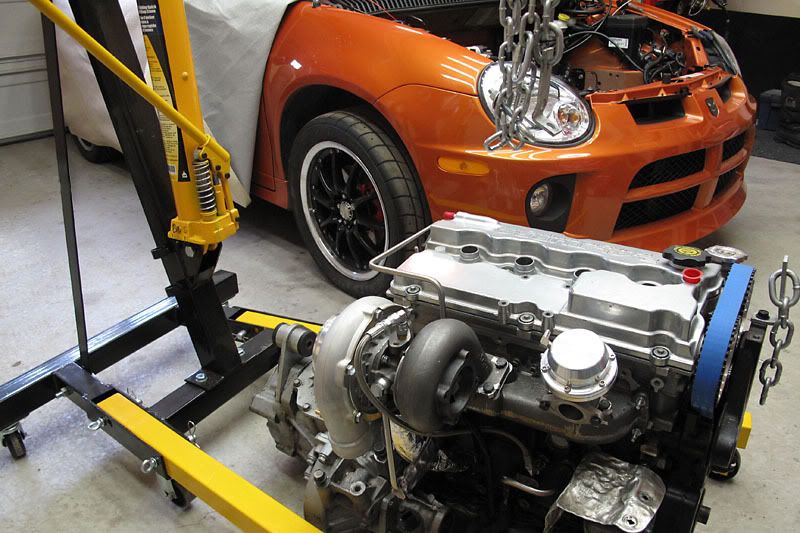
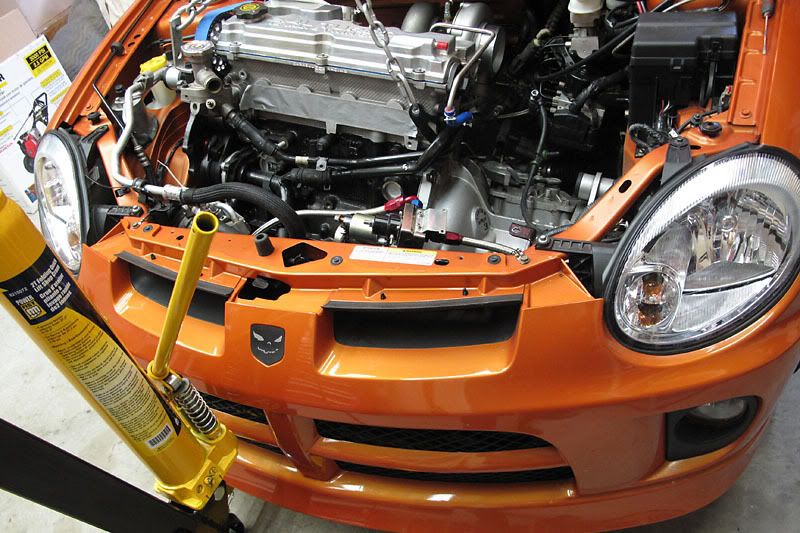
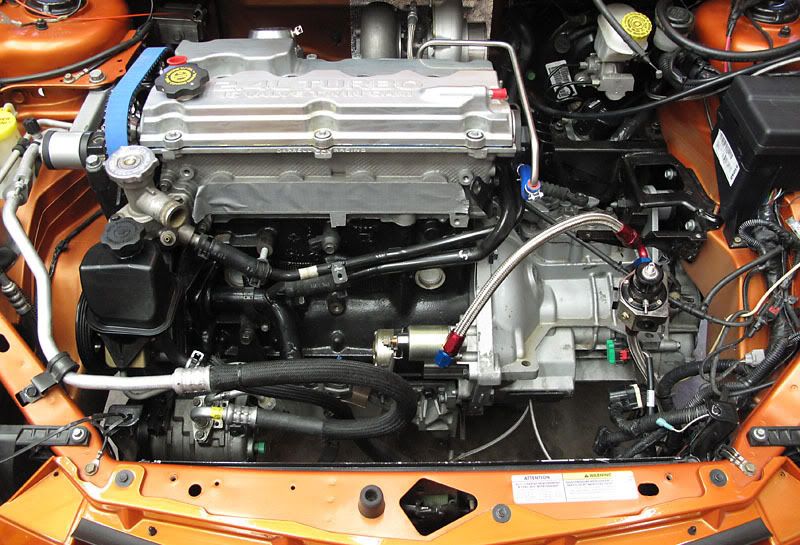
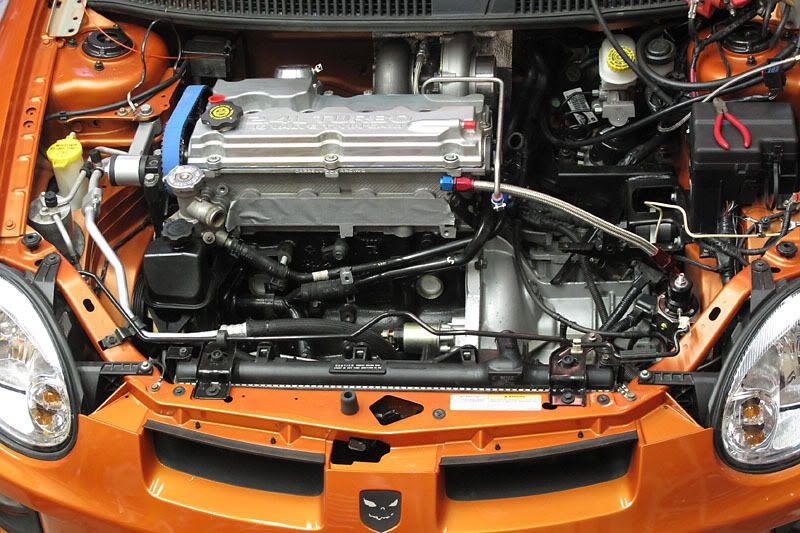
Engine:
DCR Stroker 2.6L
Darrell Cox Racing - 2.6L DCR Stroker Short Block High Output (Powered by CubeCart)
DCR Pro Series Head
Darrell Cox Racing - Pro Series Cylinder Head (Powered by CubeCart)
Gates Racing Timing Belt
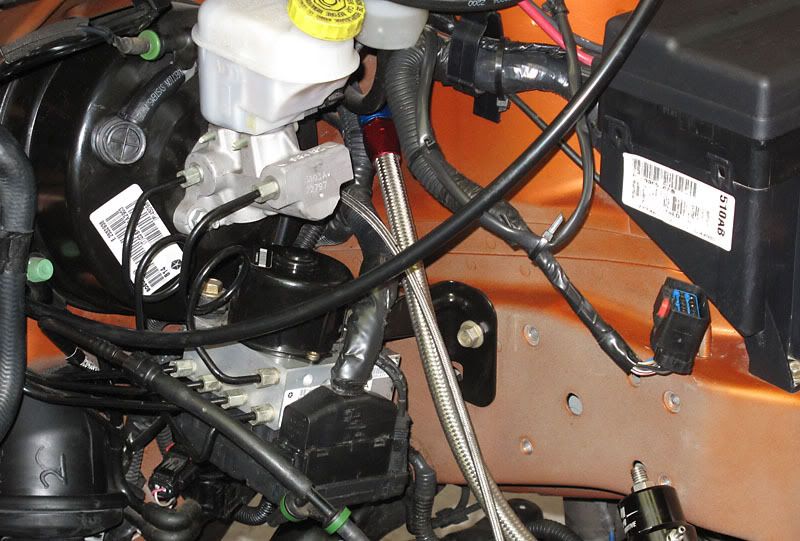
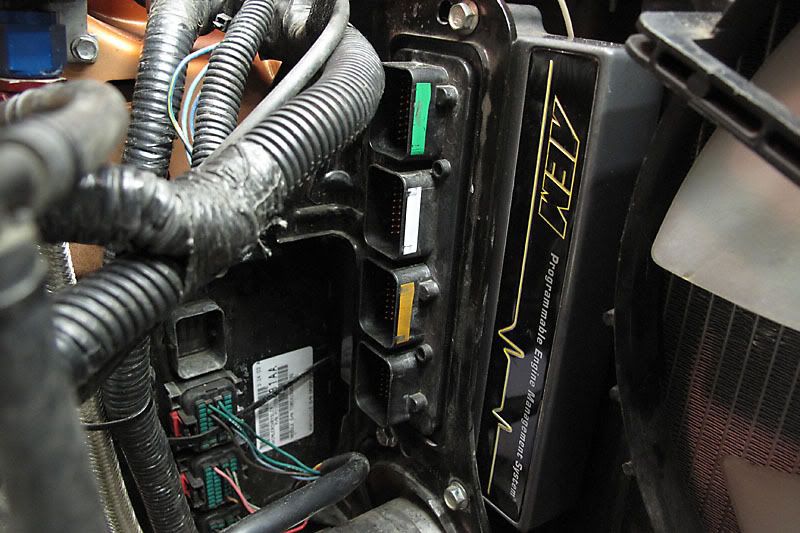
Electronics / Engine Management:
AEM EMS Non-UEGO w/OEM PCM
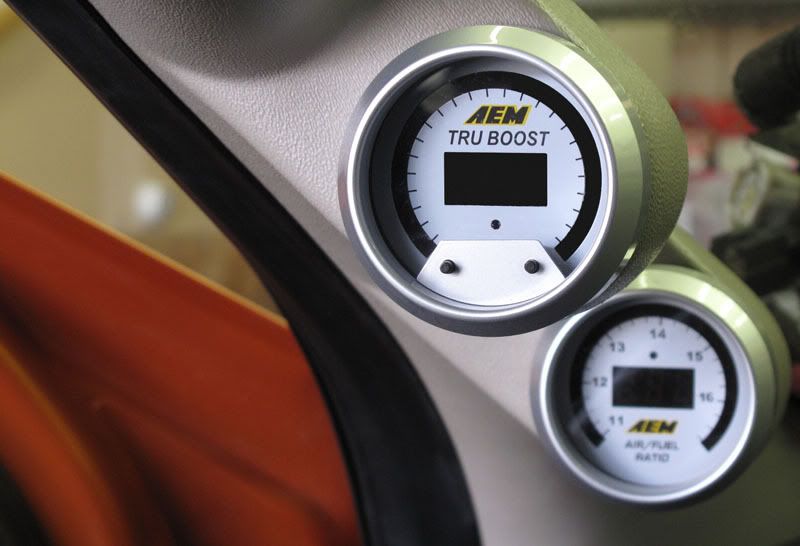
AEM UEGO Wideband A/F Gauge
AEM Tru Boost Electronic Controller w/Gauge
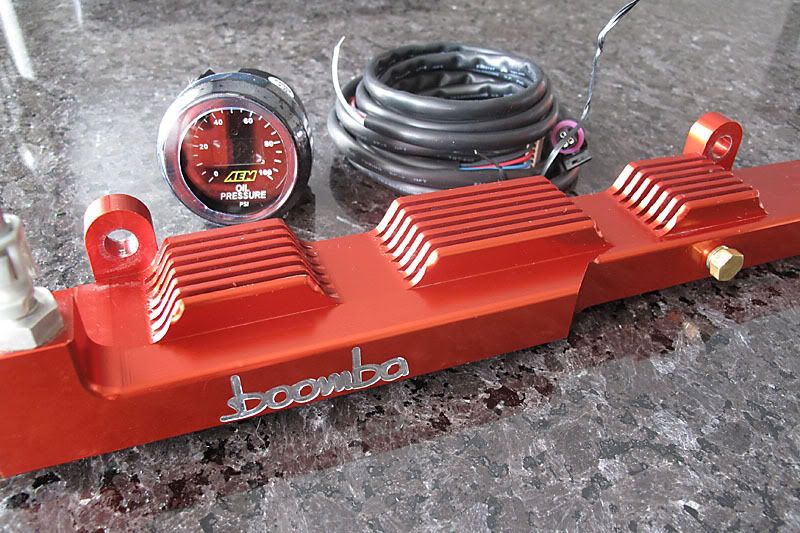
AEM Pressure Gauge (Oil)
Aeroforce Scan Gauge in OEM boost gauge location
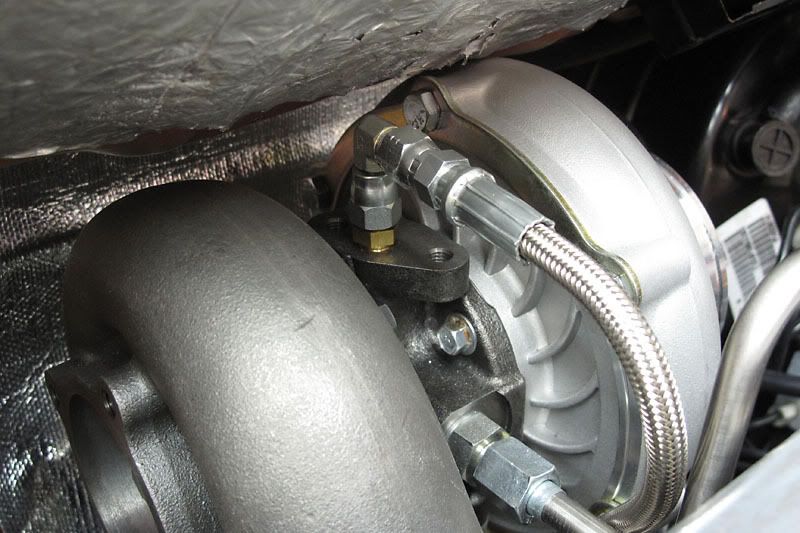
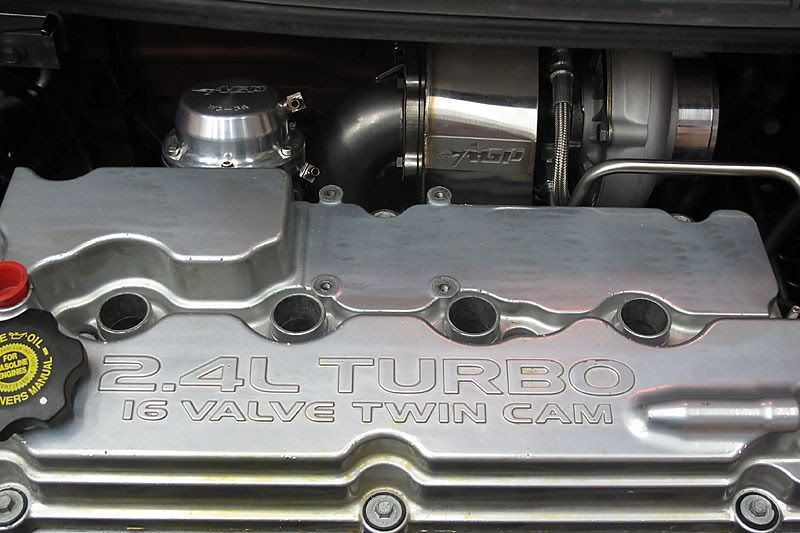
Turbo Package / Exhaust:
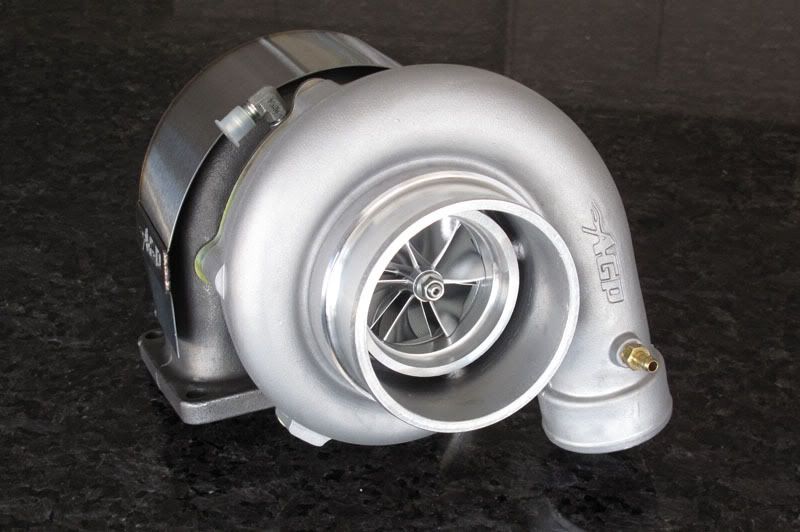
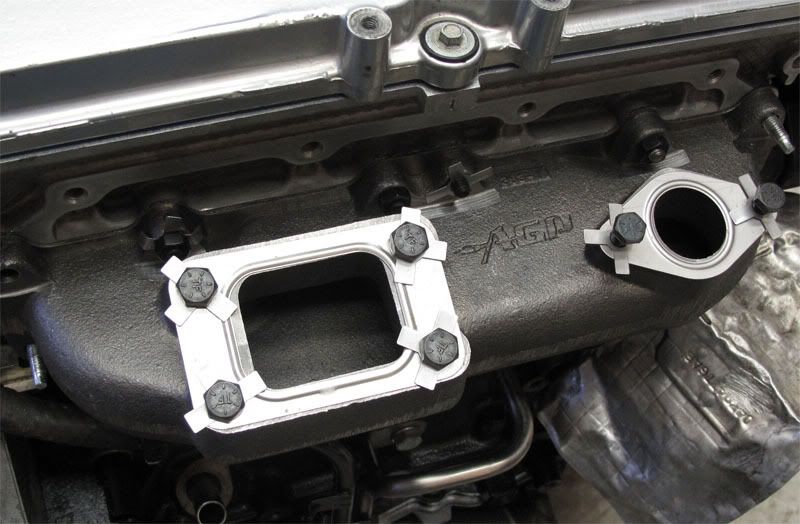
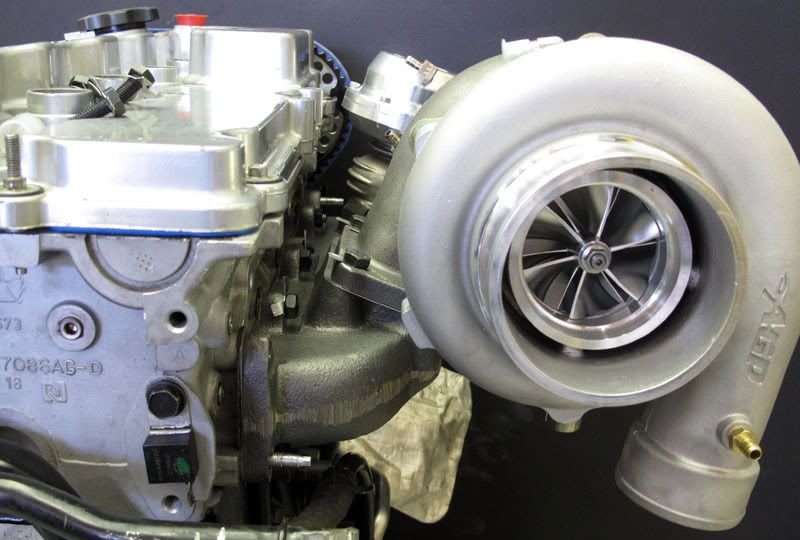
AGP Zeta 3.2 BB Turbocharger 82 A/R
AGP Exhaust Manifold
AGP 3 O2 Housing
AGP Dump Tube
AGP 38mm External Wastegate
MPx 3 Downpipe & Full Catless Dual Exit Exhaust
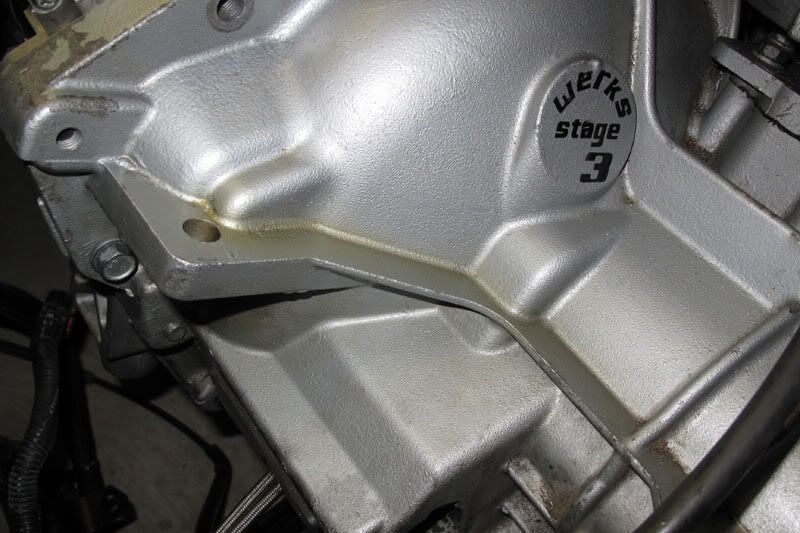
Transmission:
PWerks Stage 3 Tranny
RageTek Hydraulic Release Bearing
Clutch/Flywheel (Unknown, as I did not take it apart lol)
[I know I will be soon enough!]
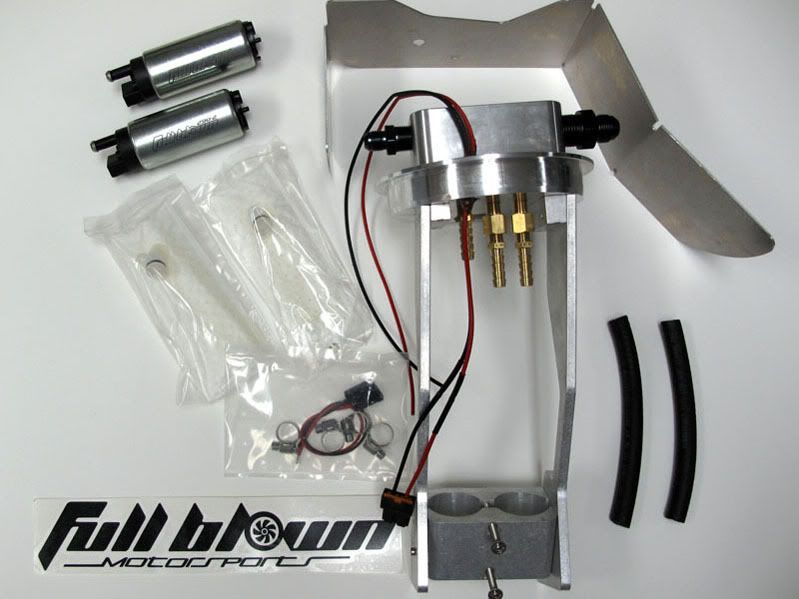
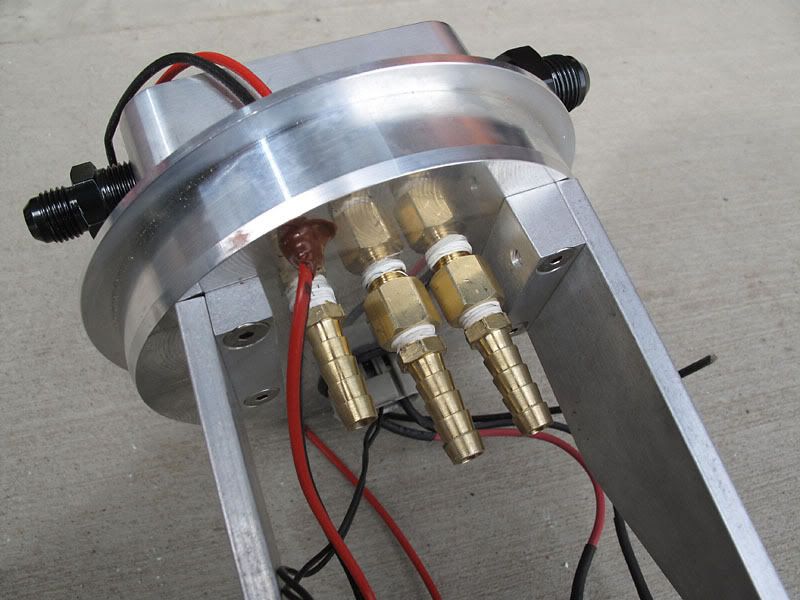
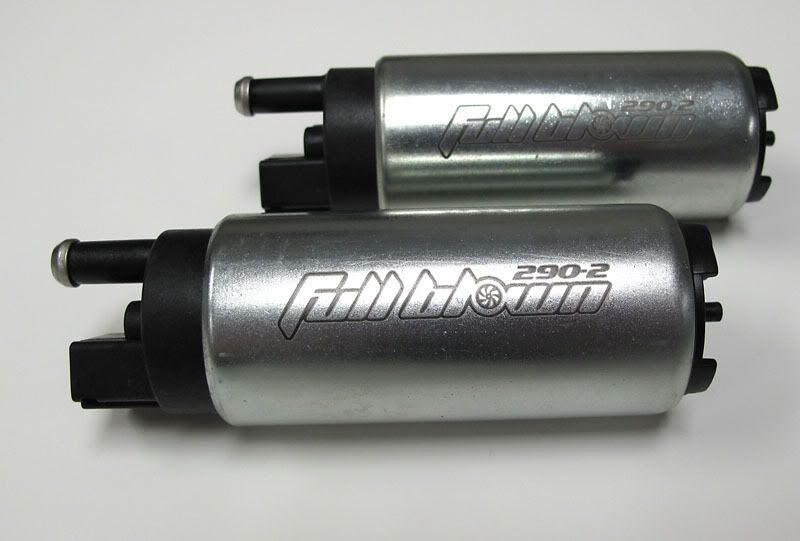
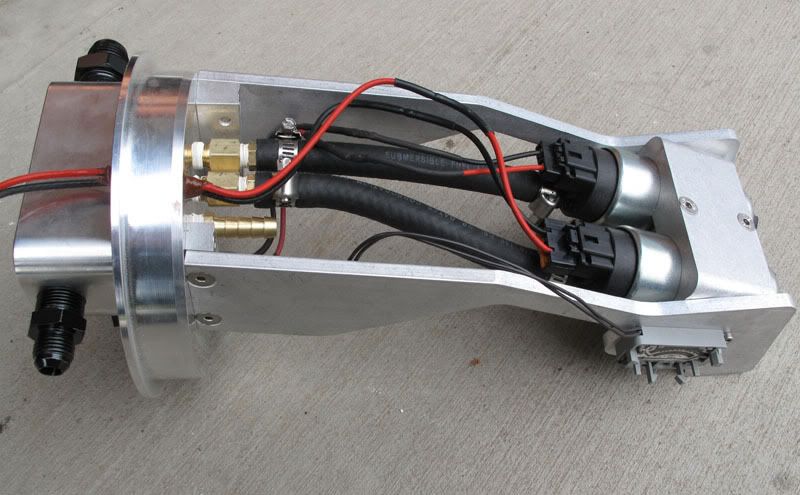
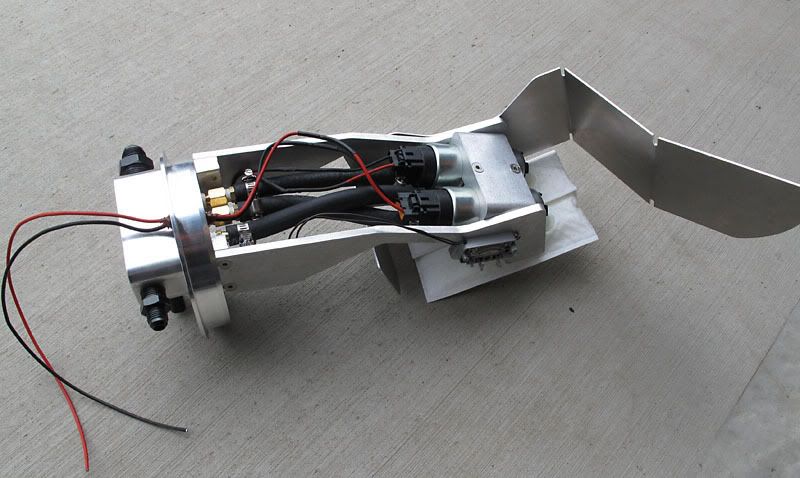
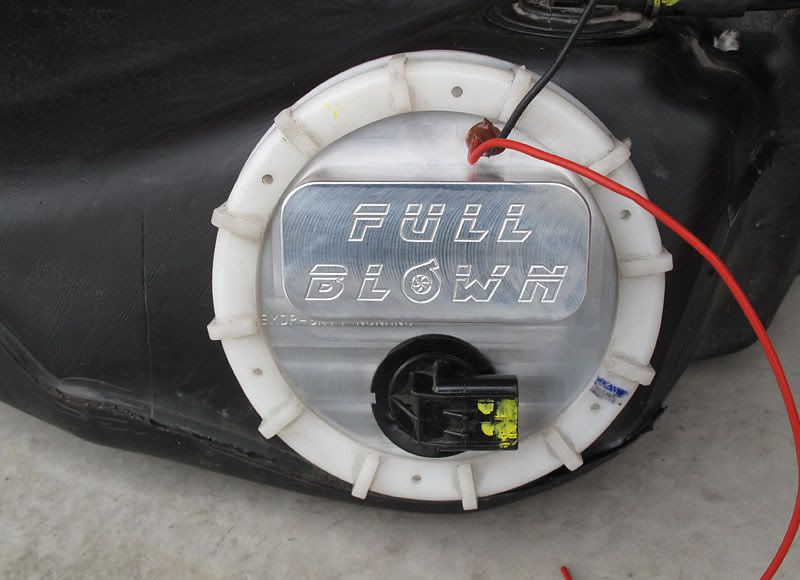
Fuel:
Full Blown Dual Fuel Pumps
AGP after rail FPR & return line
AN-8 Feed, AN-8 Return
Boomba Fuel Rail
In rail fuel pressure gauge
RC Engineering 750cc Injectors
[1200cc/1400cc Injectors to go in at Dyno]
Air / Intake / Intercooling:
JMB Ultimate 3 CAI
Extrude Hone Intake Manifold
Boomba 70mm Throttle Body
Custom Tubes Intercooler, Anodized Black
Cold Side Hard Pipe
Turbonetics Blow Off Valve
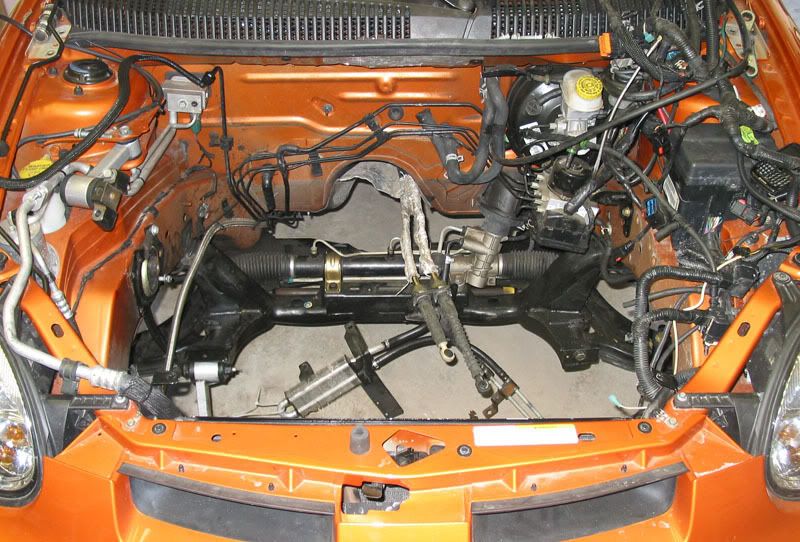
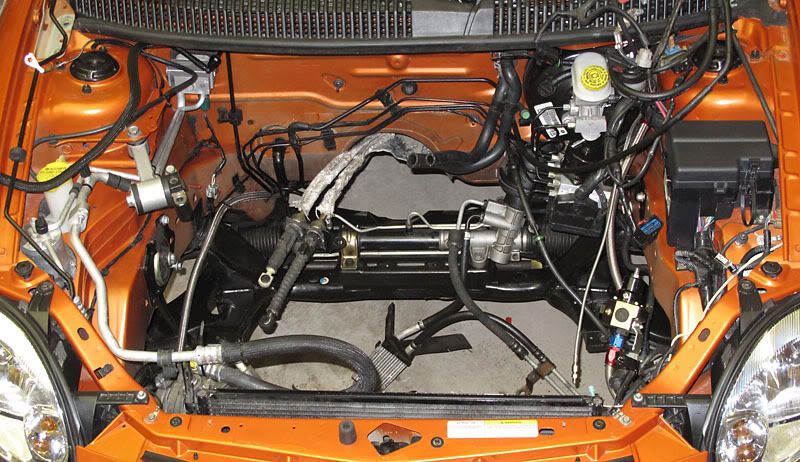
Suspension / Axles:
Mopar Performance Stage 3 Coilover Suspension Kit
DSS Level 3 Axles

 Quote
Quote